If your hosting provider enabled the option to change the PHP values from the Cpanel just login to your
panel and change the options there.
Otherwise try the following methods. Be aware that this section
requires advanced knowledge.
The max_input_vars directive can be configured in .htaccess, php.ini or wp-config.php file. We
recommend to increase default value to 3000. But if you have a lot of menu items try 5000 or higher.
Here is how you can do it:
php_value max_input_vars 3000
max_input_vars = 3000
@ini_set( 'max_input_vars' , 3000 );
You may receive a message such as Maximum execution time of 30 seconds exceededor “Maximum execution time of 60 seconds exceeded”. This means that it is taking to longer for a process to complete and it is timing out. There are a number of ways to fix this error.
php_value max_execution_time 300
max_execution_time = 300
set_time_limit(300);
php_value memory_limit 256M
memory_limit = 256M
define('WP_MEMORY_LIMIT', '256M');
Should you not feel comfortable in trying the above methods, or the above did not work for you, you need to your hosting support about having them increase your PHP values.
To use Emart WordPress Theme, you must be running WordPress 6 or higher,
or newer version (WordPress officially suggests to use)
and MySQL 5 or higher version. Emart has been tested with Mac, Windows and Linux. Below is a checklist of items your host needs to comply with to ensure proper operation:
Ensure your web host has the minimum requirements to run WordPress.Issues you may encounter, such as demo content fails when importing and similar issues, are generally
related to excessively low PHP configuration limit settings. You can either increase these limits on
your own, or contact your web host and ask to have the limits increased to the following minimums:

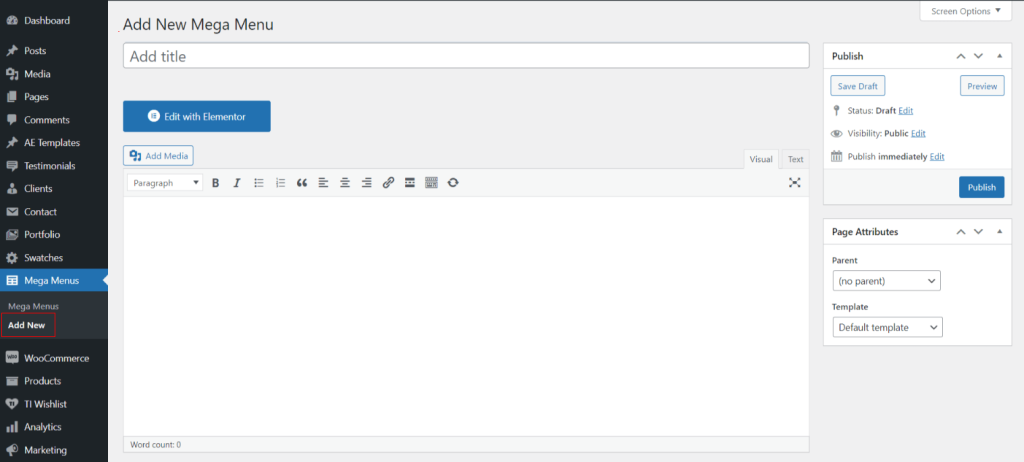
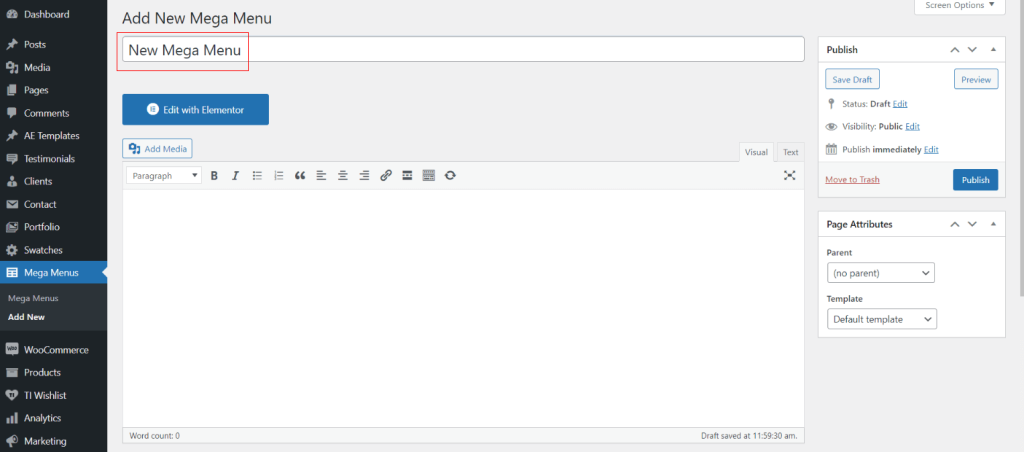
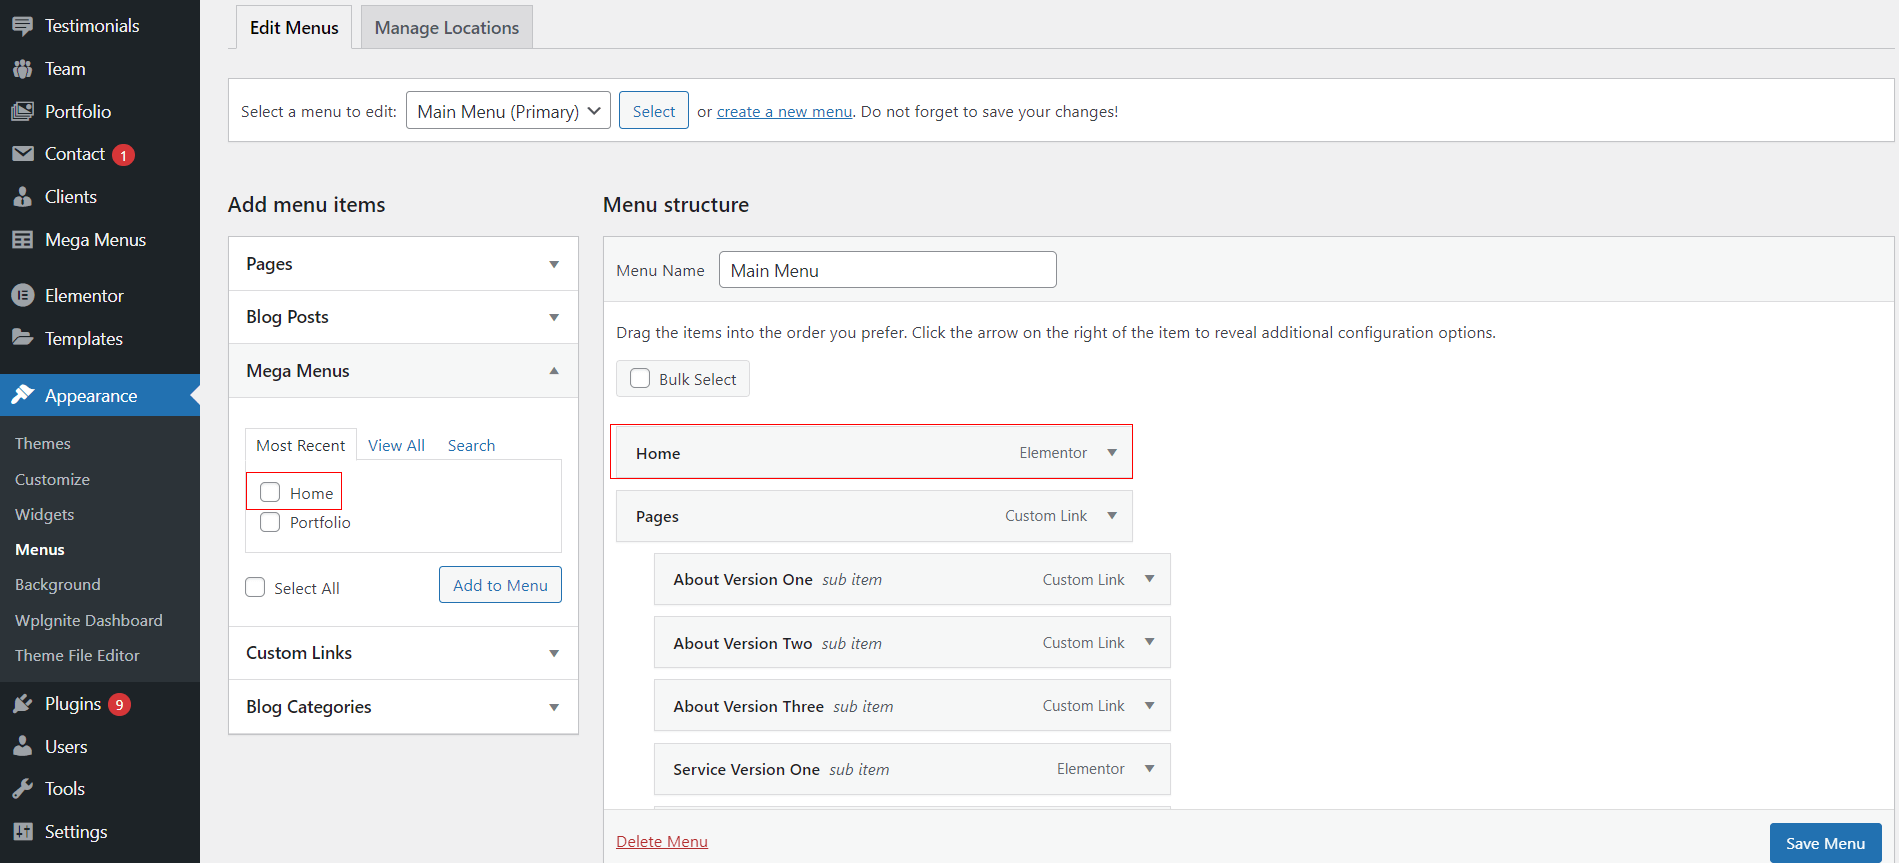
Please follow below steps to create a brand new mega menu from scratch. However, we recommend using existing mega menu (Which has come with the theme) and customize for ease of use through elementor.
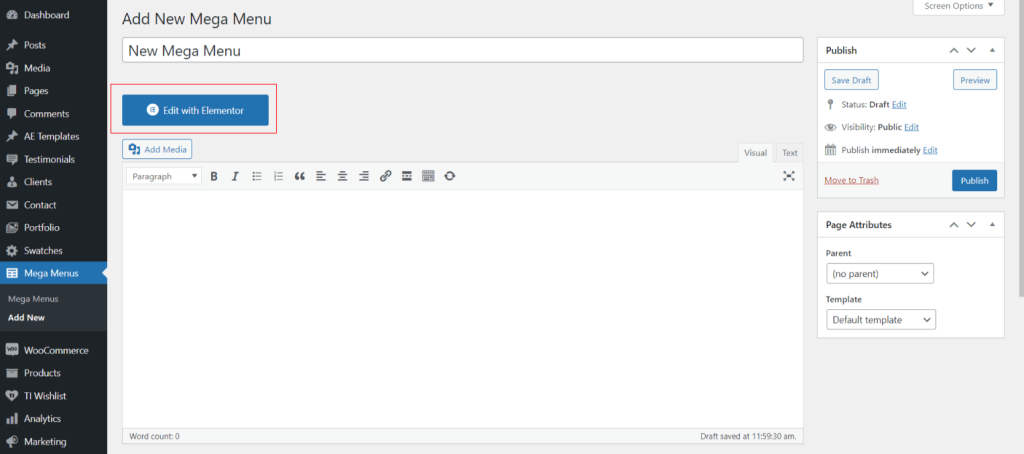
When done, then Click “Add to Menu” and “Save Menu”.
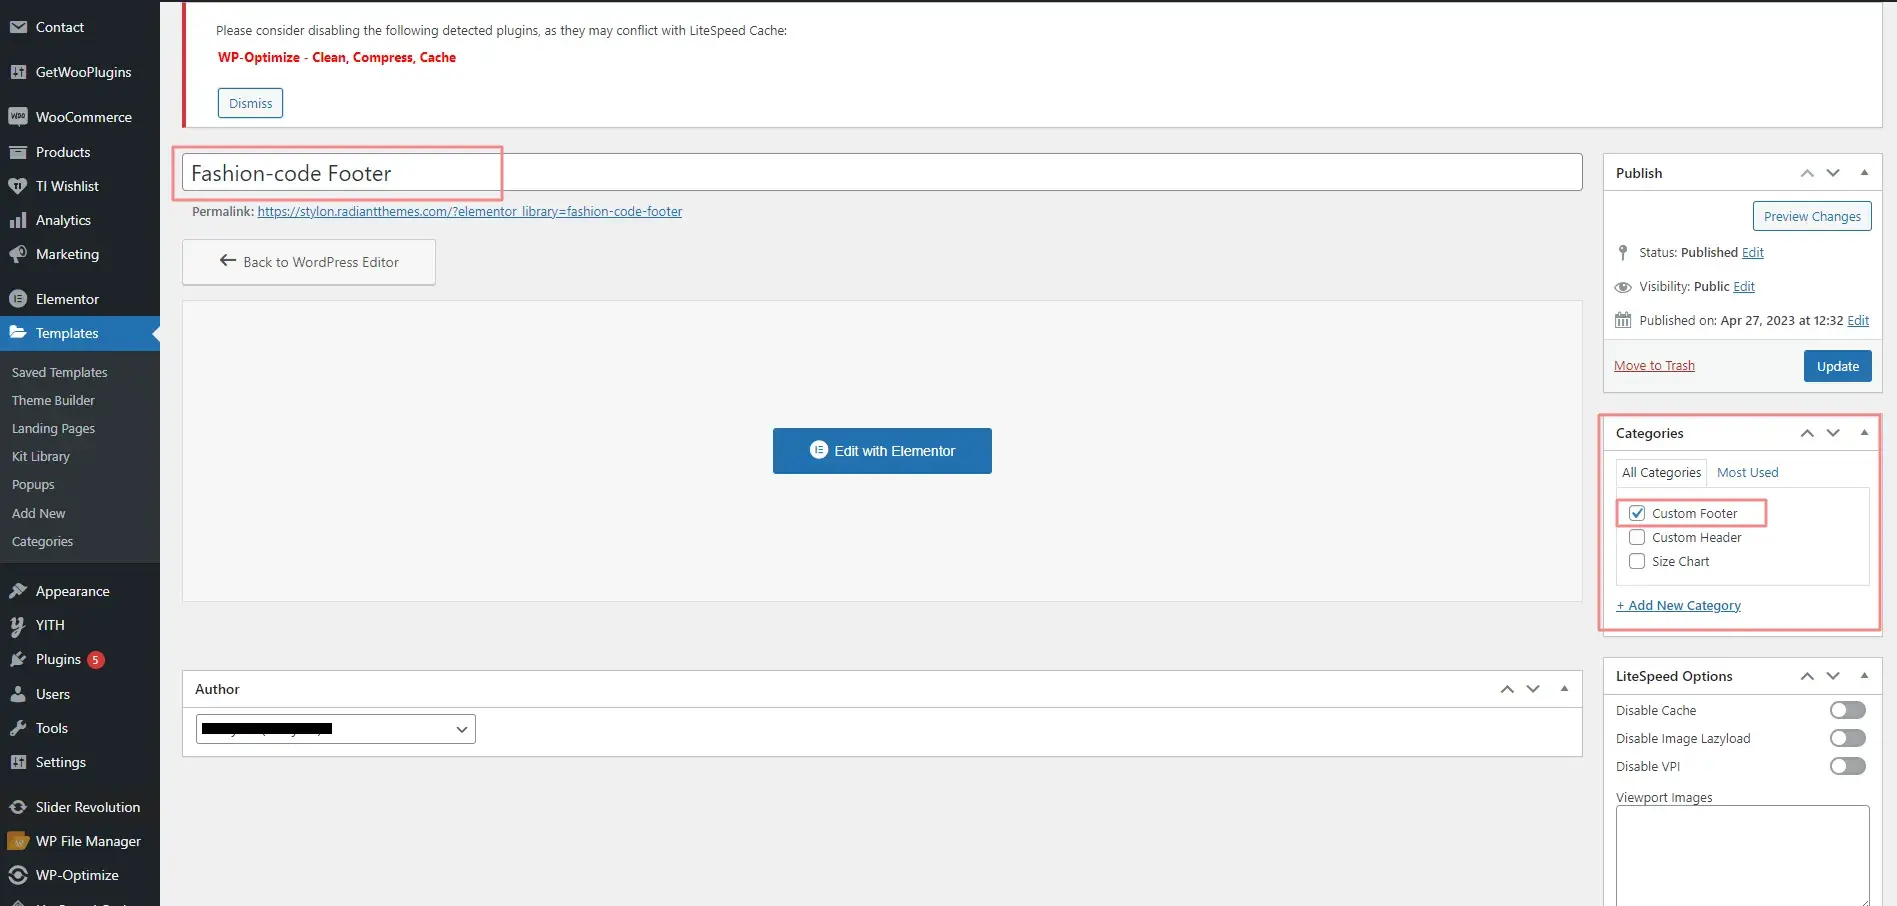
Footer styles are coming through ‘Elementor’ and you can edit those styles from ‘Template > Saved Templates’.
Those templates which are assigned under ‘Custom Footer’ category are the templates of
footer. You can edit all those templates through ‘Elementor’.
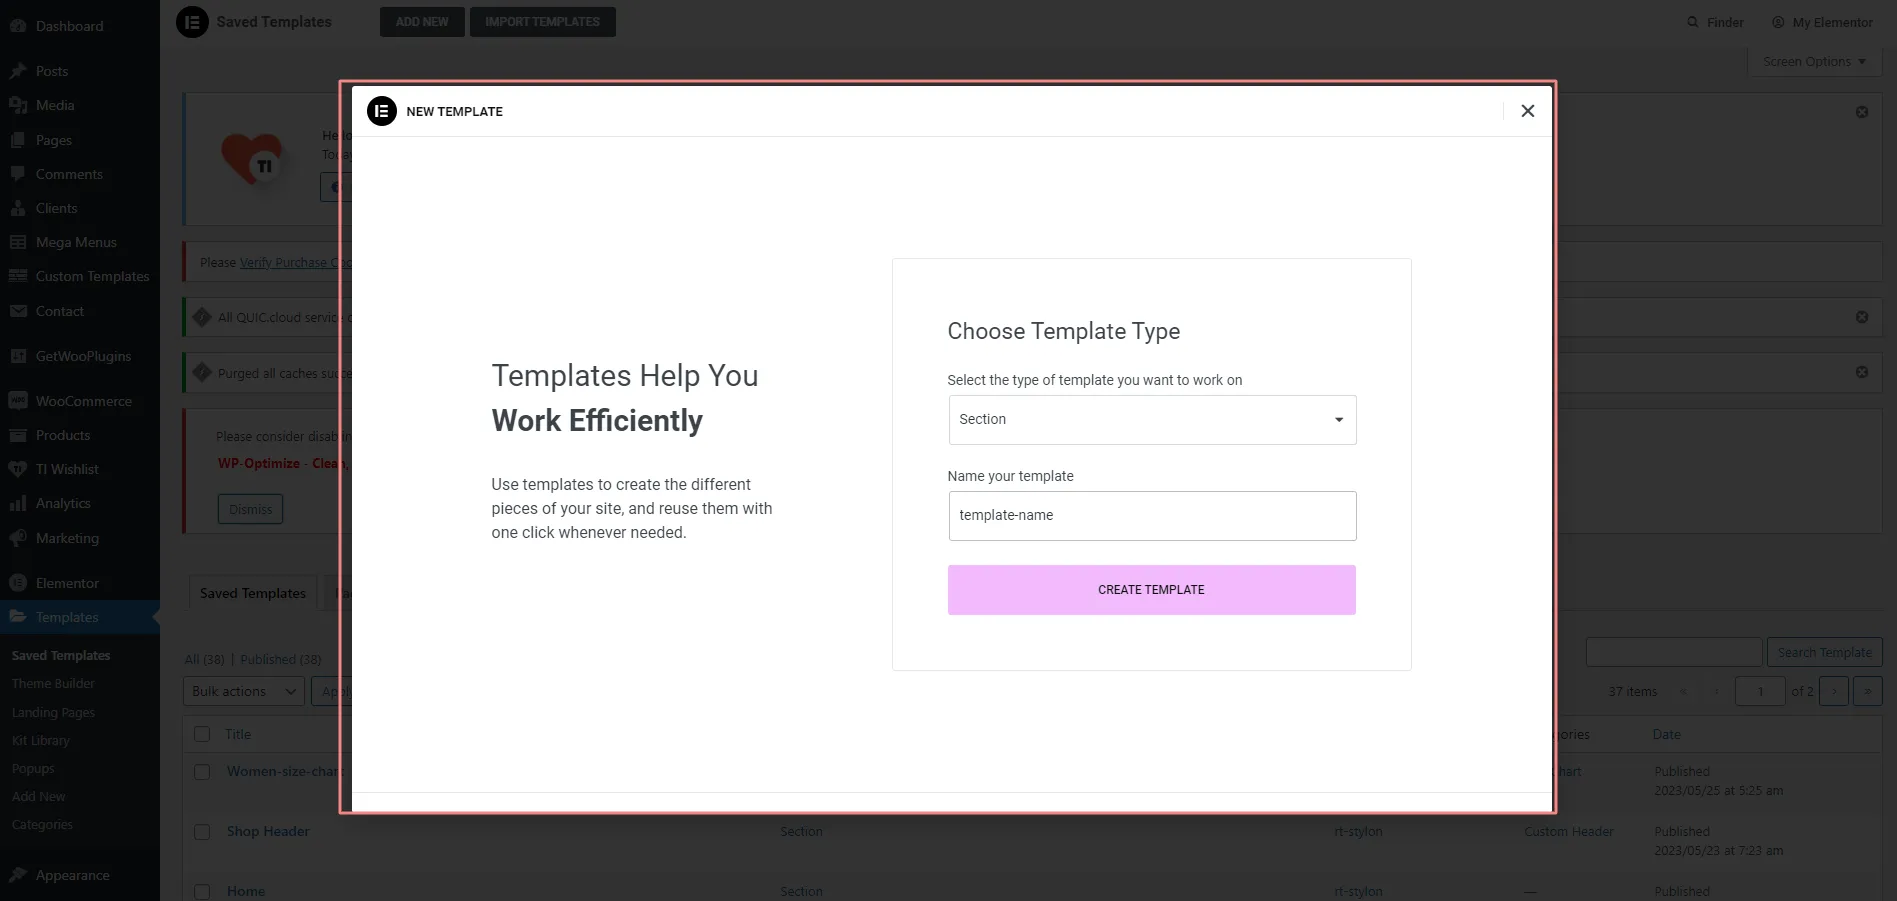
You can add new templates for footer from ‘Templates > Add New’ (Choose
‘Section’ as template type, name your template and click on the 'CREATE
TEMPLATE button)'.
After creating the template, please choose the ‘Custom Footer’ category for that
template.
Header styles are coming through ‘Elementor’ and you can edit those styles froms ‘Template > Saved Templates’.
Those templates which are assigned under ‘Custom Header’ category are the templates of
header. You can edit all those templates through ‘Elementor’.
You can add new templates for header from ‘Templates > Add New’ (Choose
‘Section’ as template type, name your template and click on the ‘CREATE
TEMPLATE button).
After creating the template, please choose the ‘Custom Header’ category for that
template.
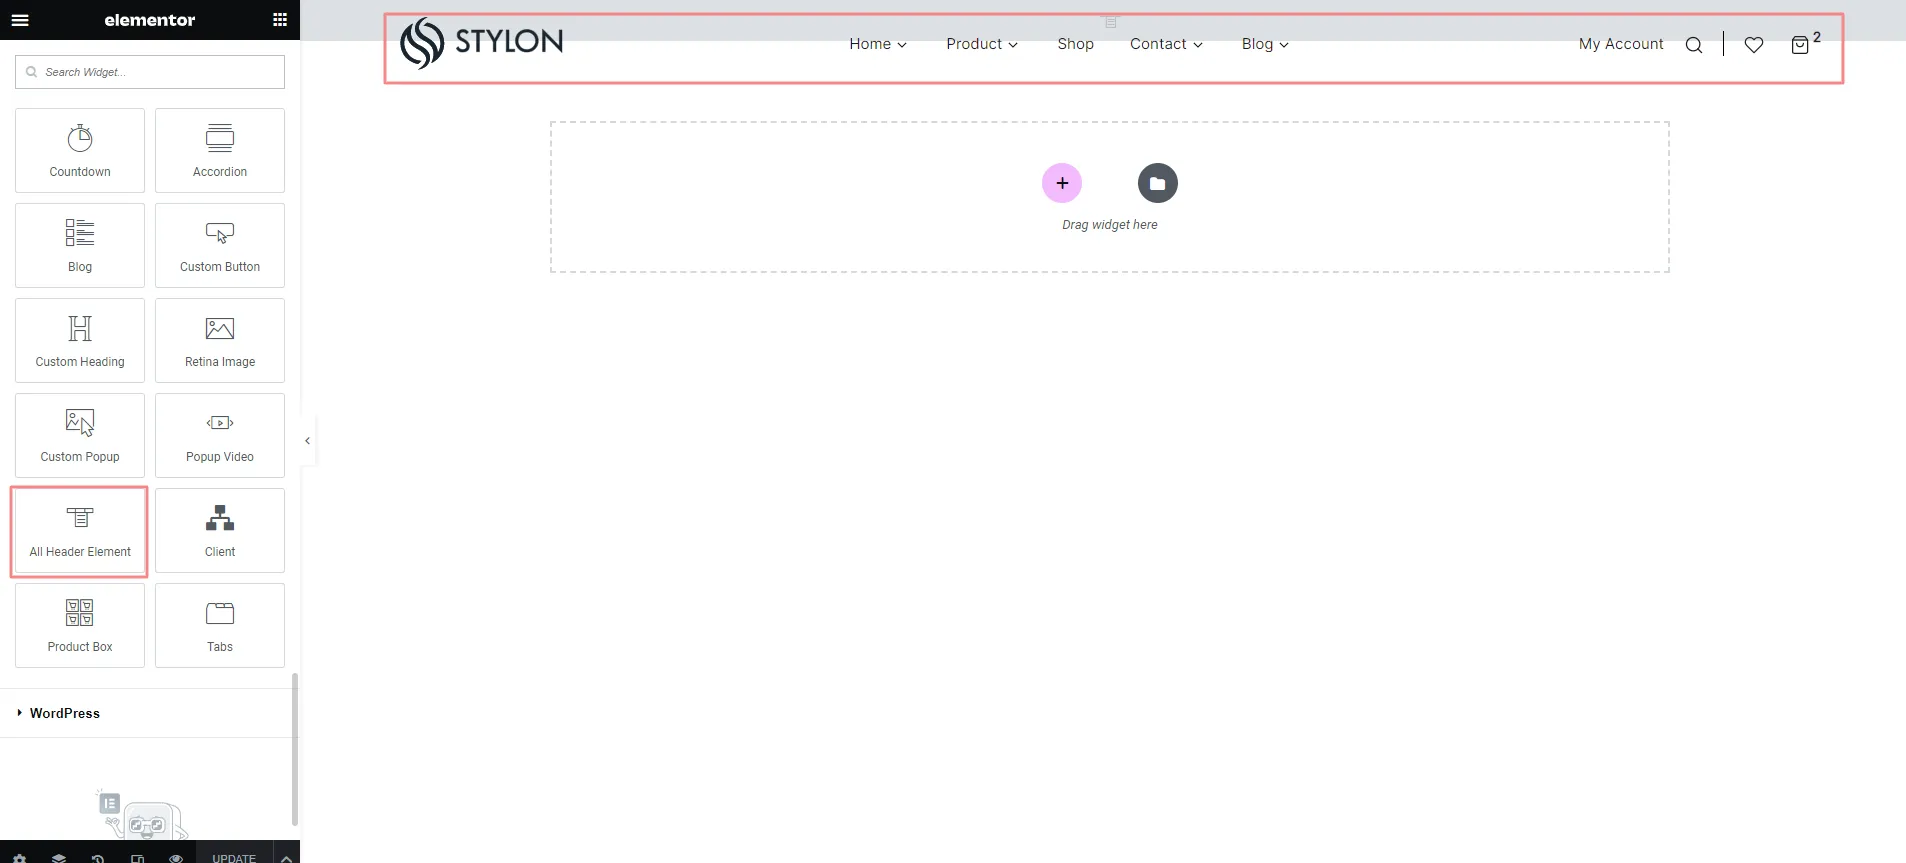
You can edit header by editing existing elements through ‘Elementor’. You can manage
logo, menu and all other properties of header from there.
Also, you can add all header properties (Logo, menu and all other properties) for new header by using
‘All Header Element’.
You can change footer from both Customizer and page level. If you want same footer on all pages, then choose any footer as per your choice from ‘Customizer > Footer >Default Footer Template’ (Figure-1) and choose ‘Theme Default Footer’ from page level (Figure-2) and this is not applicable Shop related pages.
Figure-1
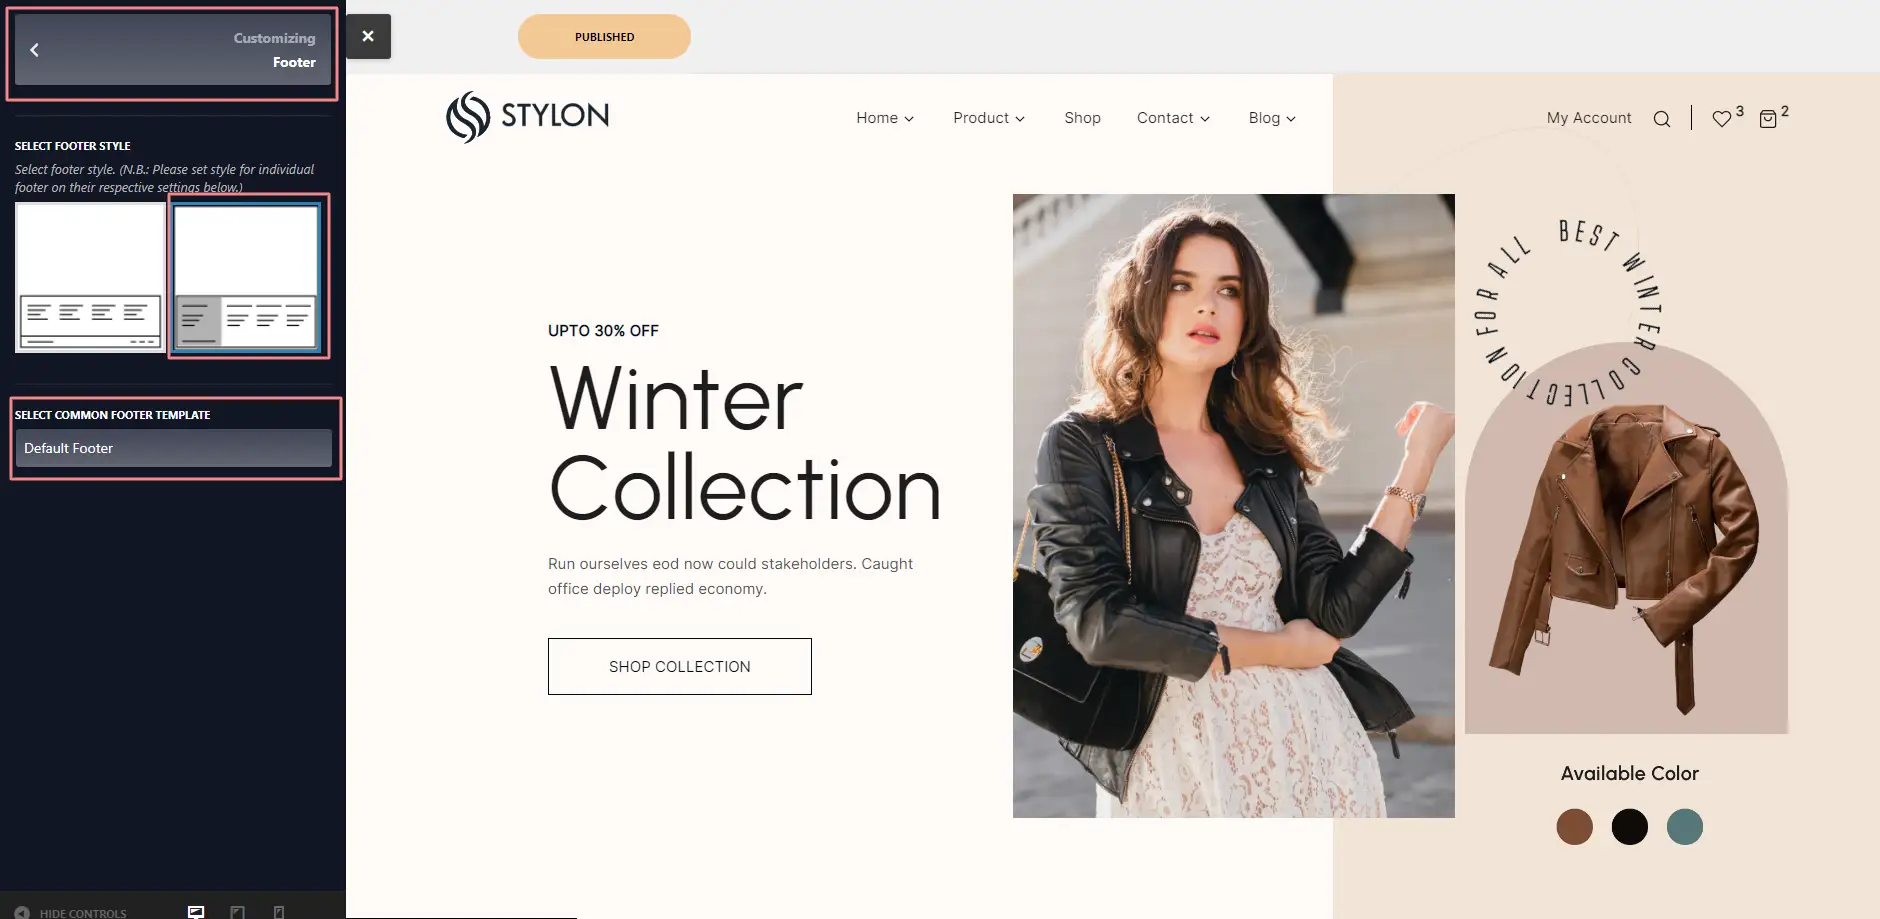
Figure-2
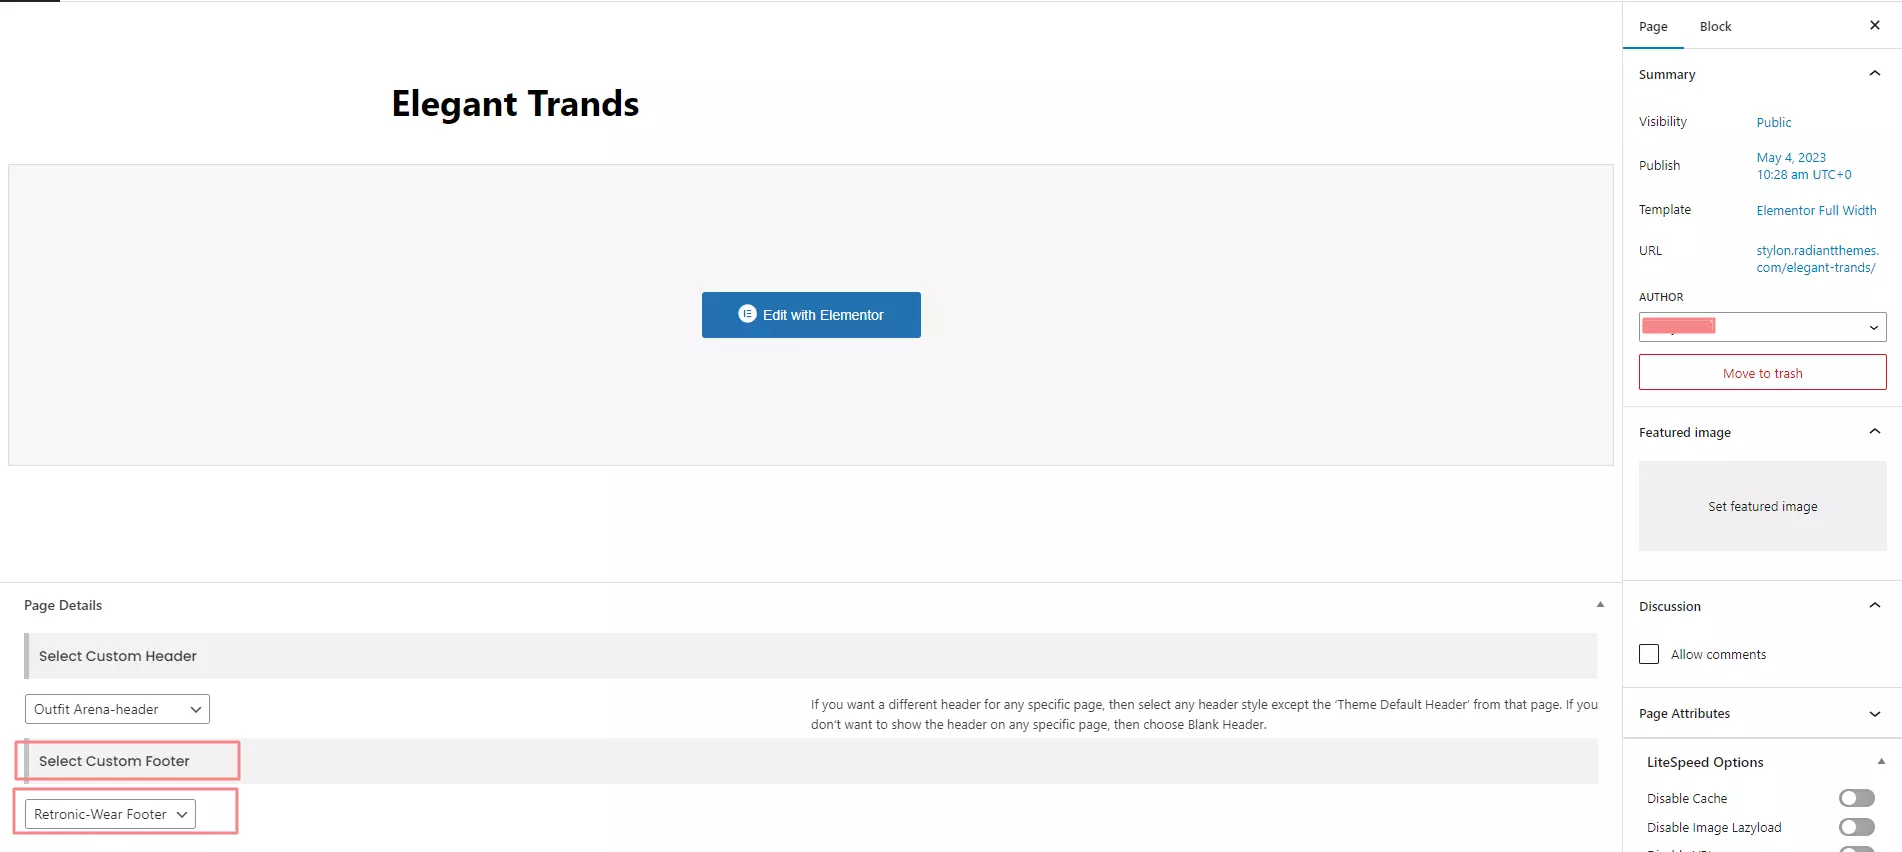
If you want different footer on any page, then go to that page and choose any footer except ‘Theme Default Footer’ from ‘Select Custom Footer’ section.
Figure-3
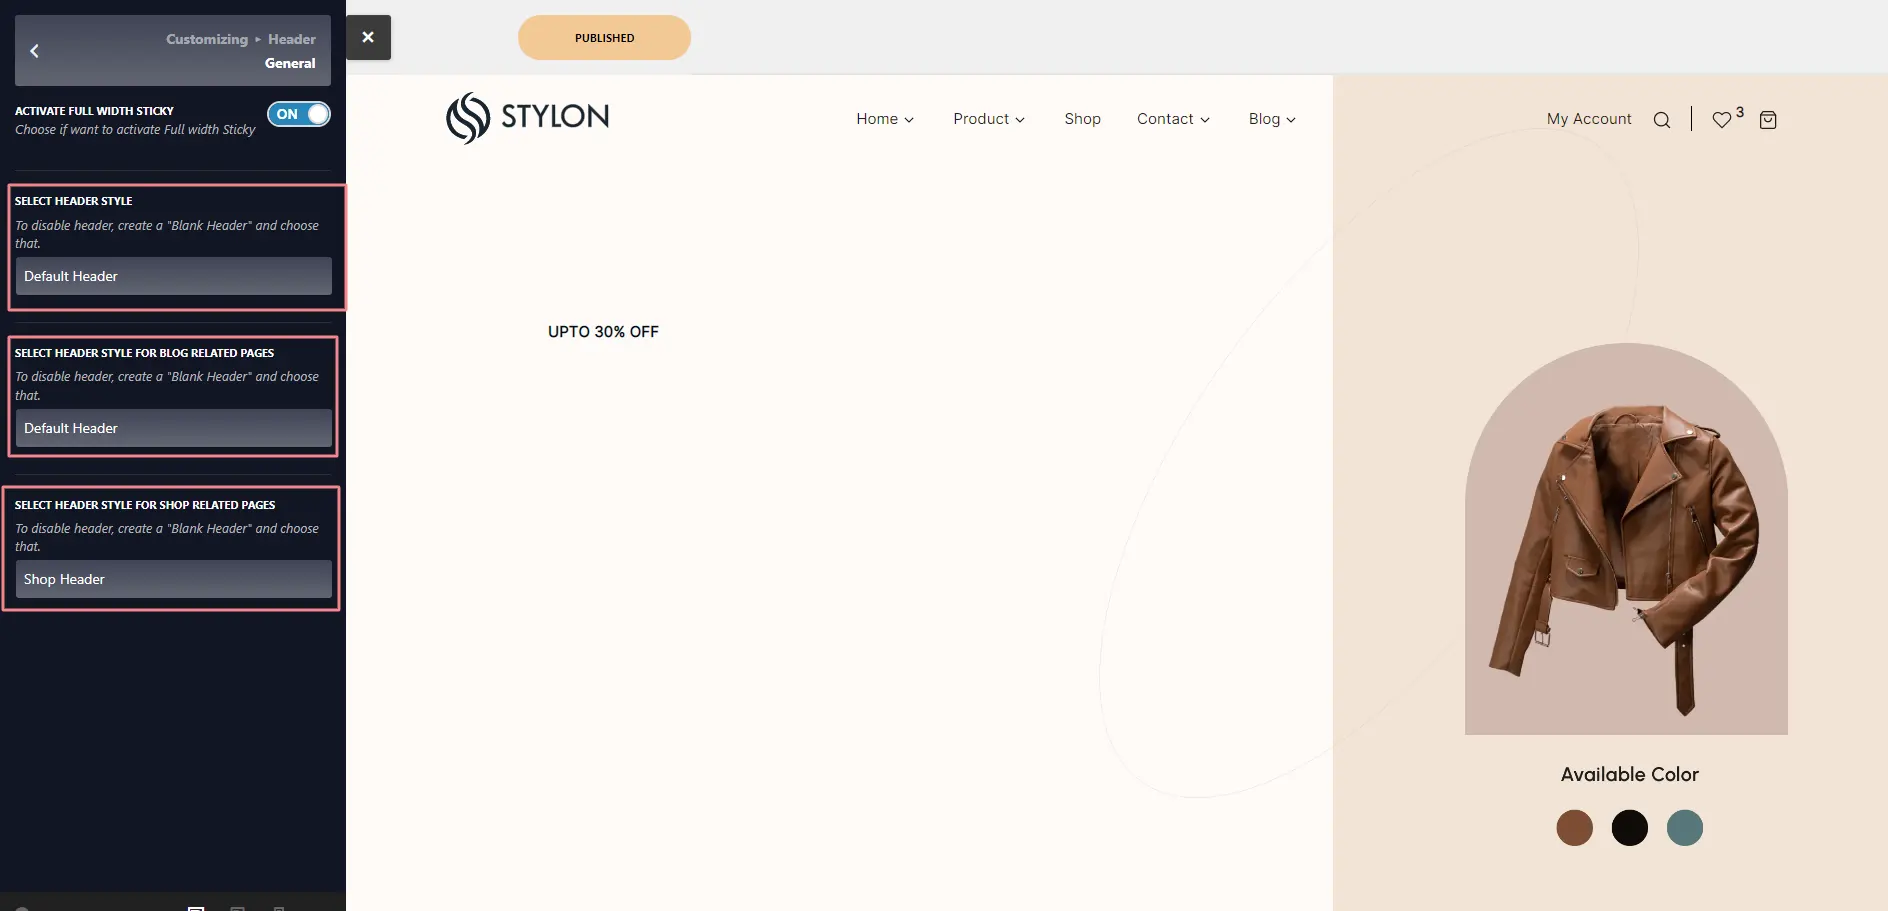
You can change header from both Customizer and page level. If you want same header on all pages, then choose any header as per your choice from ‘Customizer > Header > General > Select Header Style’ (Figure-1) and choose ‘Theme Default Header’ from page level and this is not applicable to Blog, Blog single, Shop and Product detail pages.
As layout for ‘Blog’ and ‘Shop’ pages are managing from Theme Options only, so you won't be able to edit those pages through ‘Elementor’ and can't choose individual header for them from page level. You can choose header for them from ‘Customizer > Header > General.
Figure-1
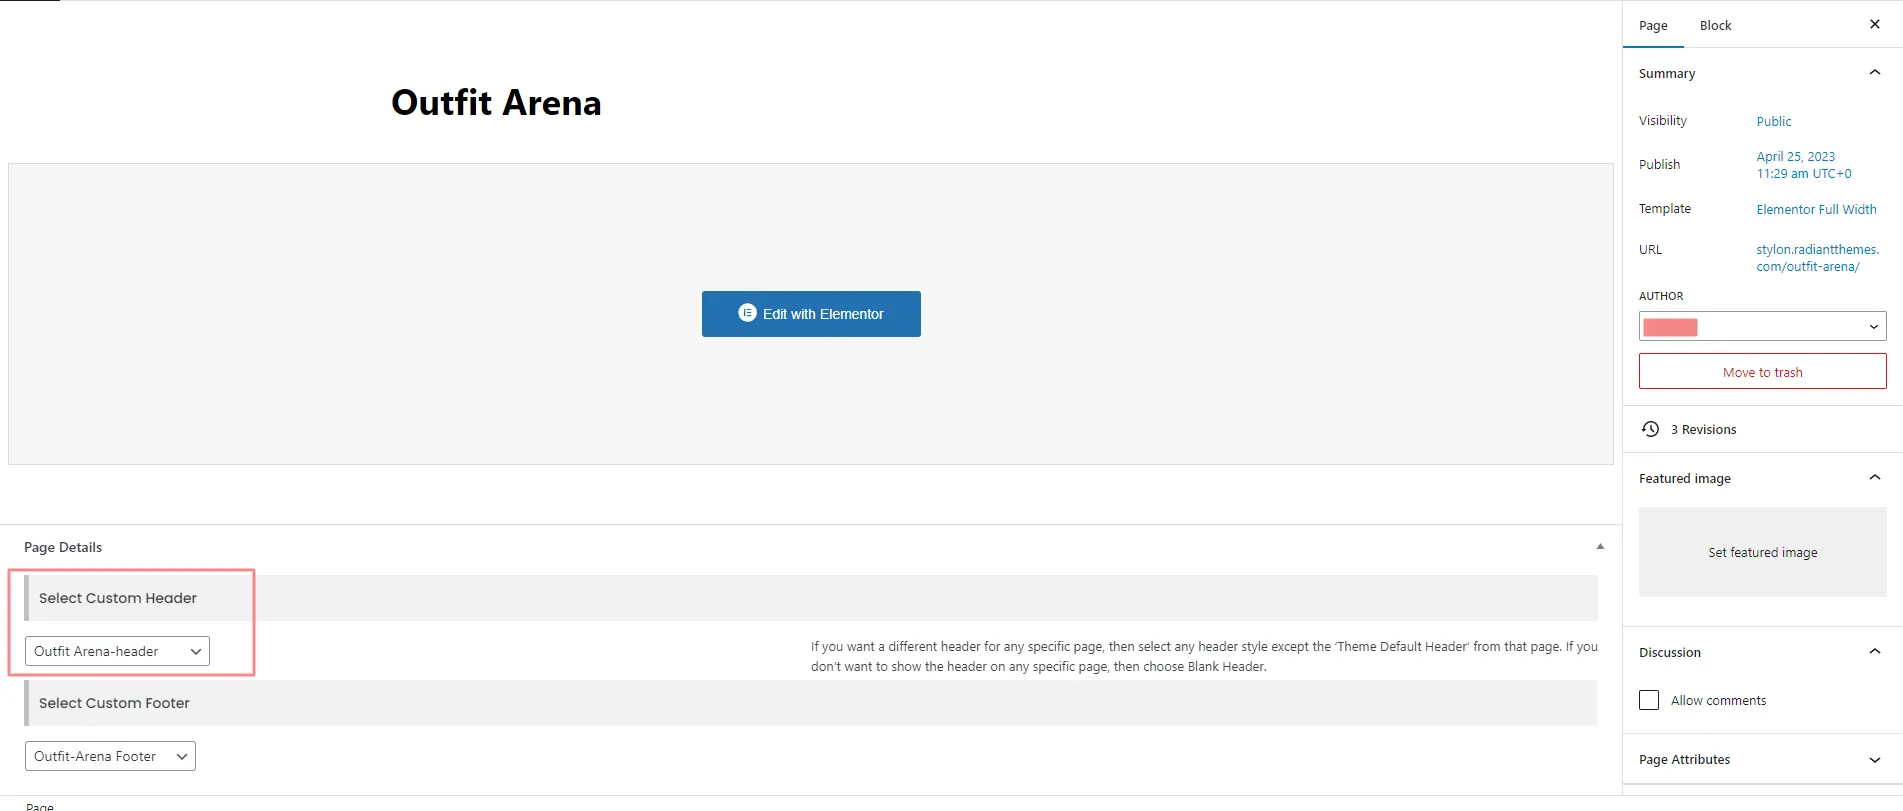
If you want different header on any page, then go to that page and choose any header except ‘Theme Default Header’ from ‘Select Custom Header’ section.
Figure-2
Step : 1
Step : 2
Step : 3
You have successfuly set the Modal on your site.

After login to wp-admin, go to the front-end and click on header template under ‘Edit with
Elementor’.
![]()
Go to ‘Custom Logo’ section and you can change logo from there (from ‘Default Logo’
field). You can change Retina Logo from there too (From ‘Default Retina Logo’ field).
For retina logo to work the name of the retina logo must be the normal logo [email protected] eg. if the
normal logo is my_image.png then the retina logo name should be [email protected]
Also both images must
be in the same location.
![]()
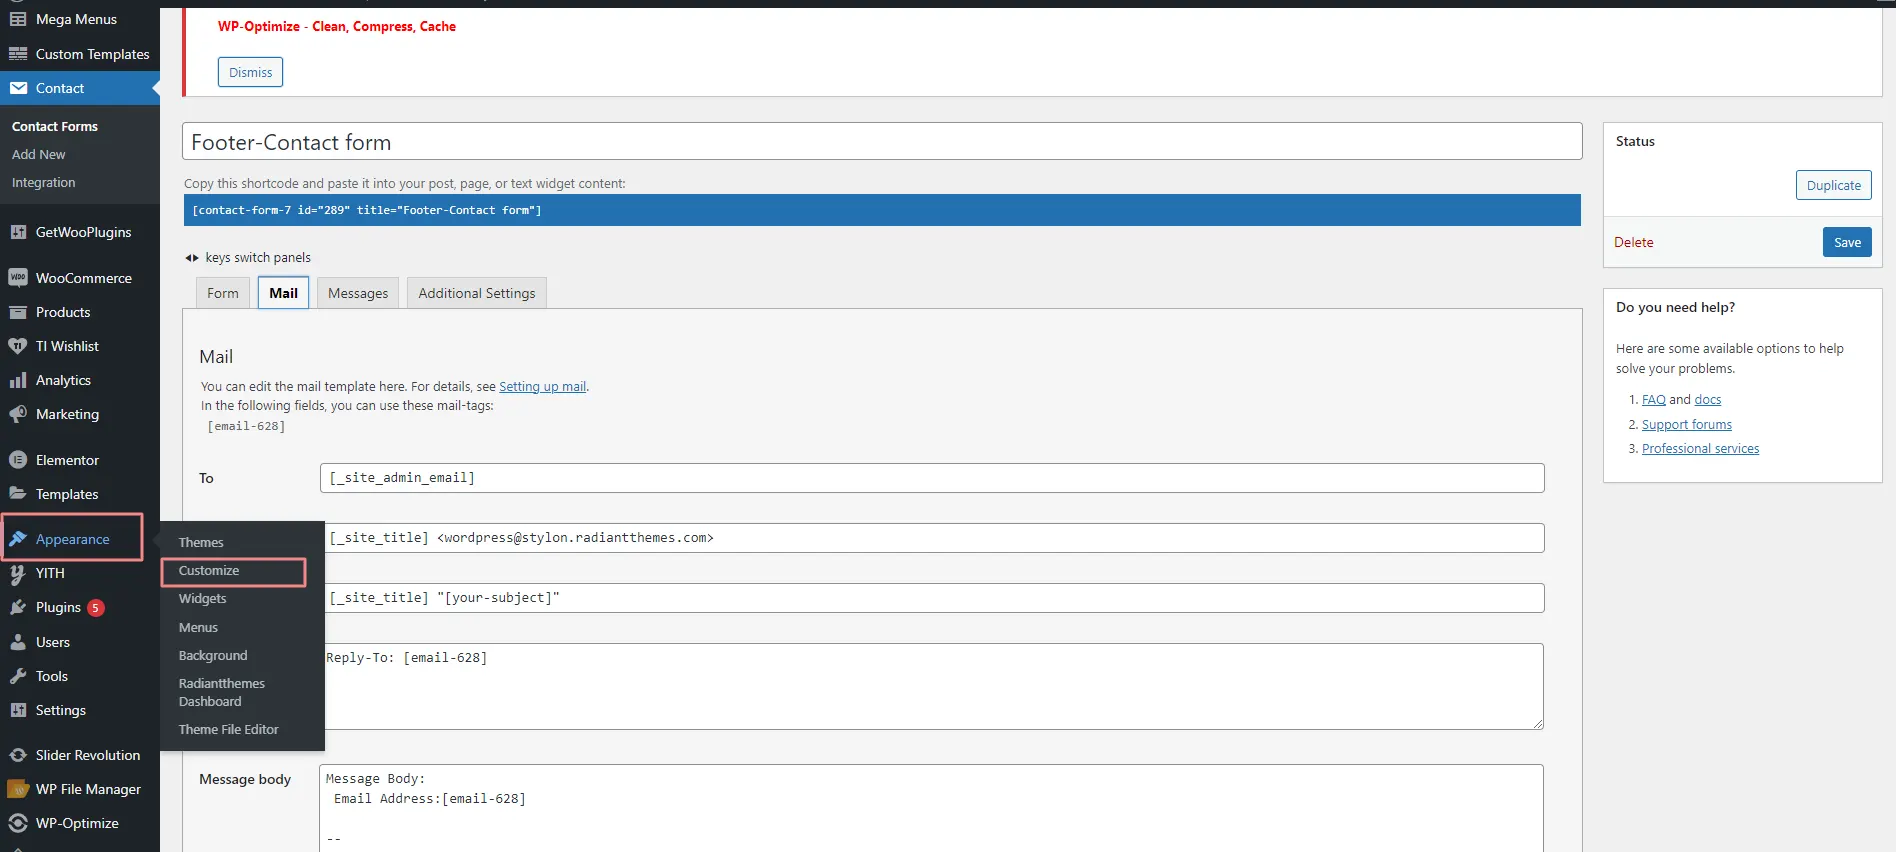
Contact form 7 is used to create ‘easy to handle’ and ‘easy to
customize’ forms. This theme has seven pre-built forms. To get all forms, ‘Contact
Form 7’ plugin must be installed and activated. You can add/edit/delete the contact form by
following this documentation-
https://contactform7.com/getting-started-with-contact-form-7/
If you have imported our demo designs then you'll get all contact forms along with demo import. You only need to configure them to suit your purpose. We've created contact forms through ‘Contact Form 7’. Once you'll import the demo designs, you'll find all the forms on ‘Contact > Contact Forms’.
You need to provide all the information for every contact form, so that you can get the details upon customers fill up any form. You can put information(Information may vary as per the form) on the ‘Mail’ tab as per below screenshot:-

Contact form 7 uses php mail() function to send form data. Few hosting providers block php mail()
function to send email via forms. In such case you may need to authenticate using
https://wordpress.org/plugins/smtp-mailer/ or similar.
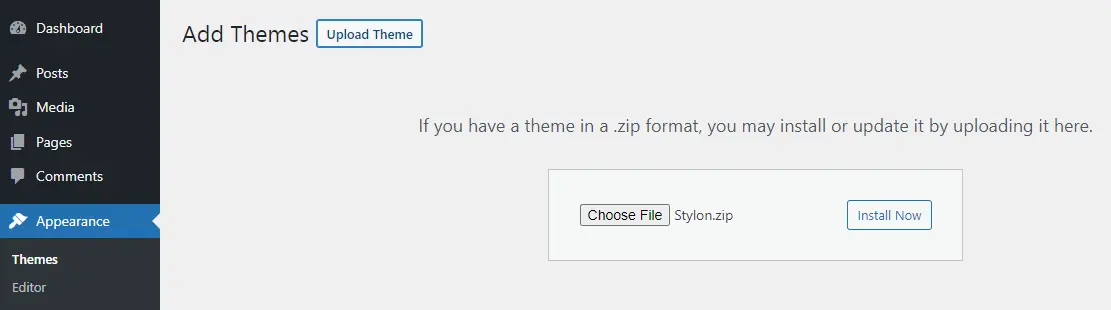
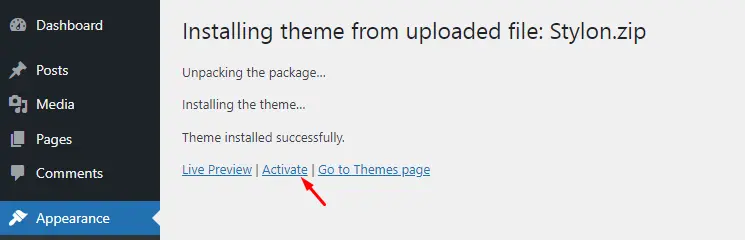
Download the latest package of the theme, unpack the files, and upload the theme on the server.
You need to upload the theme on your server by following these steps–
You can update plugins by following below steps–
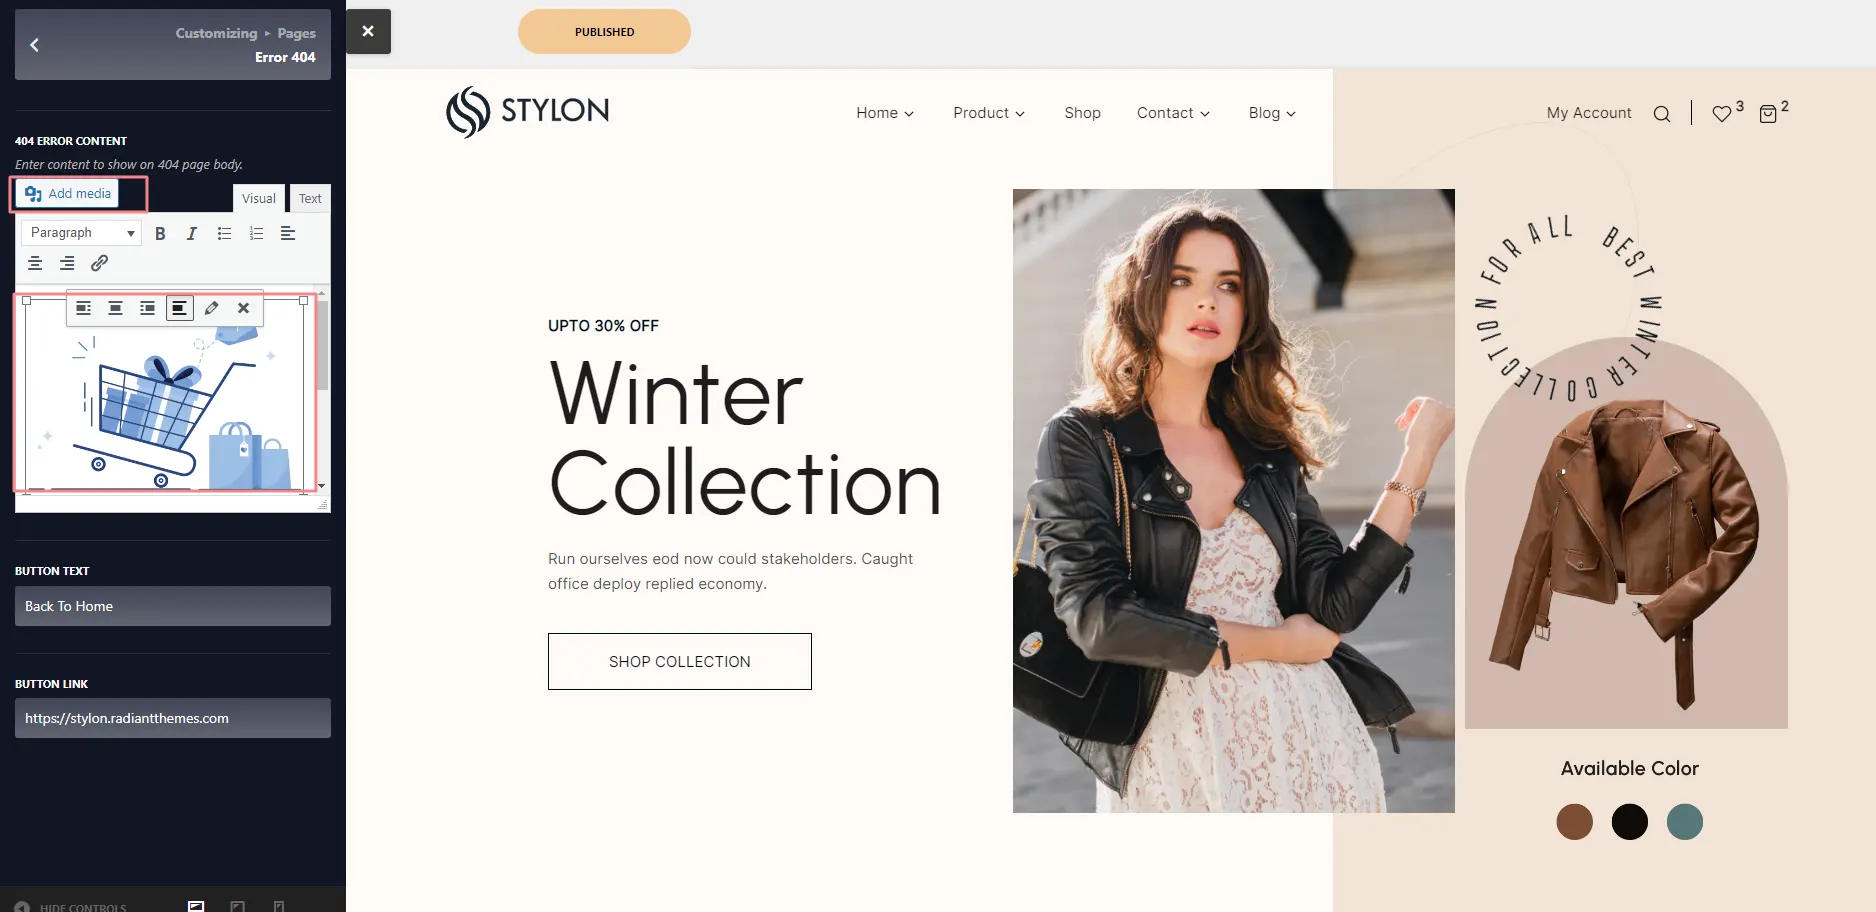
You can change image for 404 page. Please go to Customizer–>Pages–>Error 404.
Here is an option to change change and text.Please check screenshot.
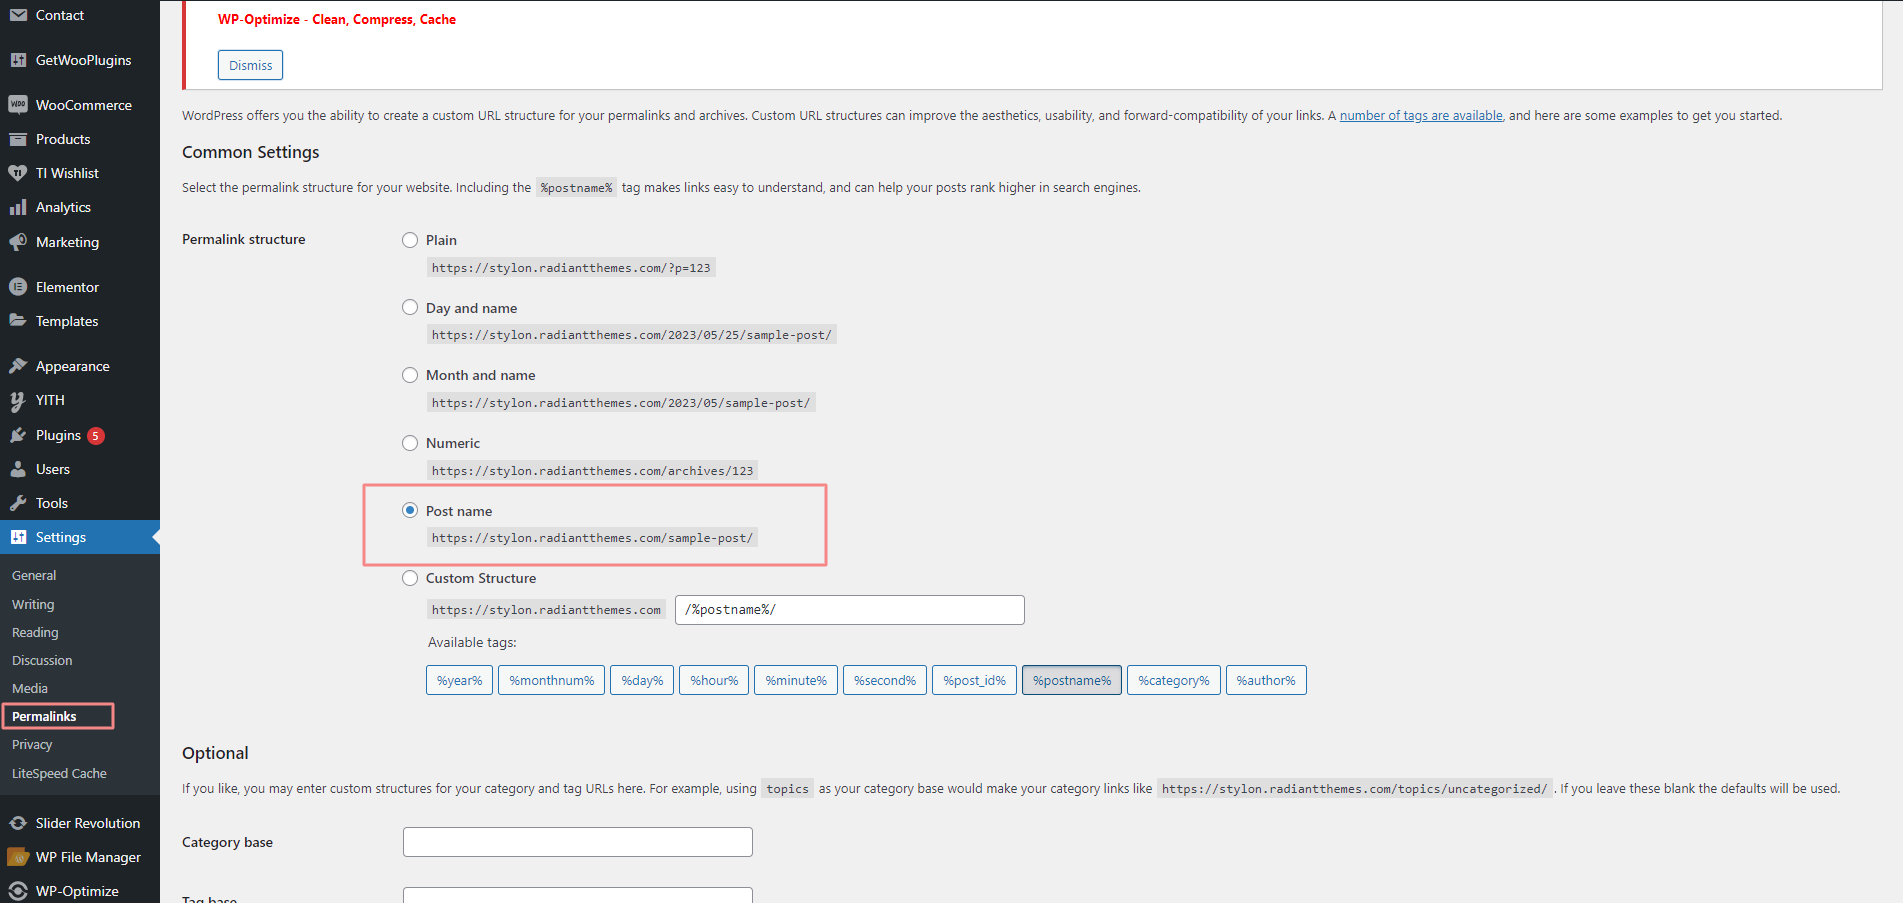
WordPress shows by default your posts in the homepage but you can configure a specific page for your posts.
To setup the blog page, in your WordPress admin panel, navigate to Settings → Reading.
For example if you already have a page named “Blog“, for the Your homepage displays, select “A static page” and choose your “Blog” page as the Posts page.
This is what you should see on your screen:
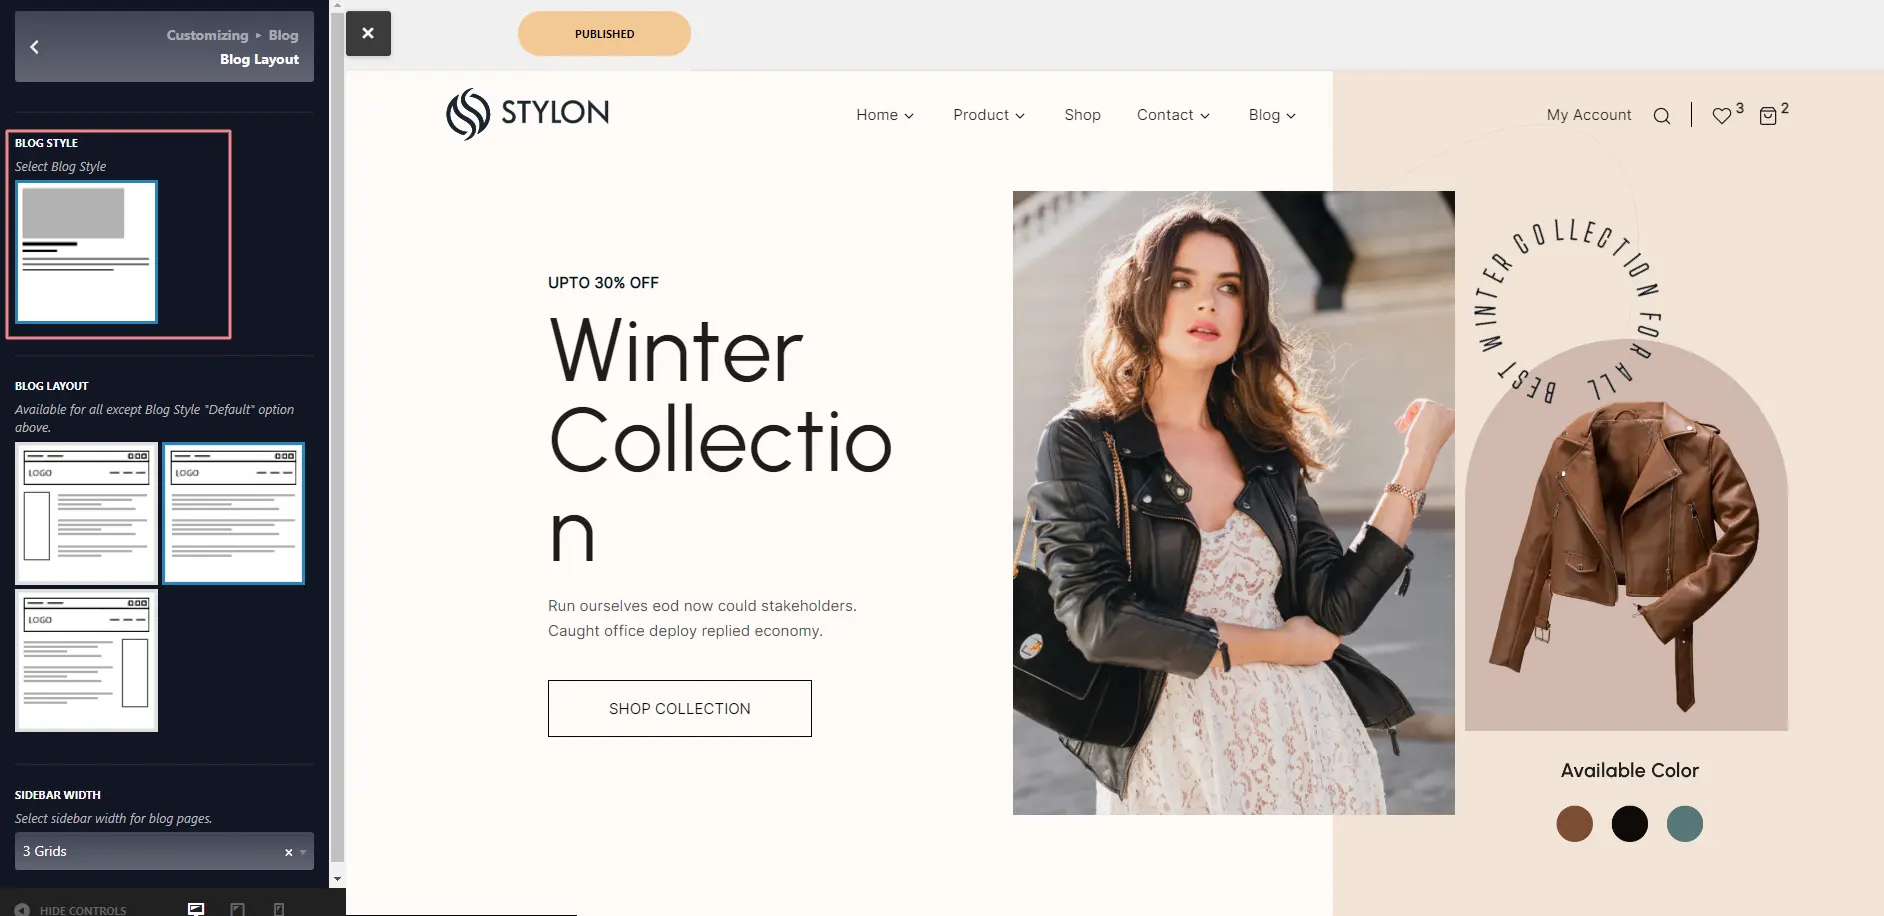
Go to Appearance->Customizer->Blog-> Blog Layout
Select your default posts listing in Blog Layout option:
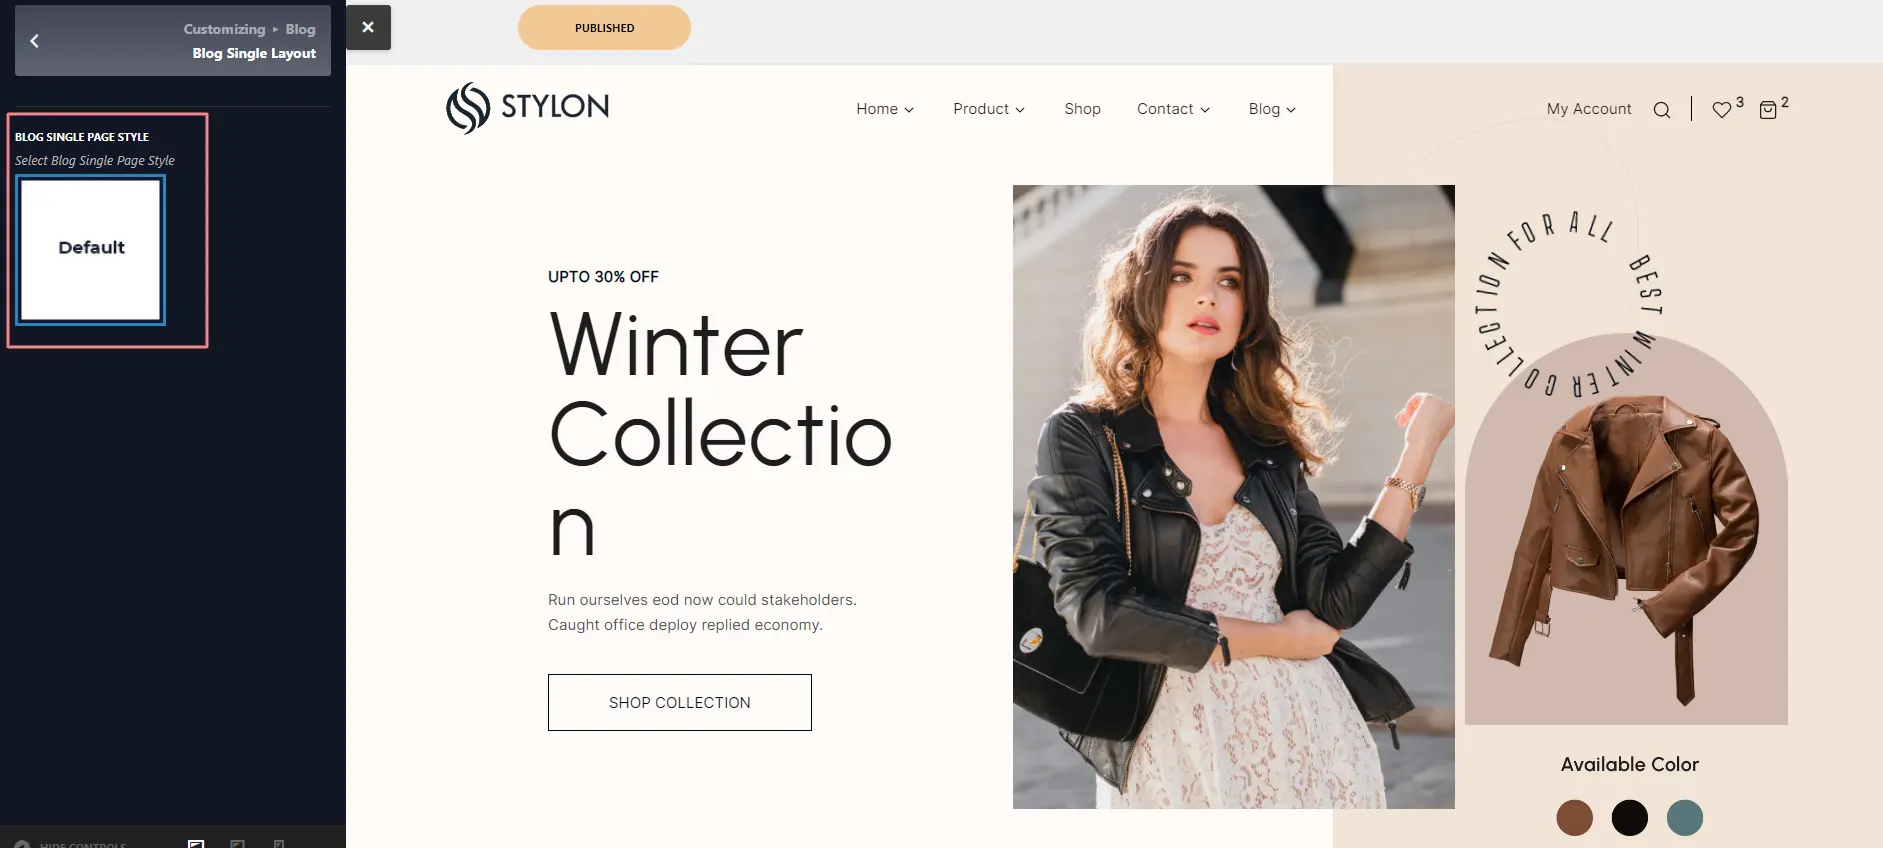
There are different types of blog details layout. Go to Appearance ->Customizer->blog->single page layout (IMPORTANT: You need to add/edit Blog posts through elementor only).
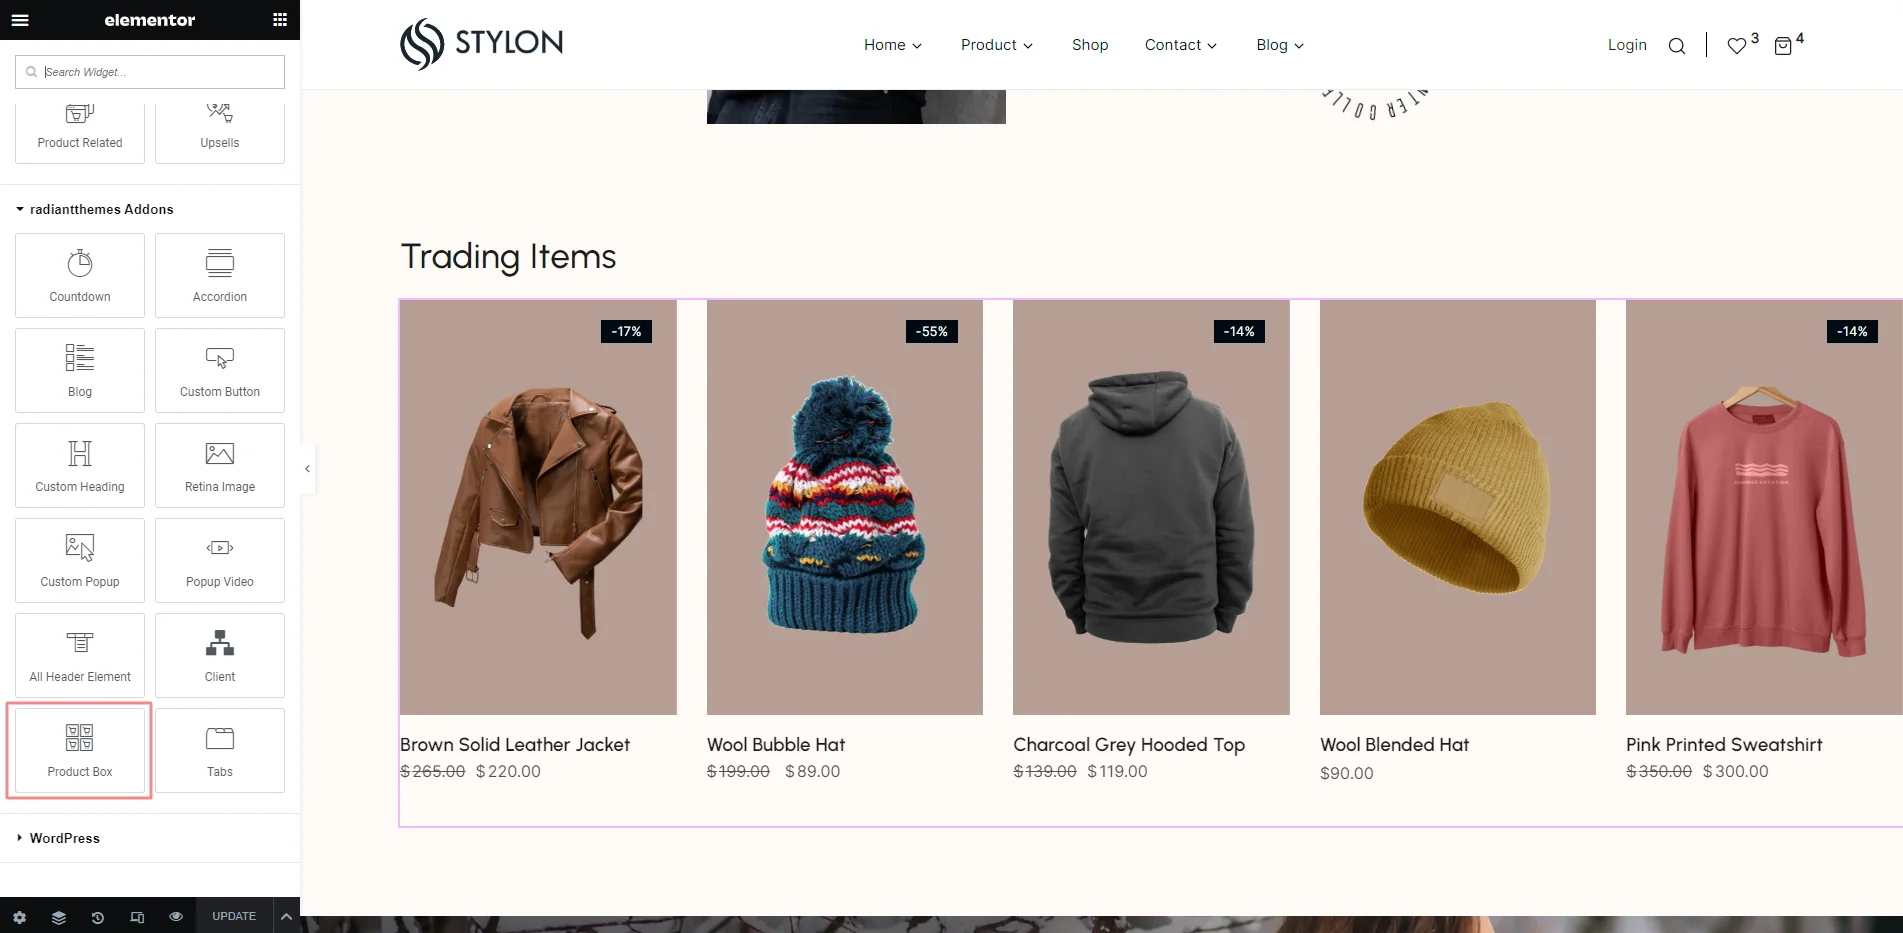
You can add a product section on any home page by using 'Product Box' through elementor.
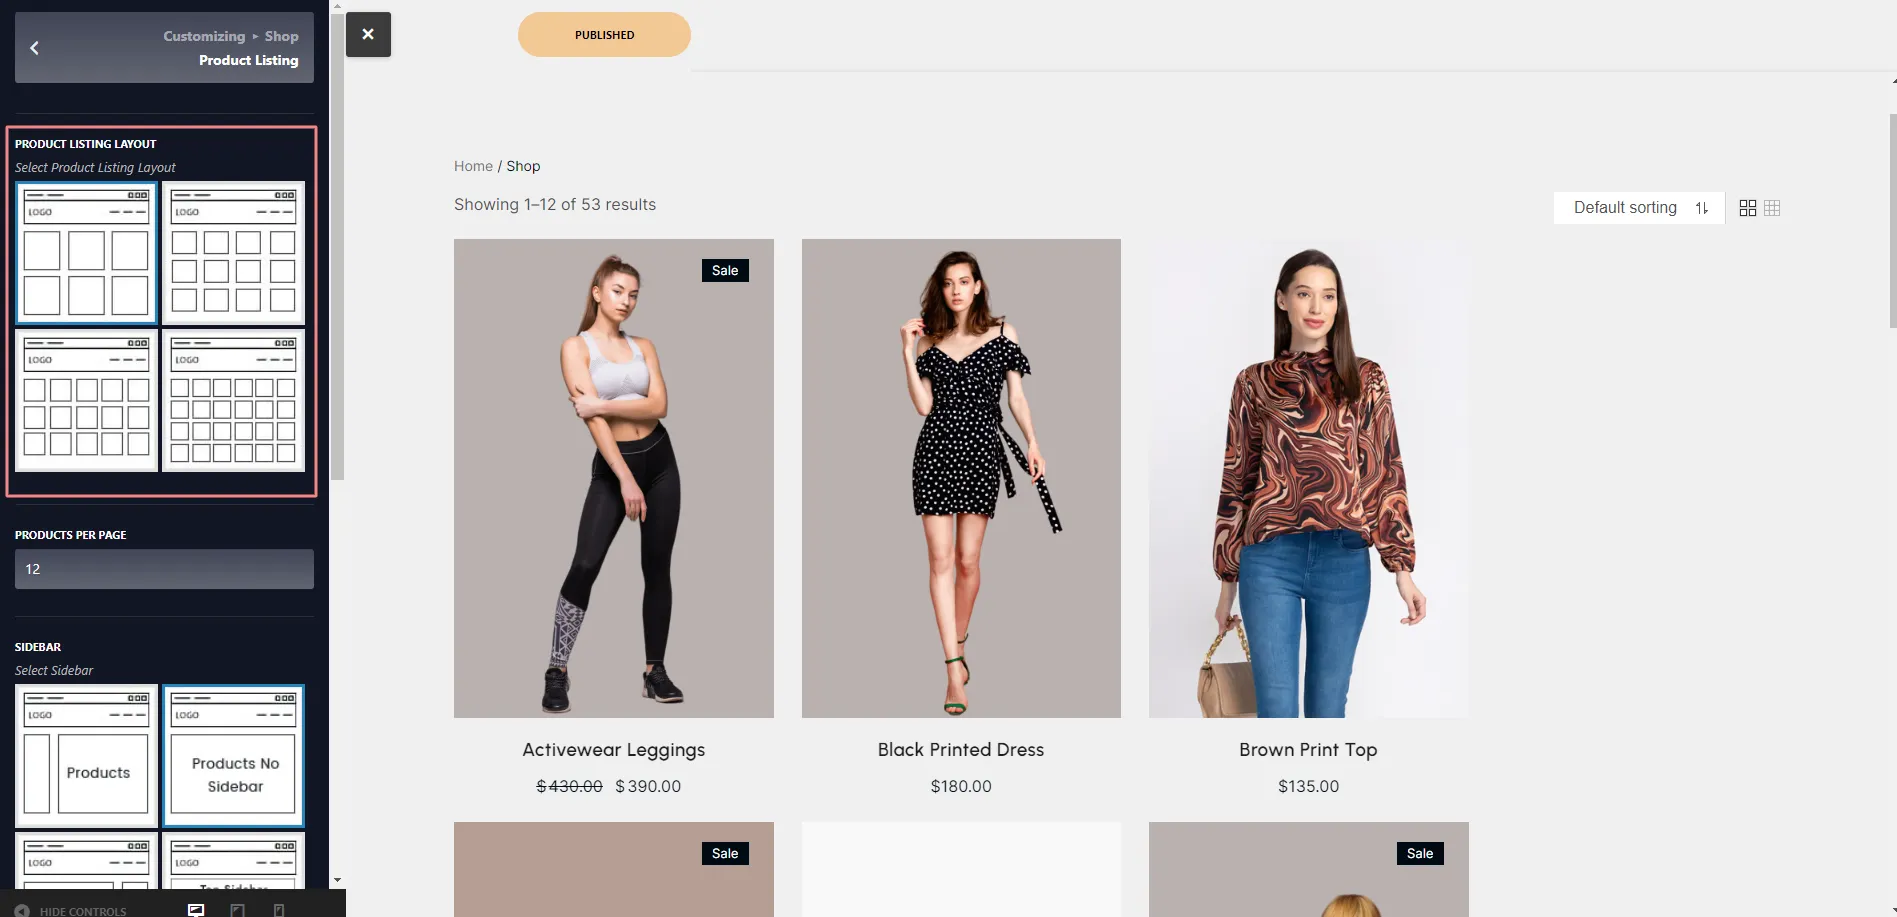
You can manage shop page layout from 'Appearance > Customize > Shop > Product Listing'.
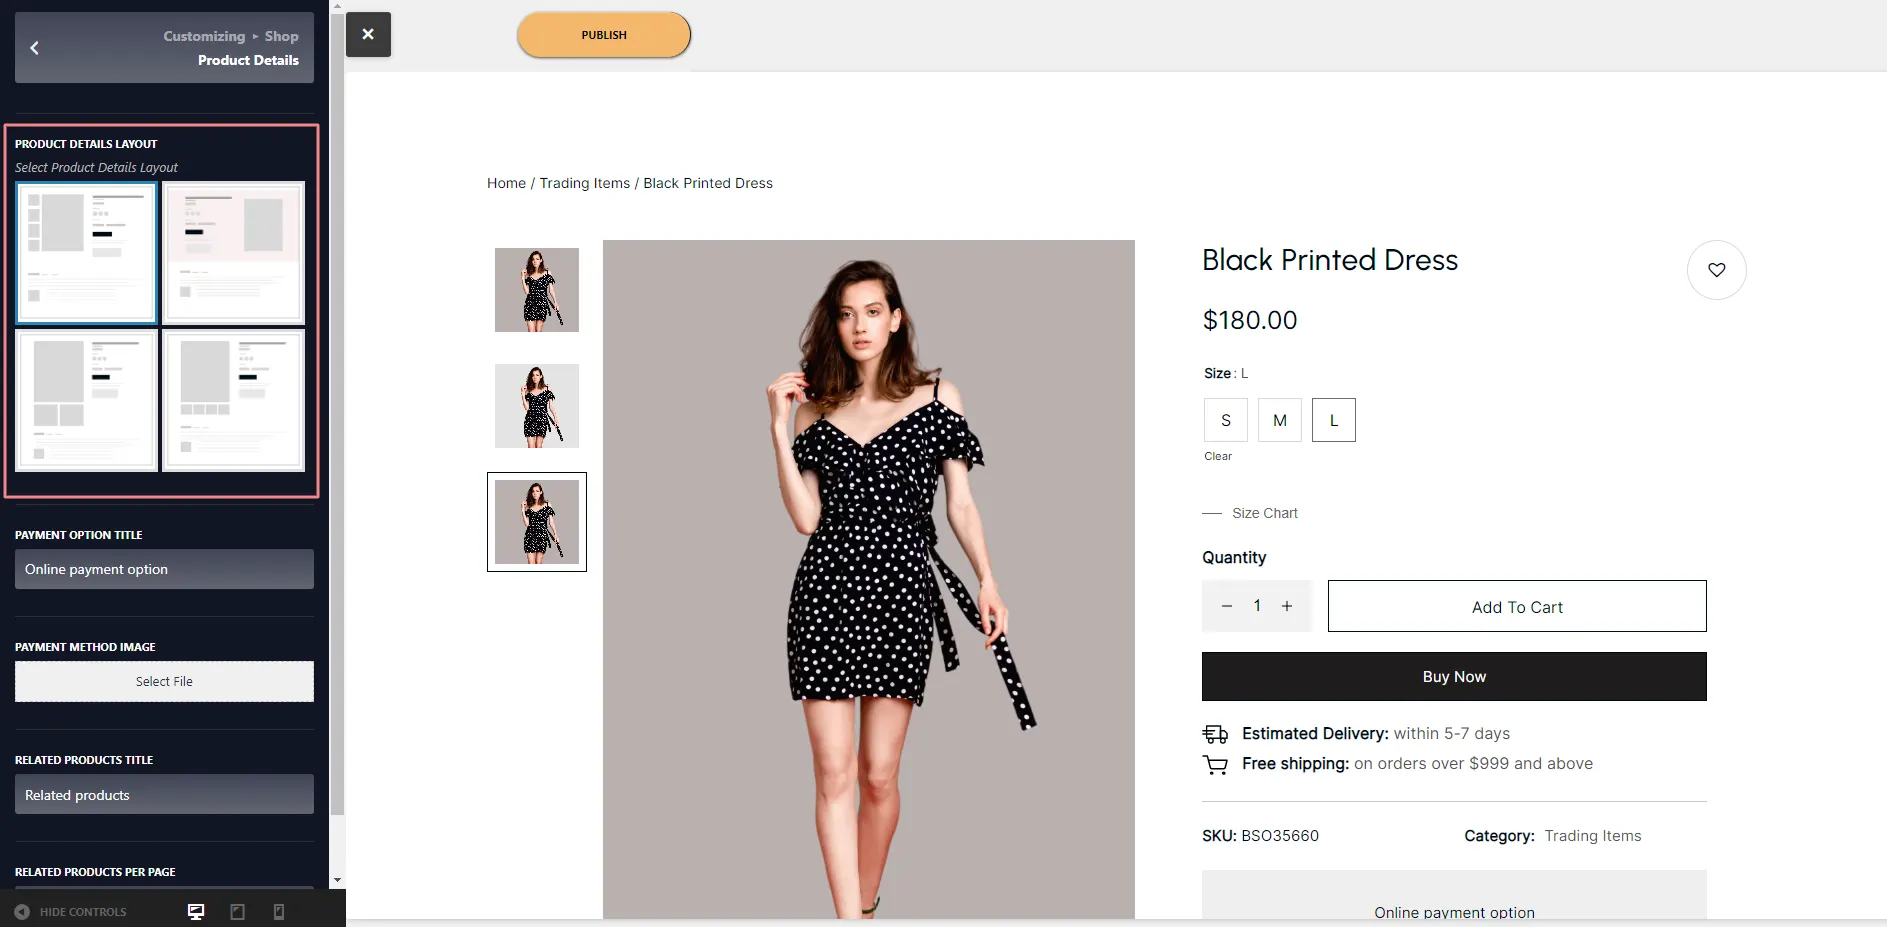
You can manage product detail page layout from 'Appearance > Customize > Shop > Product Details'. You can change some product detail page's options too from here.
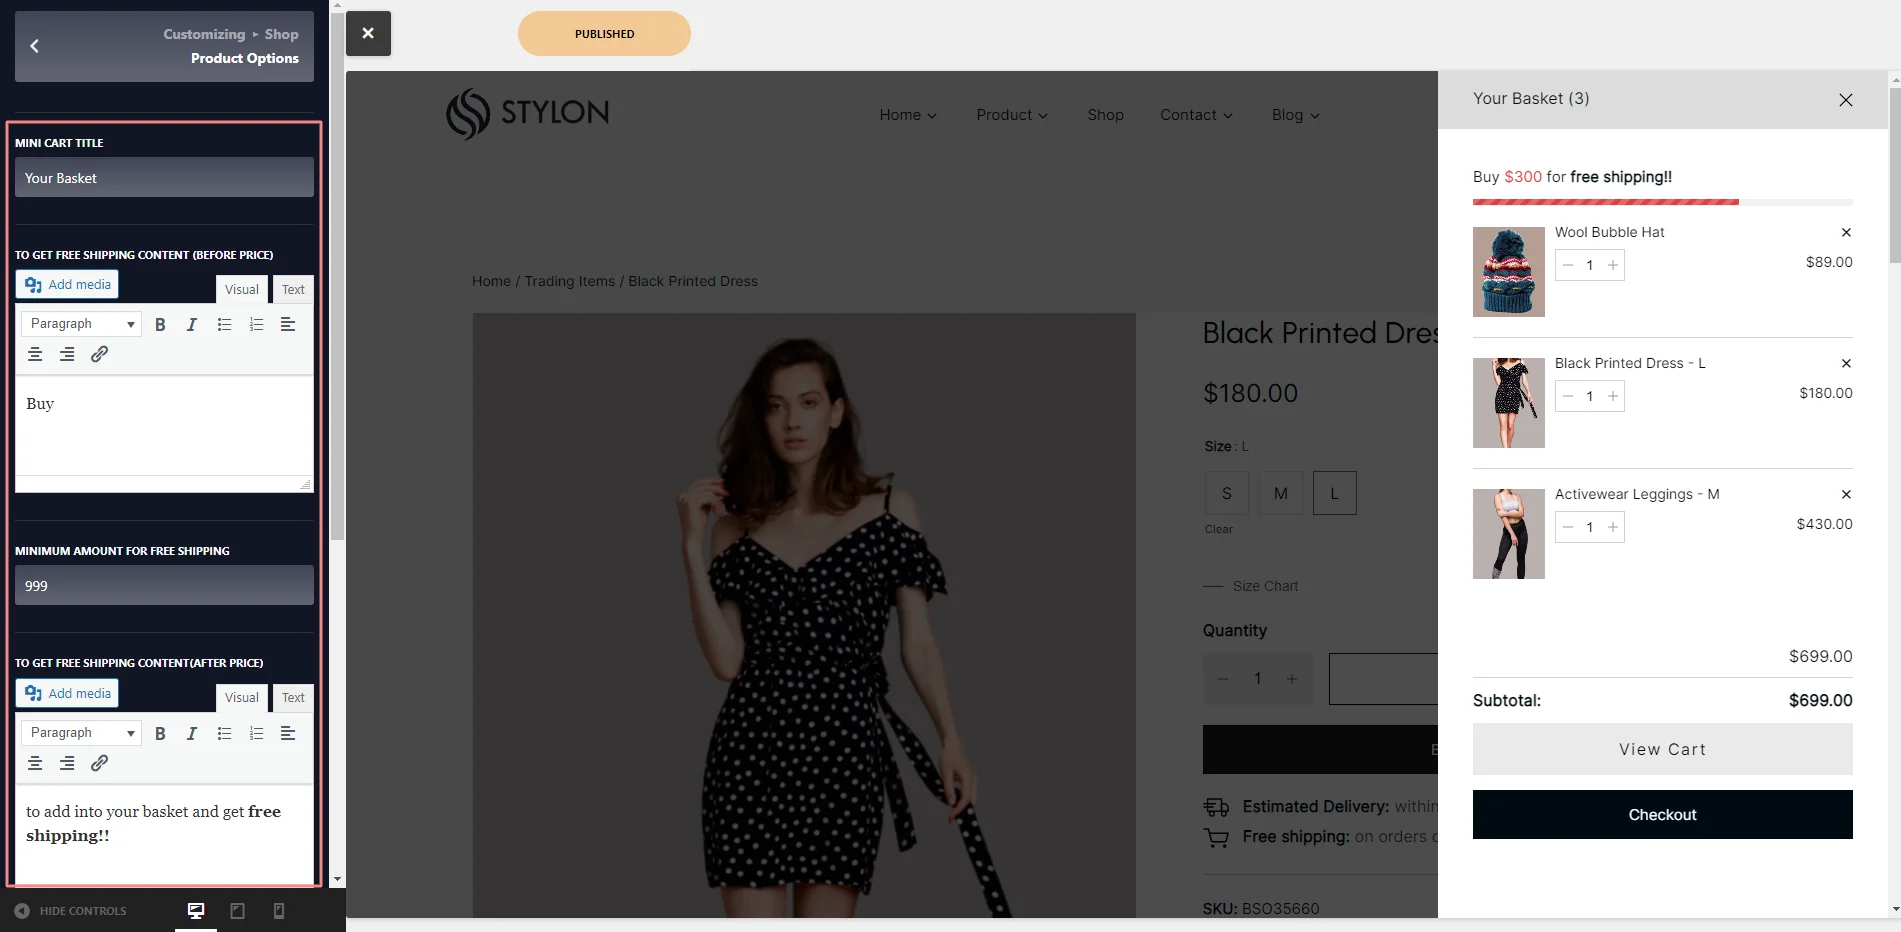
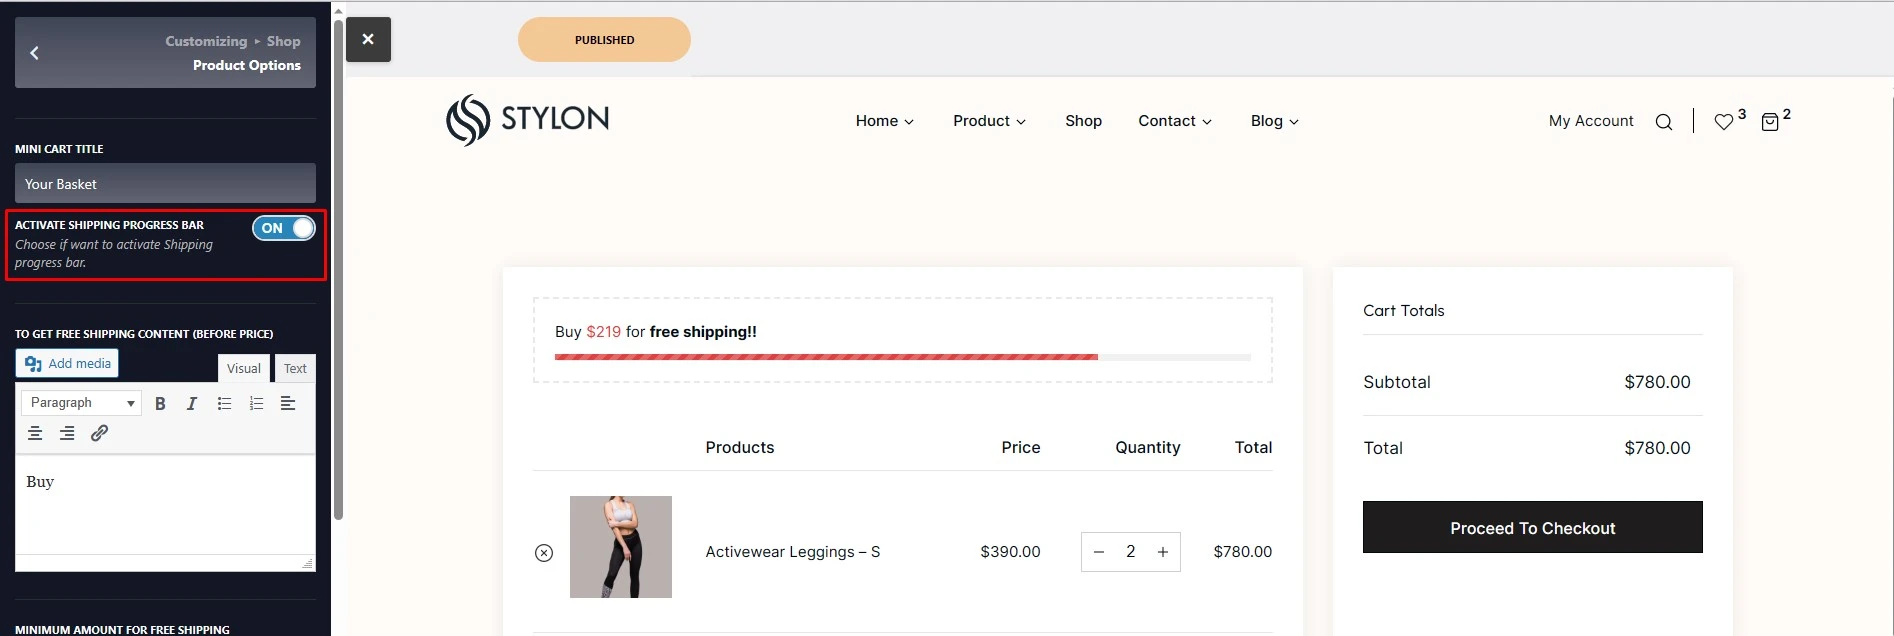
You can mini cart content from 'Appearance > Customize > Shop > Product Options'.
If your site doesn’t have WooCommerce installed already, then you need to install the WooCommerce plugin first. To do the same, navigate to ‘Plugins’ > ‘Add new and then type ‘WooCommerce into the search field. Now install the plugin by clicking on “Install Now” button. After that, click on “Activate” button to activate the plugin. After activating, you will get notification to install WooCommerce pages. So, install default WooCommerce pages from there.
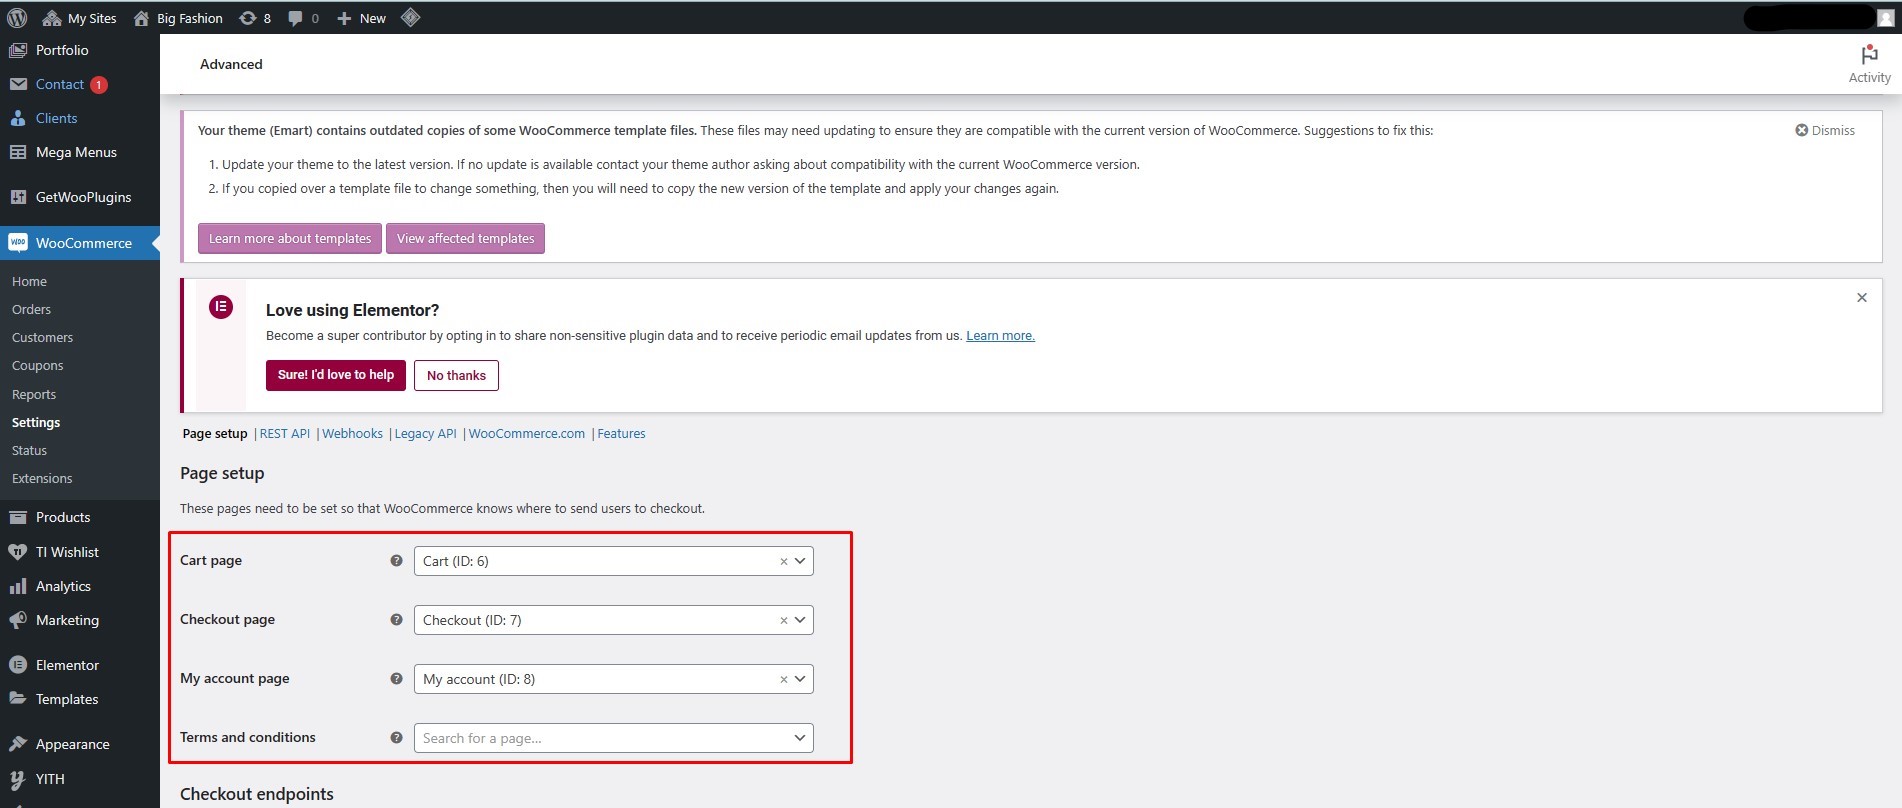
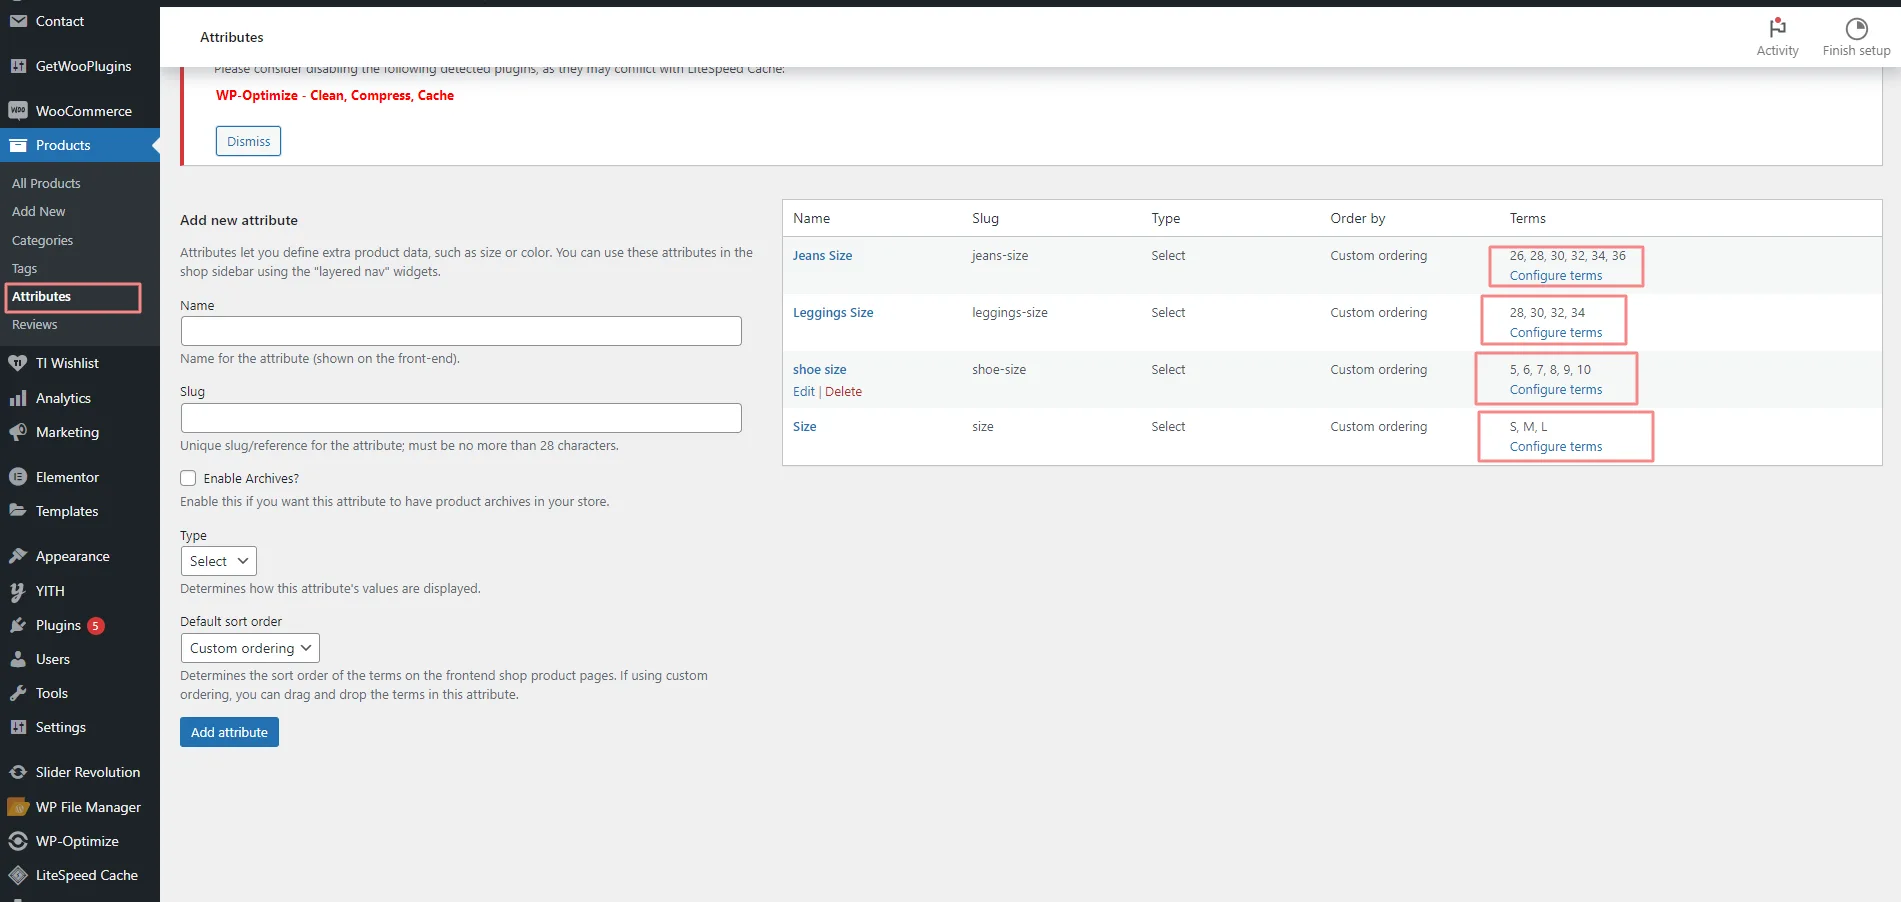
You need to assign all shop related pages from ‘WooCommerce > Settings > Advanced’ as per below screenshot:-
Please follow below tutorial to manage specific WooCommerce options:-
Managing Products: https://docs.woocommerce.com/document/managing-products/
Managing Orders: https://docs.woocommerce.com/document/managing-orders/
Managing Email Templates: https://woocommerce.com/posts/how-to-customize-emails-in-woocommerce/
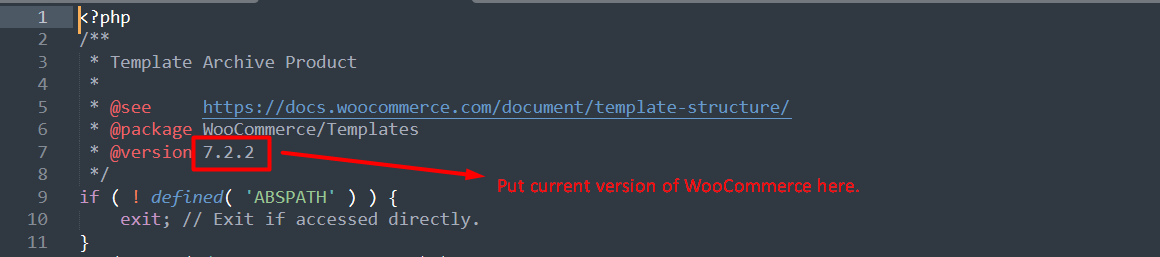
WooCommerce keeps showing this warning with every update of WooCommerce. It's nothing but a nagging warning which has nothing to do with theme or it's functionality.
If you're getting notice of outdated WooCommerce template, then you just need to update the WooCommerce version by editing files of WooCommerce from 'wp-content/themes/theme-name/woocommerce' (Edit those files of WooCommerce only in where version is mention). For example, you can update the version of 'wp-content/themes/theme-name/woocommerce/archive-product.php' as per below screenshot:-
Step : 1
Step : 2
You have successfully created a variation of the Net Weight attribute. You can now add more variation to it
Step 3: Setting the quantity for a specific product
Step : 4
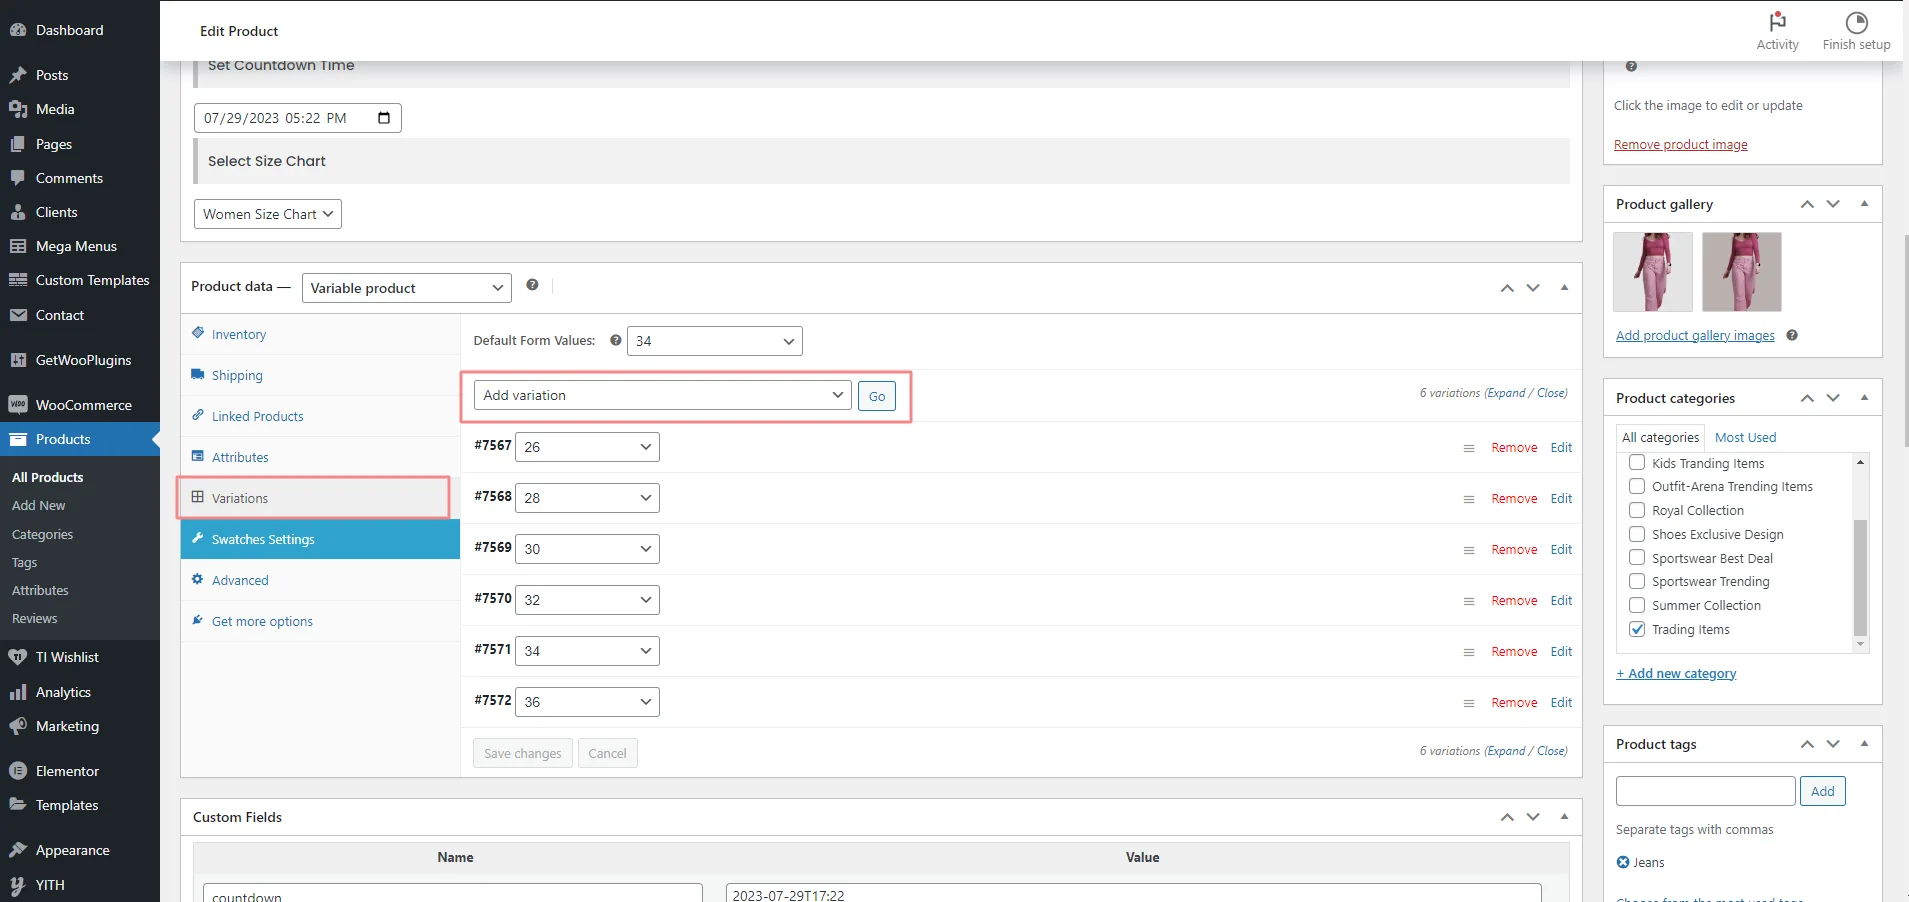
Step : 5
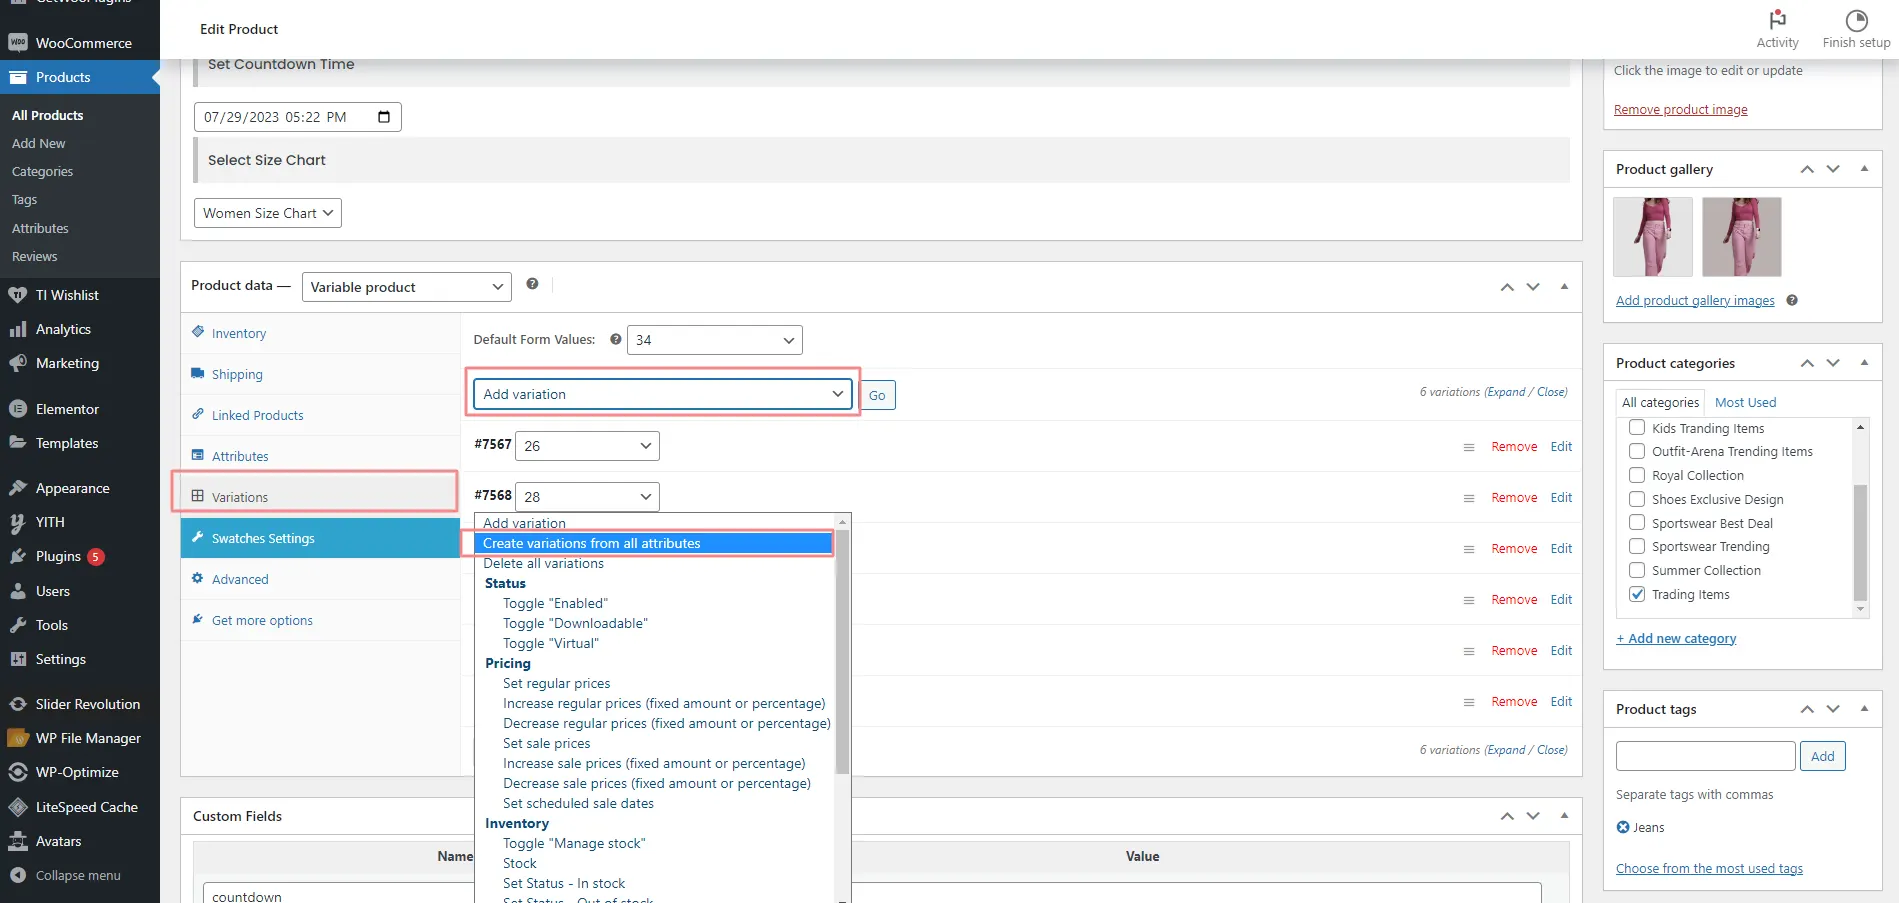
Now you can edit or remove any quantiy as per your choice.
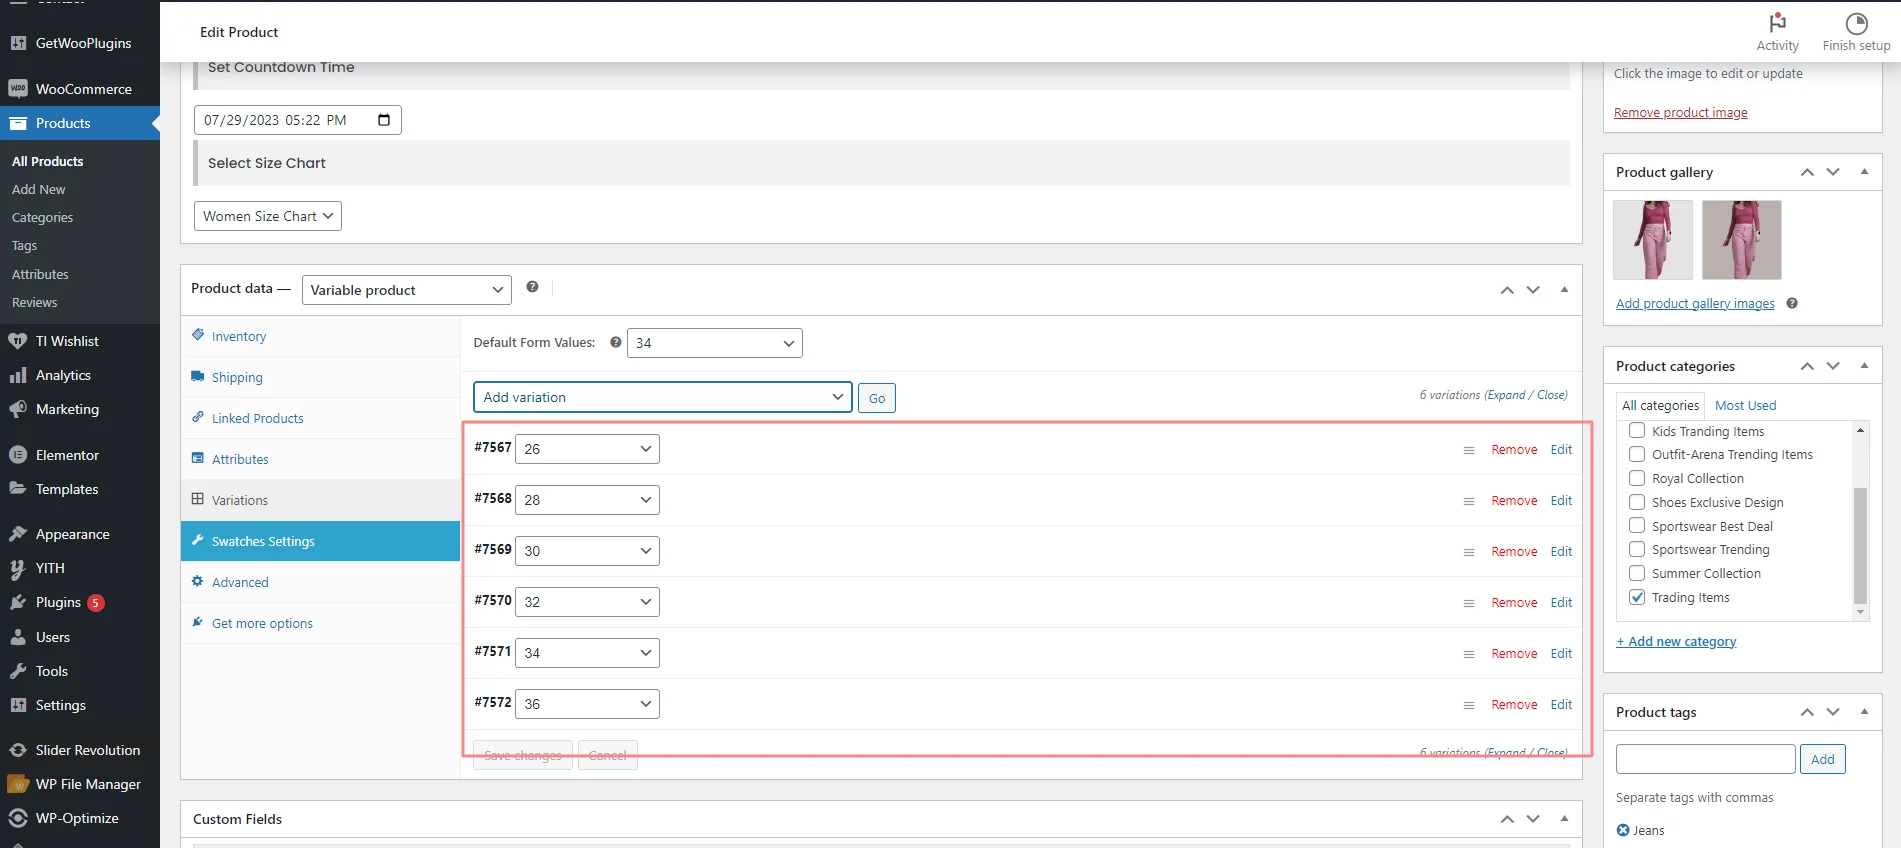
You have successfully set the variation for a specific product.
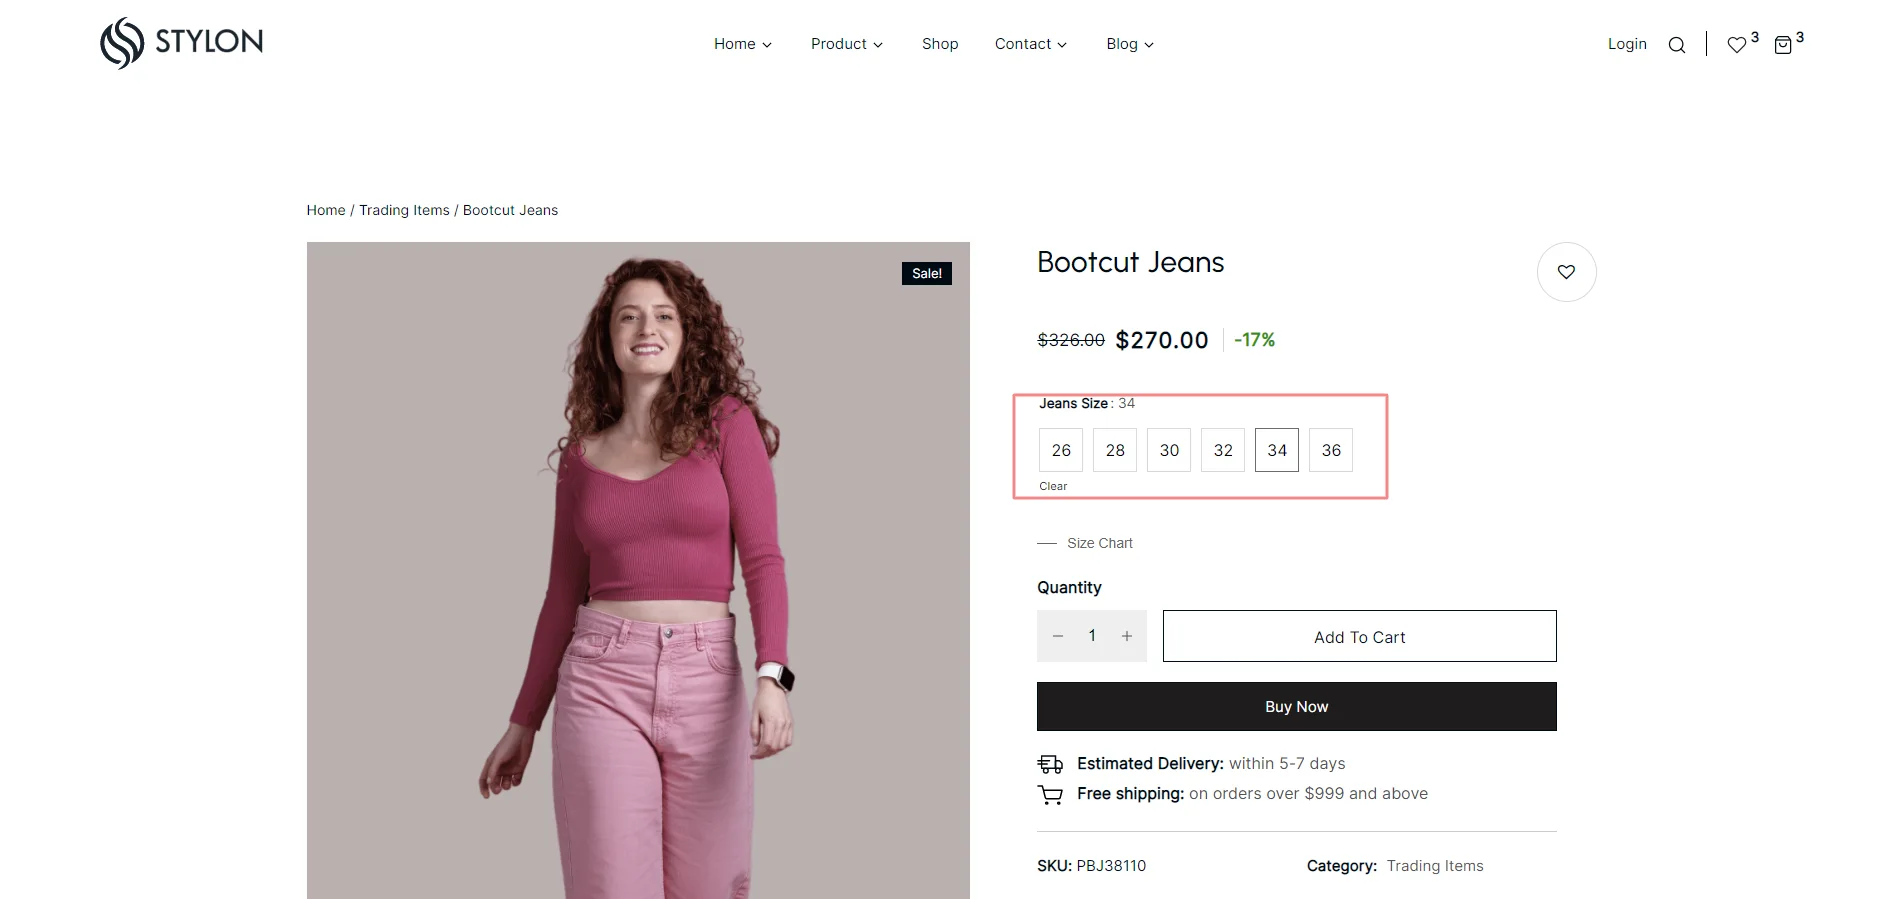
Please go through the points given below on how to set the product price
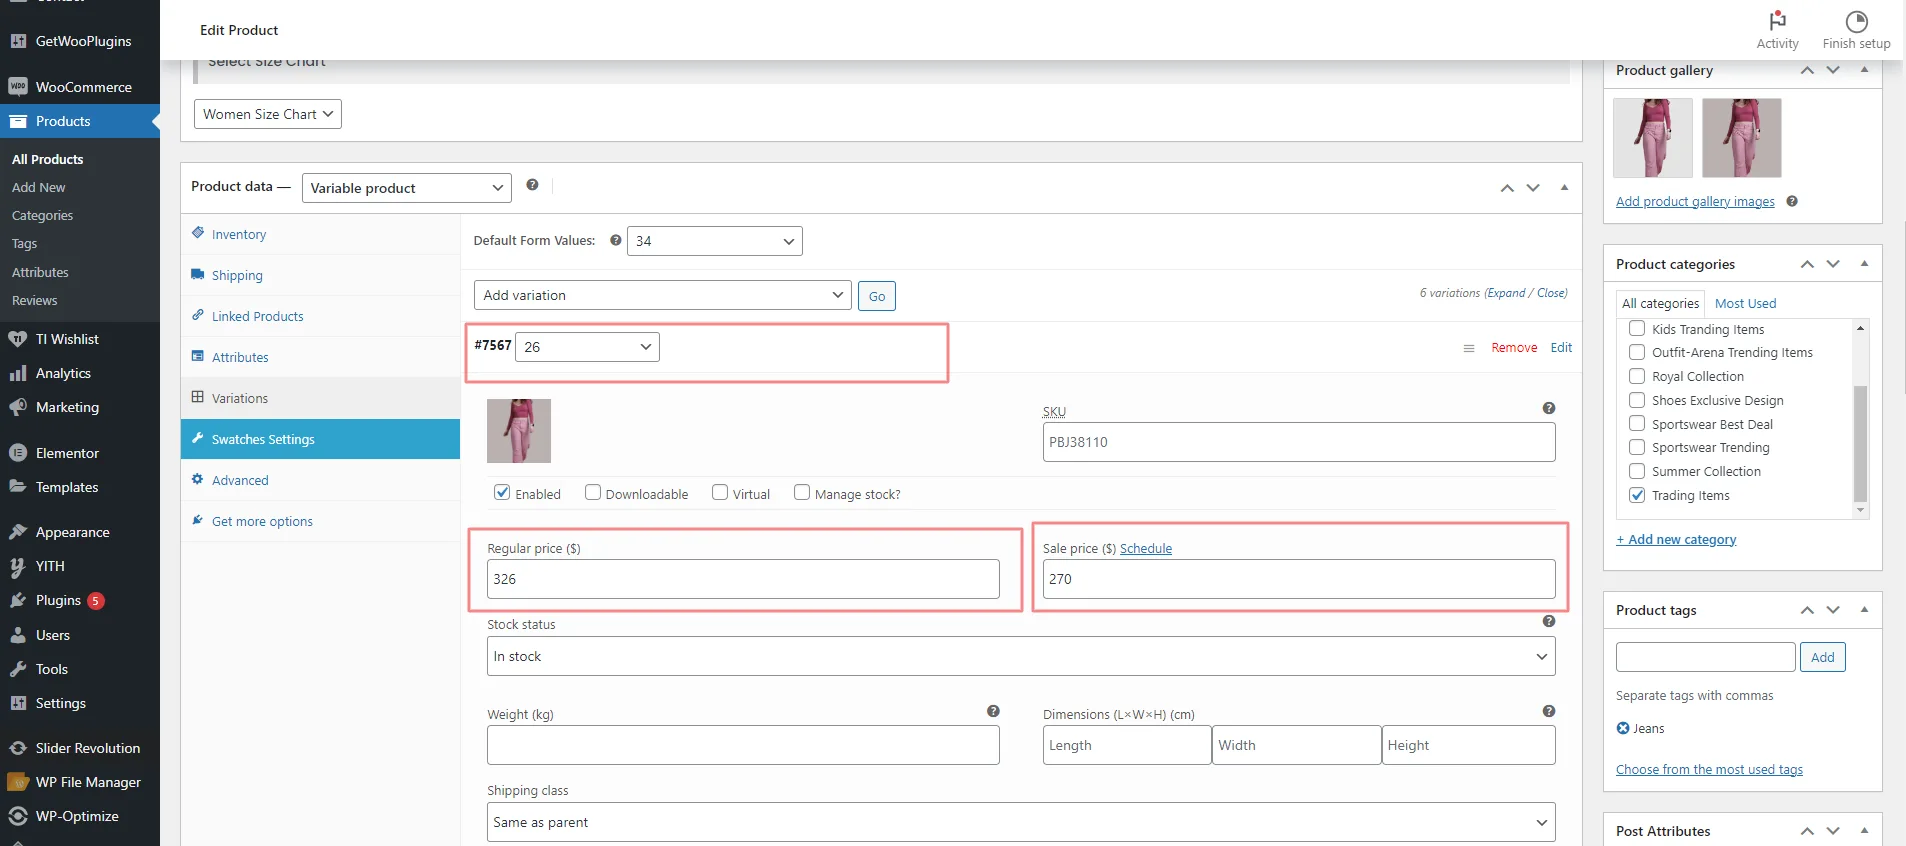
You have now successfully set the product price
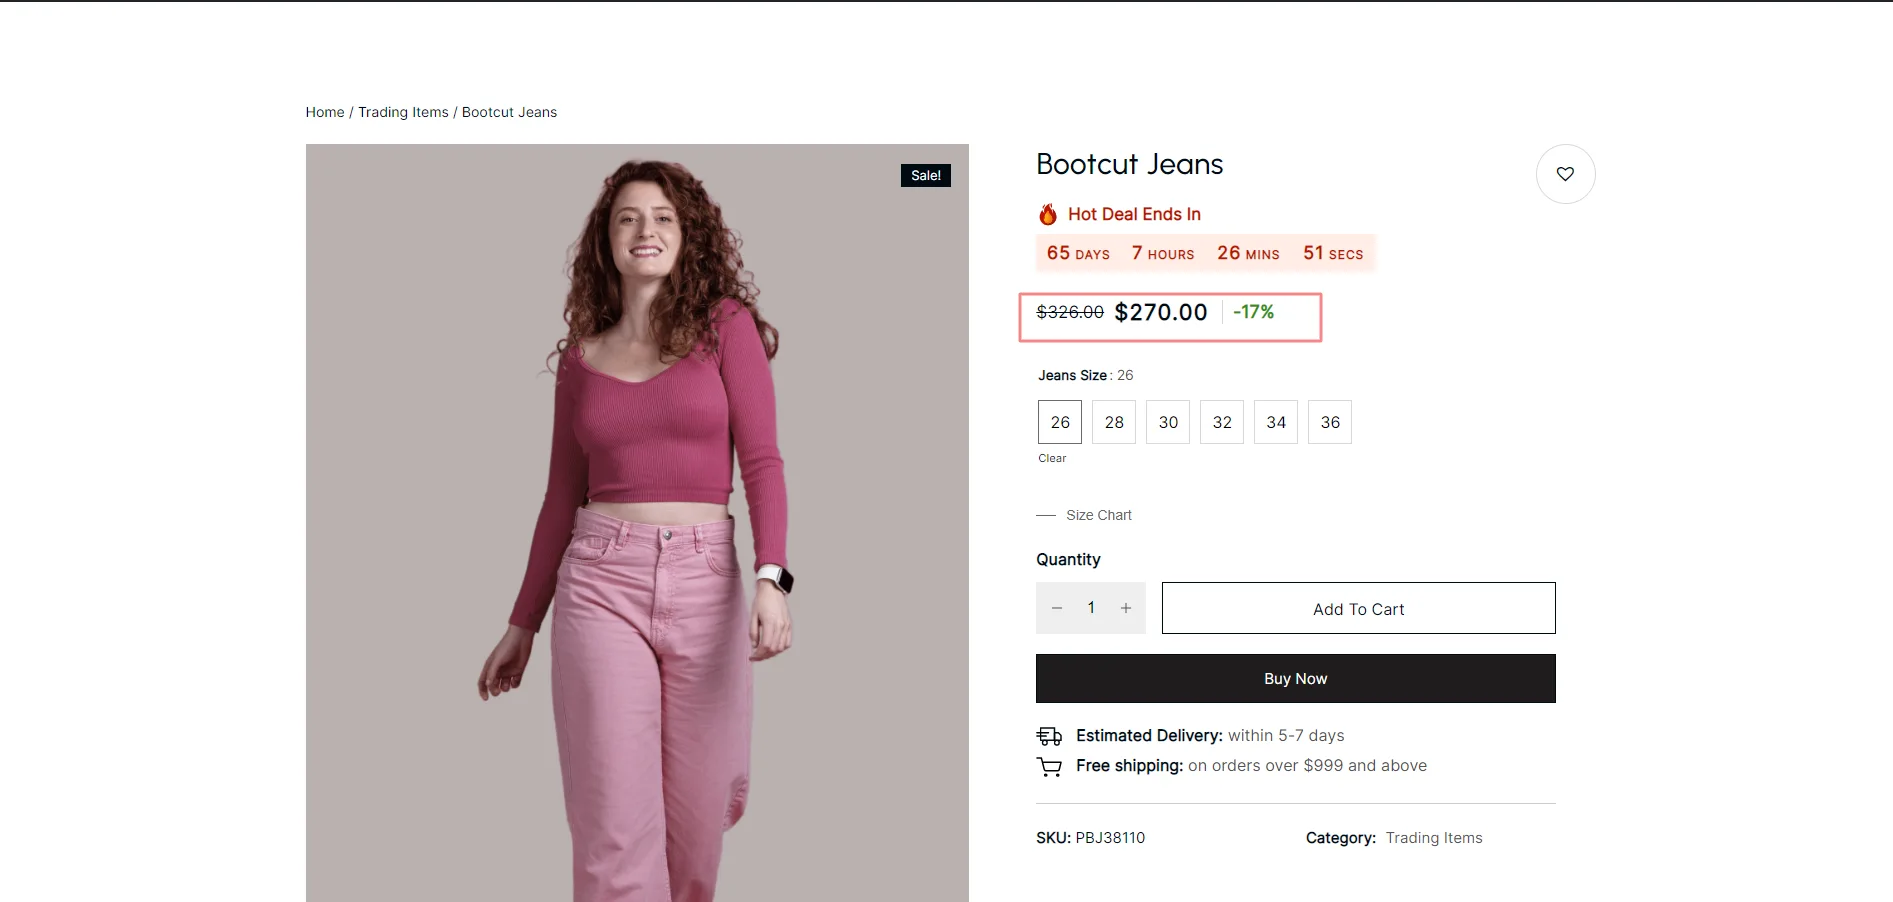
If you dont wish to display the countdown timer on the product page then please set the timer date to a previous day date from your current date.
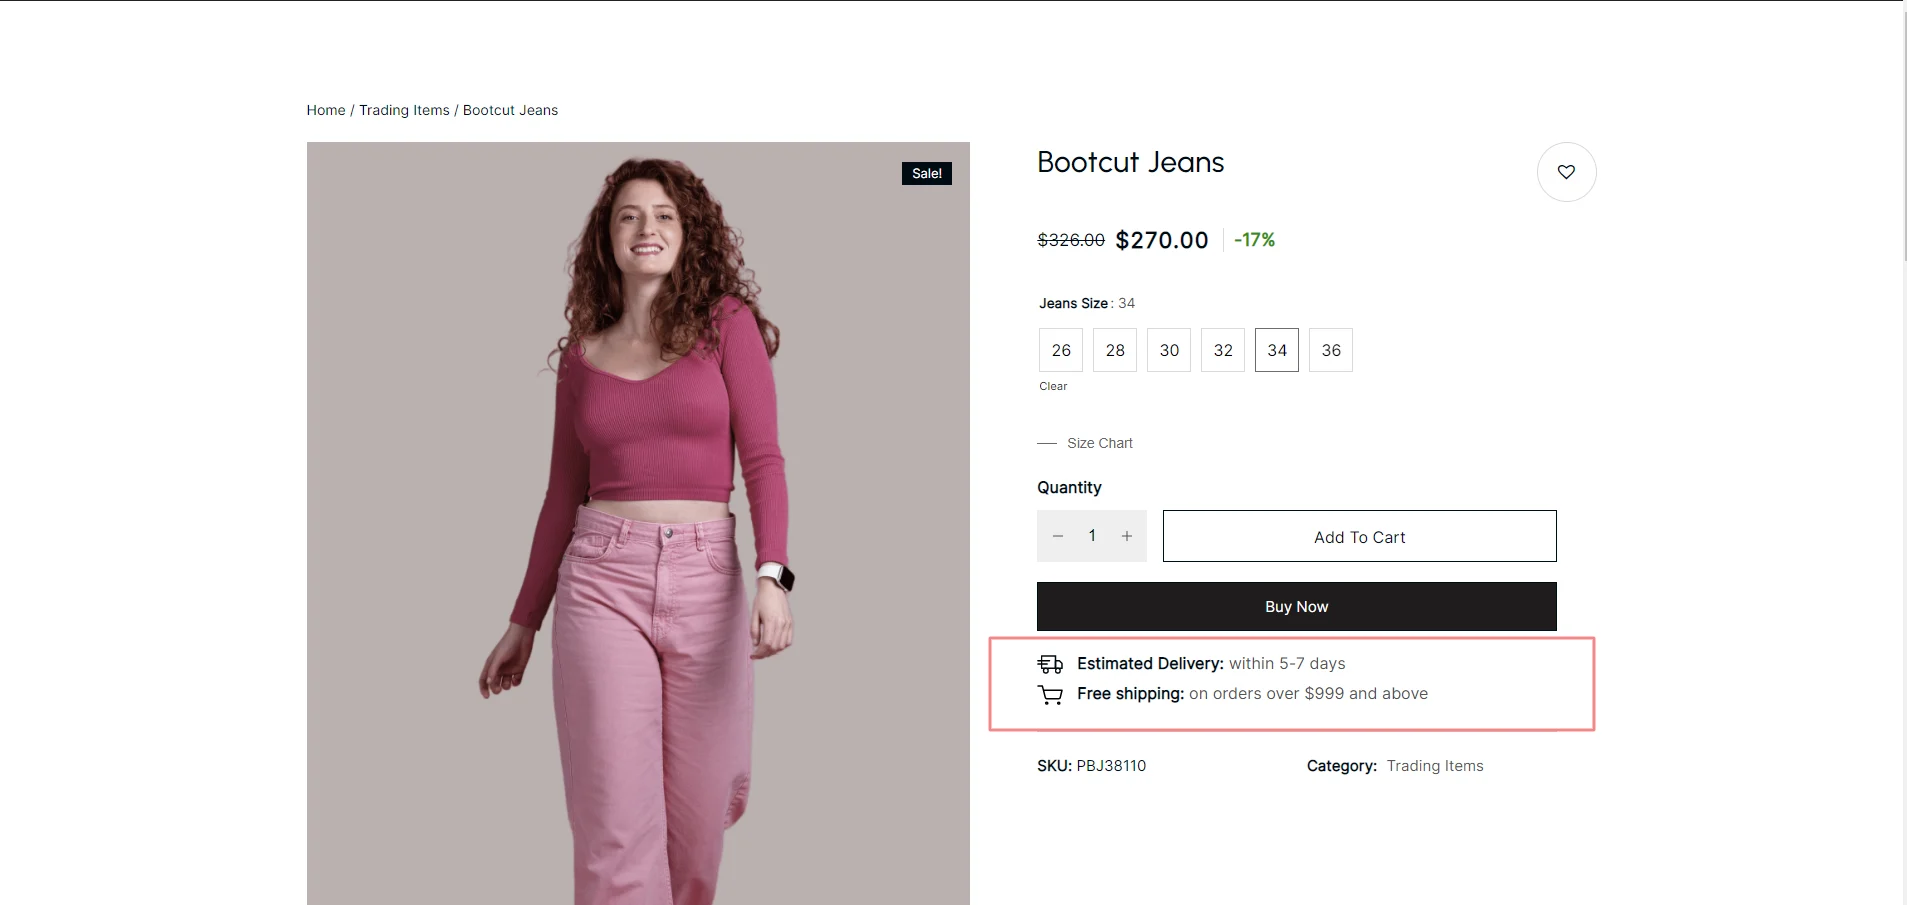
Please go through the points given below on how to set the product price

You have now successfully set the product shipping details
Step : 1
Step : 2
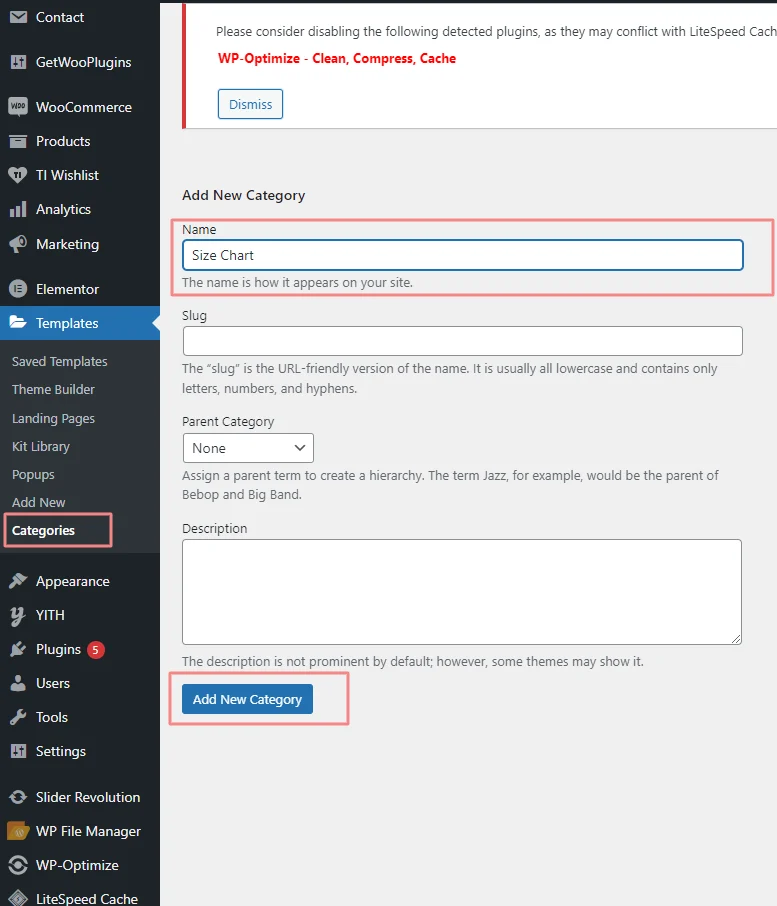
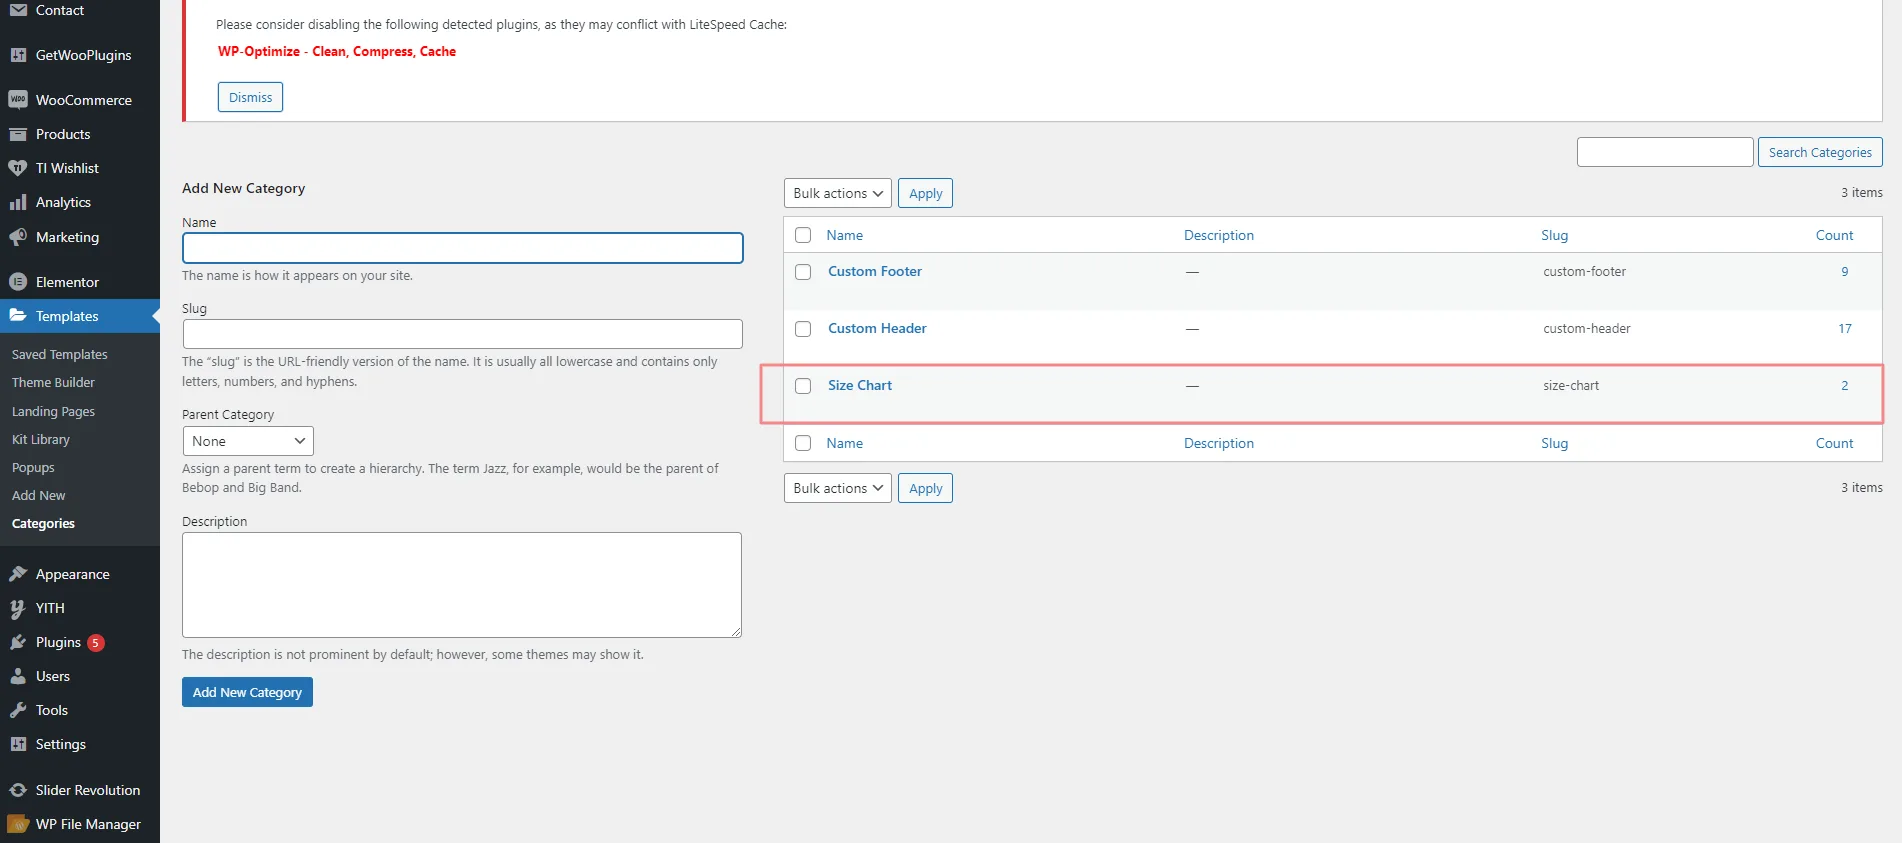
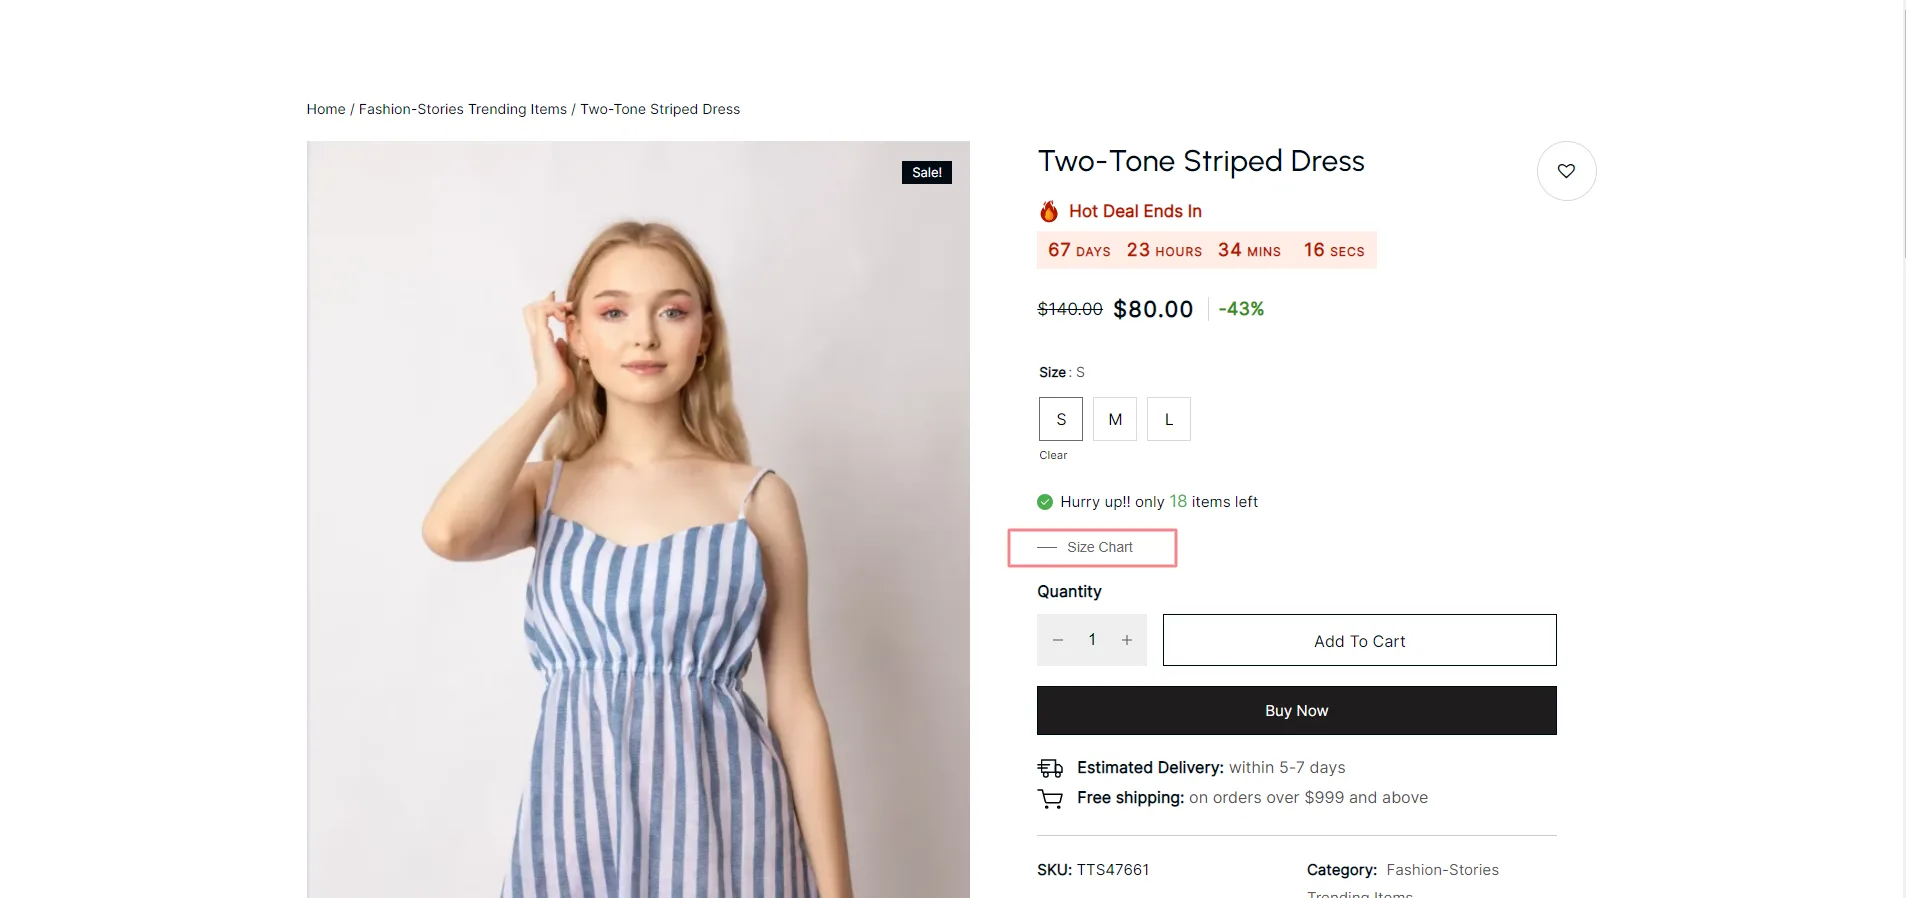
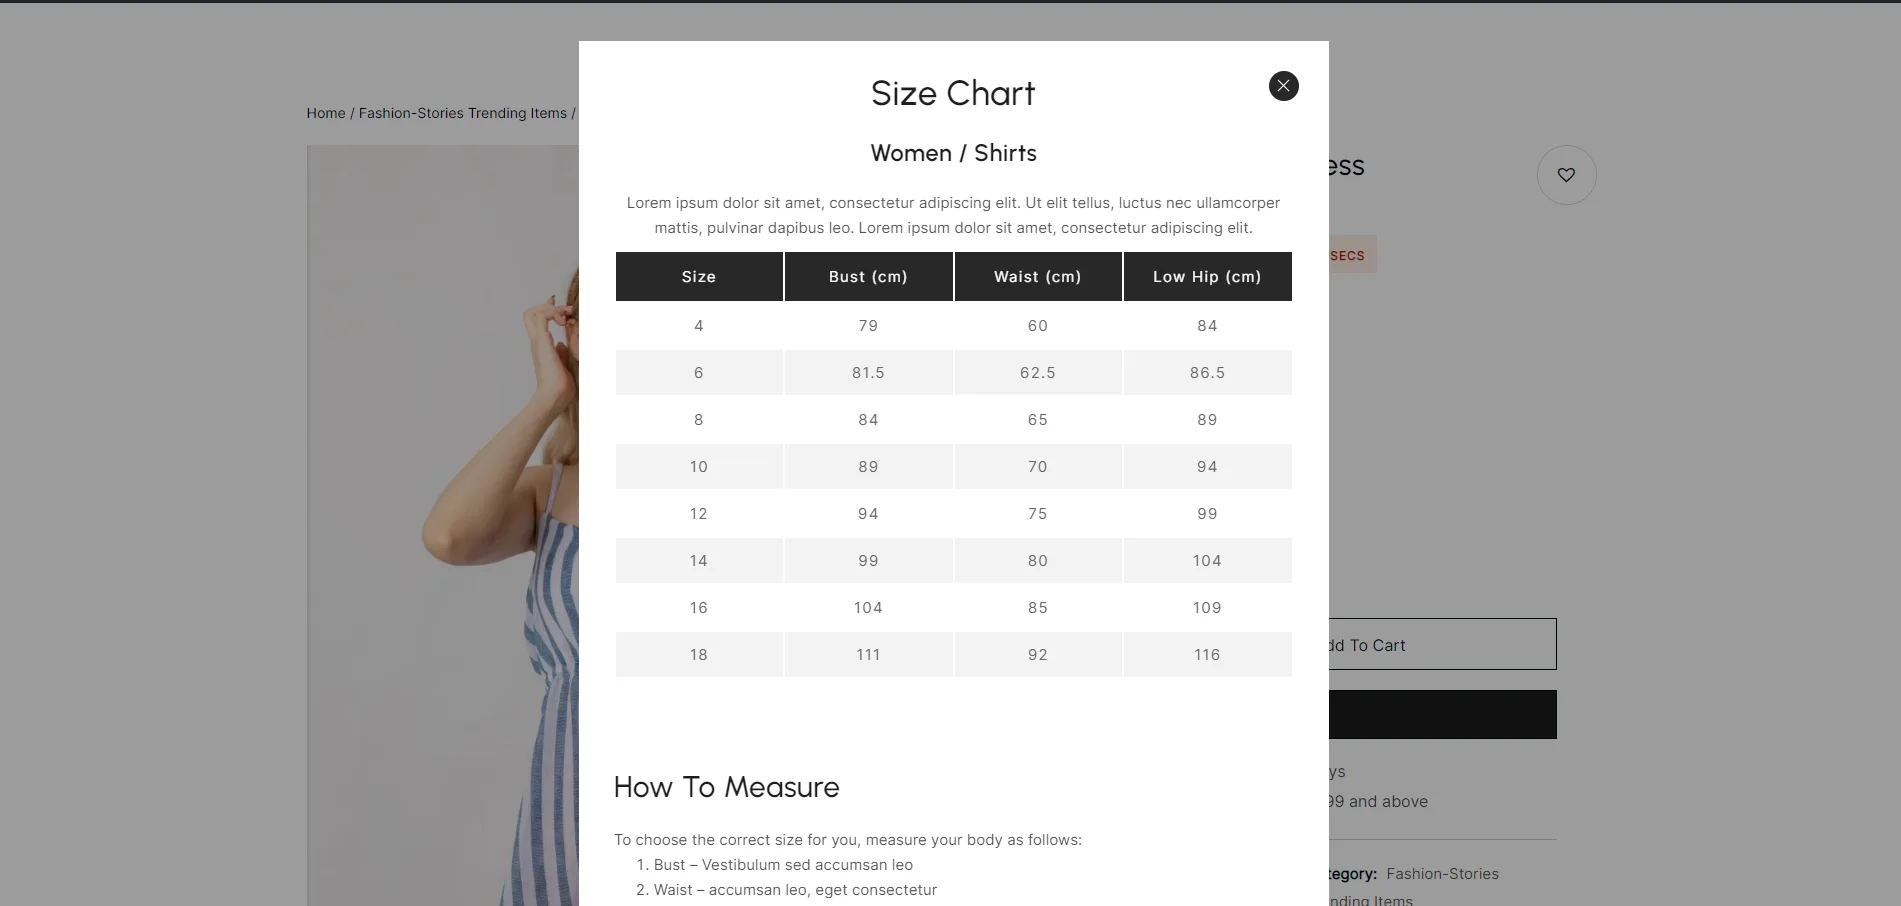
After adding template got to quick edit and select price chart . Then create size chart > edit with Elementor

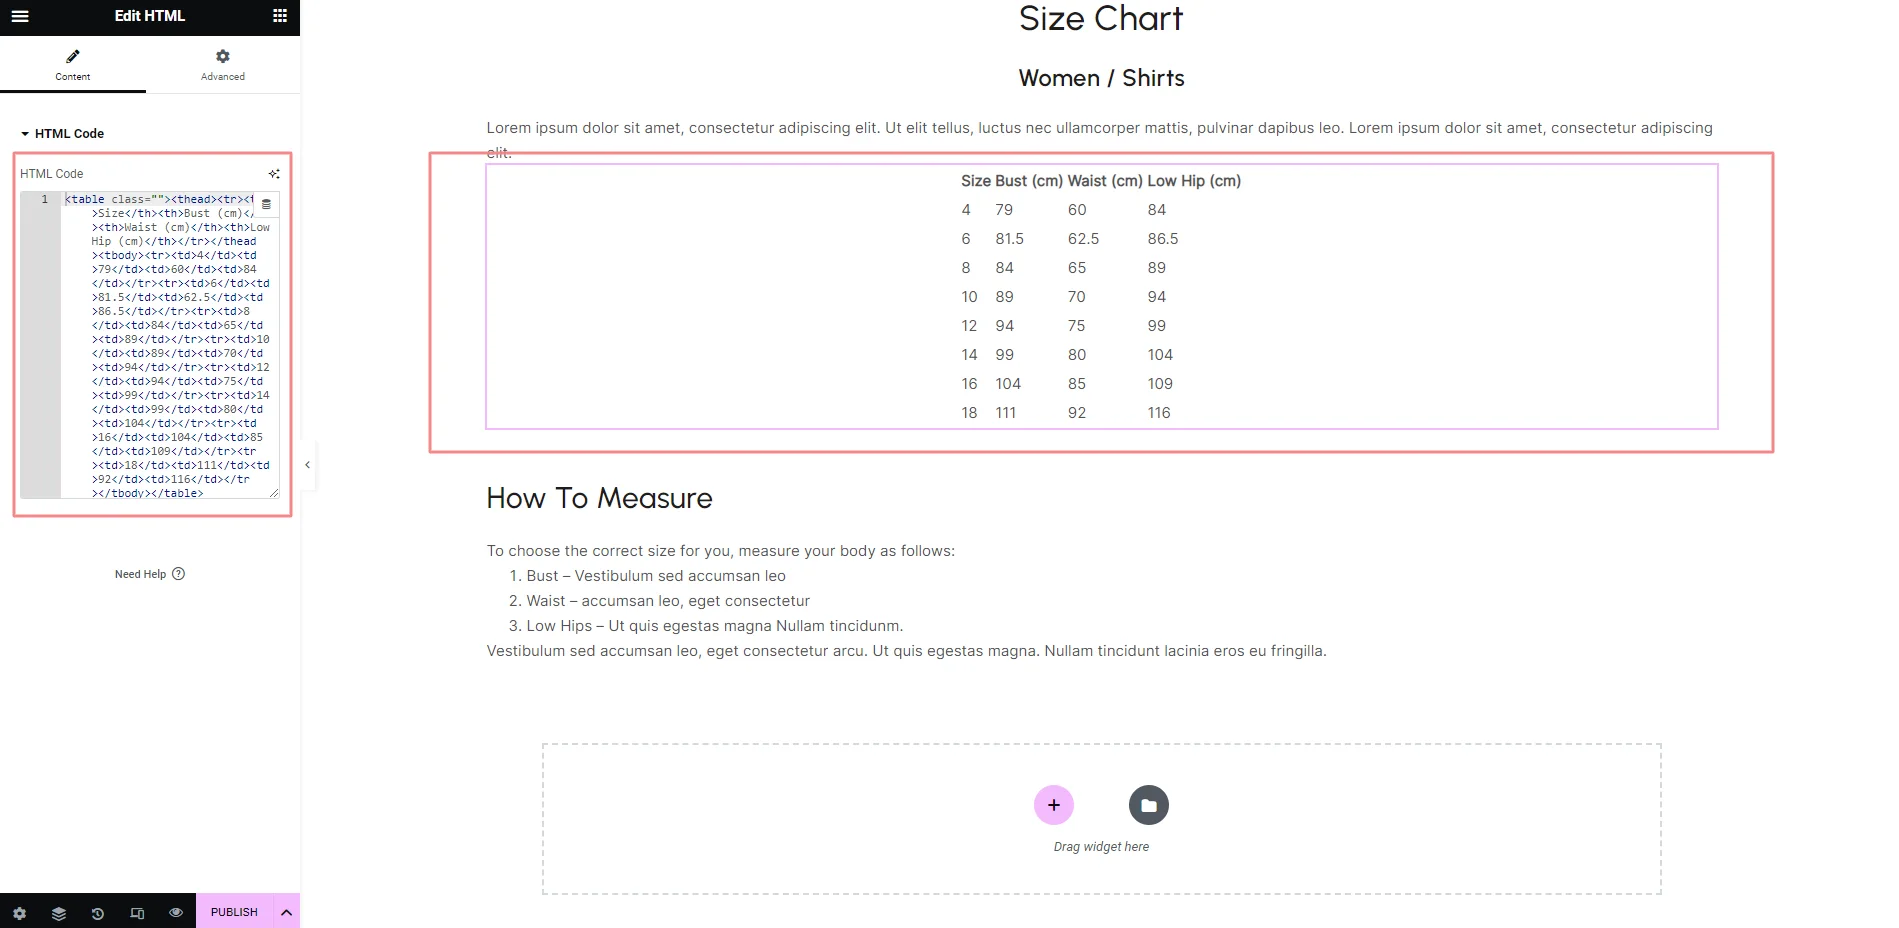
Select size chart in product editing page
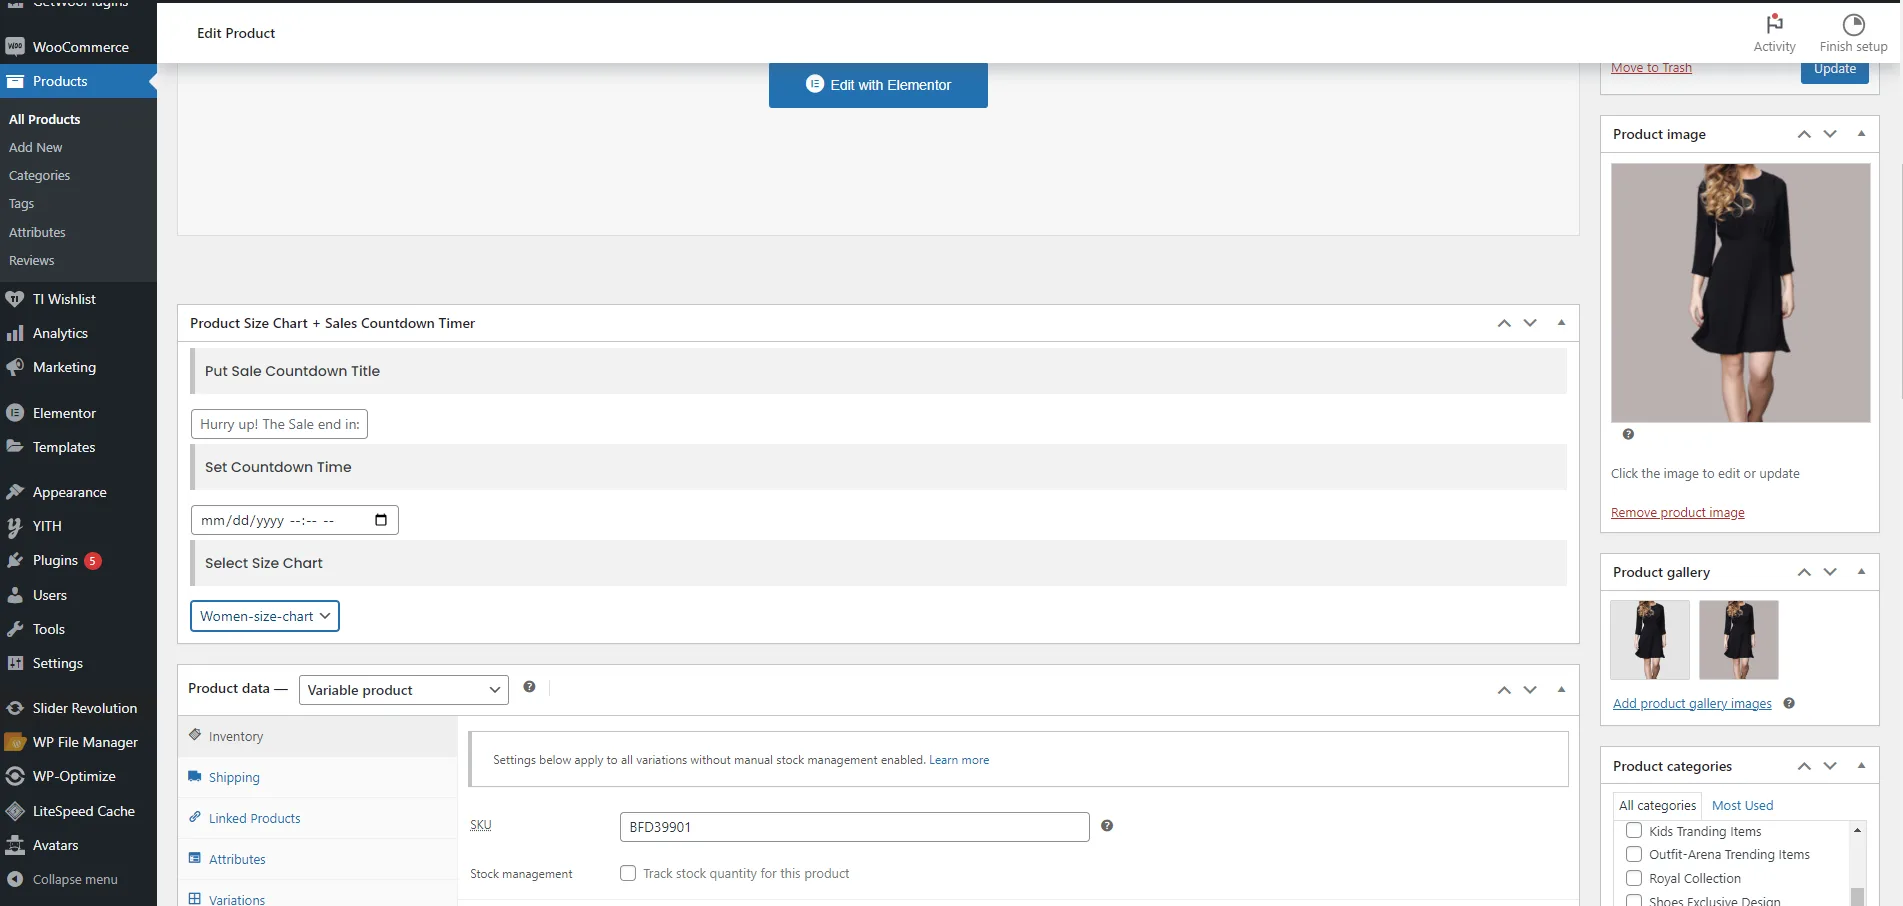
You have successfully created the product size chart.
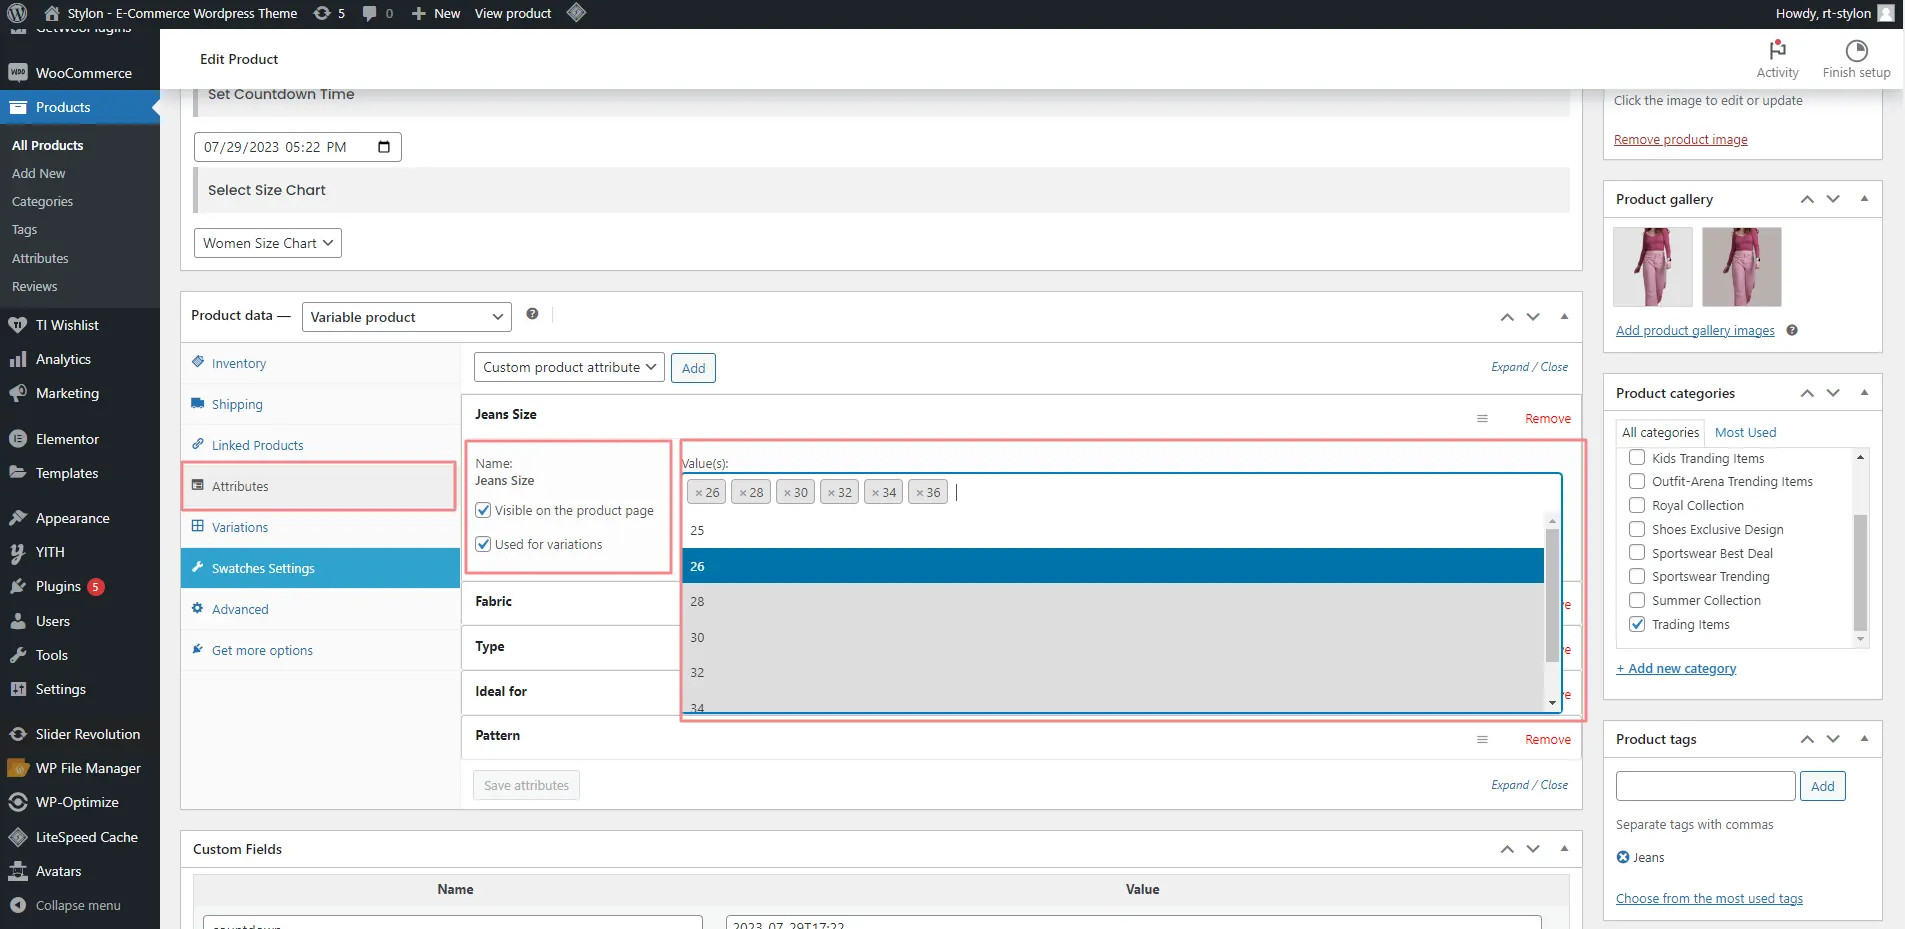
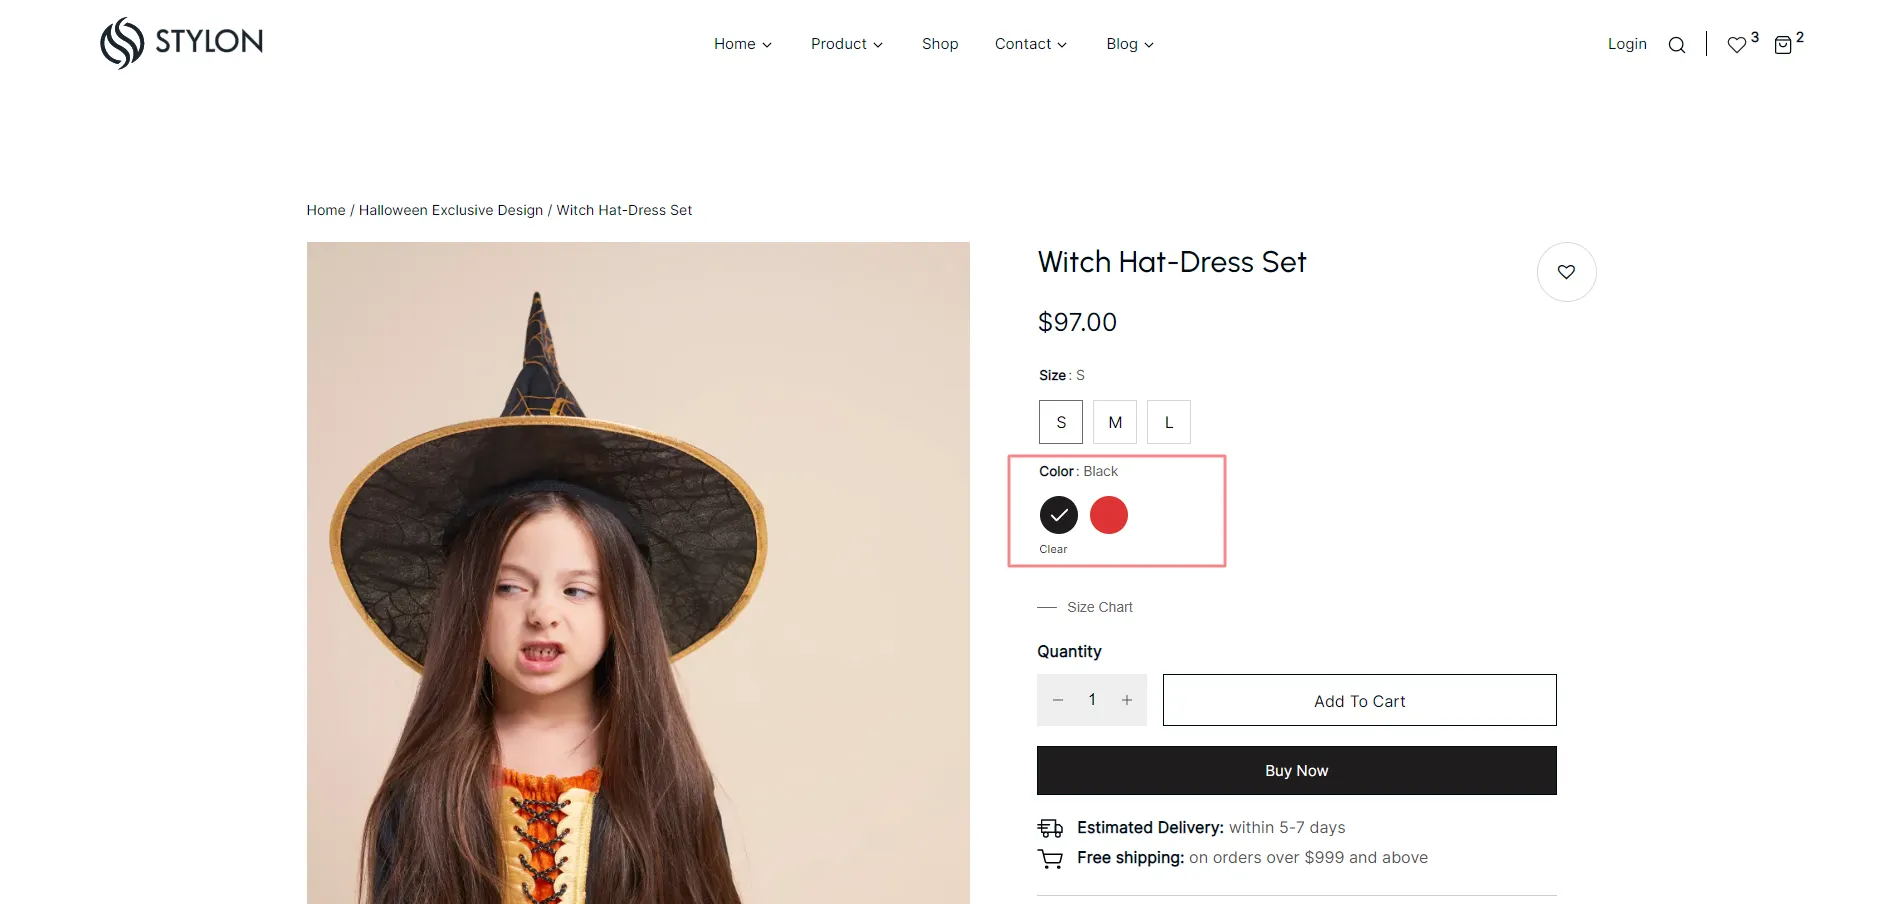
Step : 1
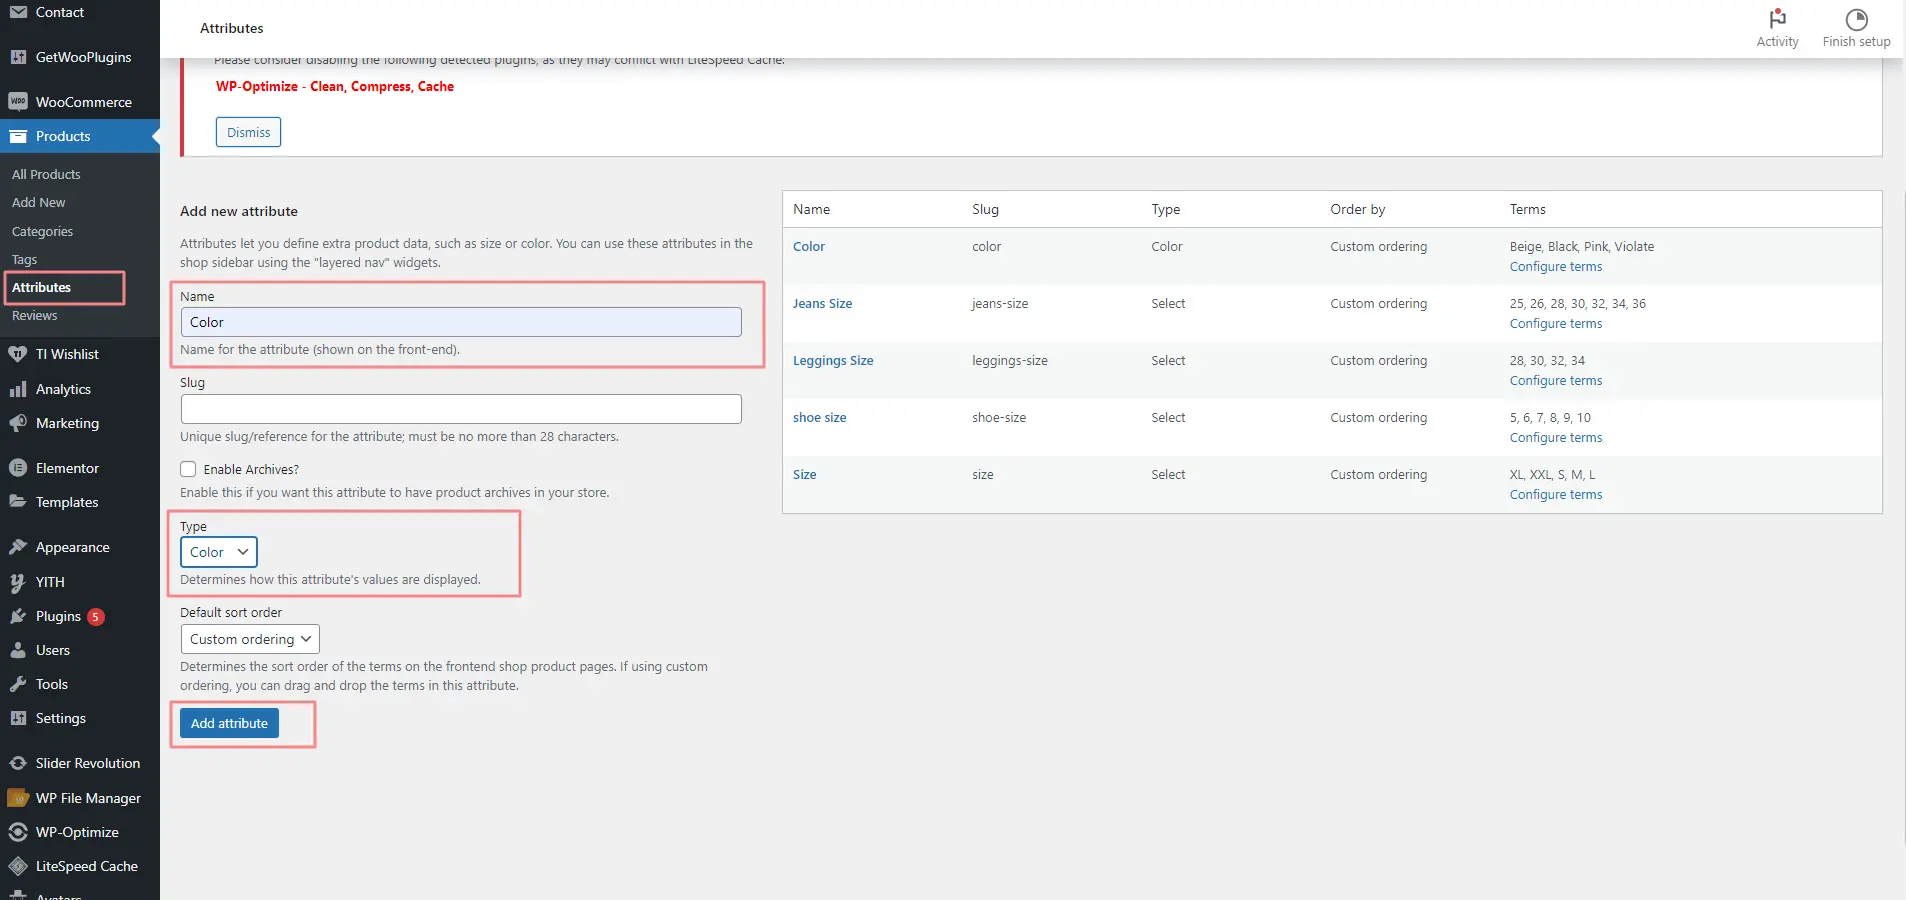
Step : 2
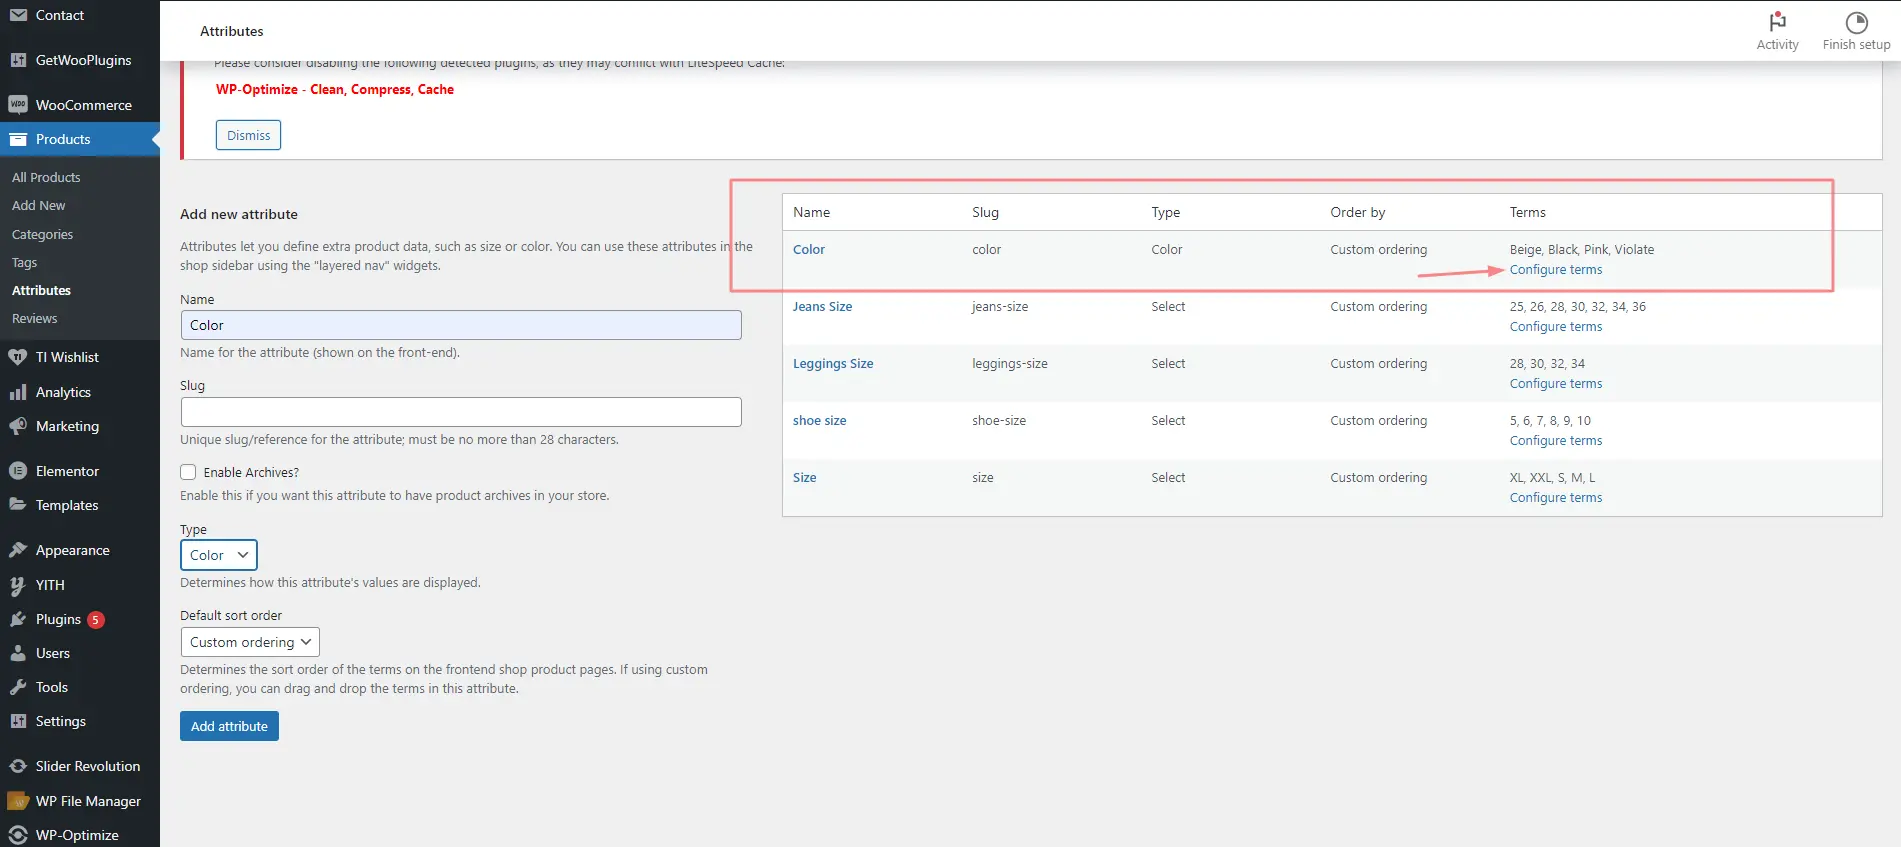
Step : 3
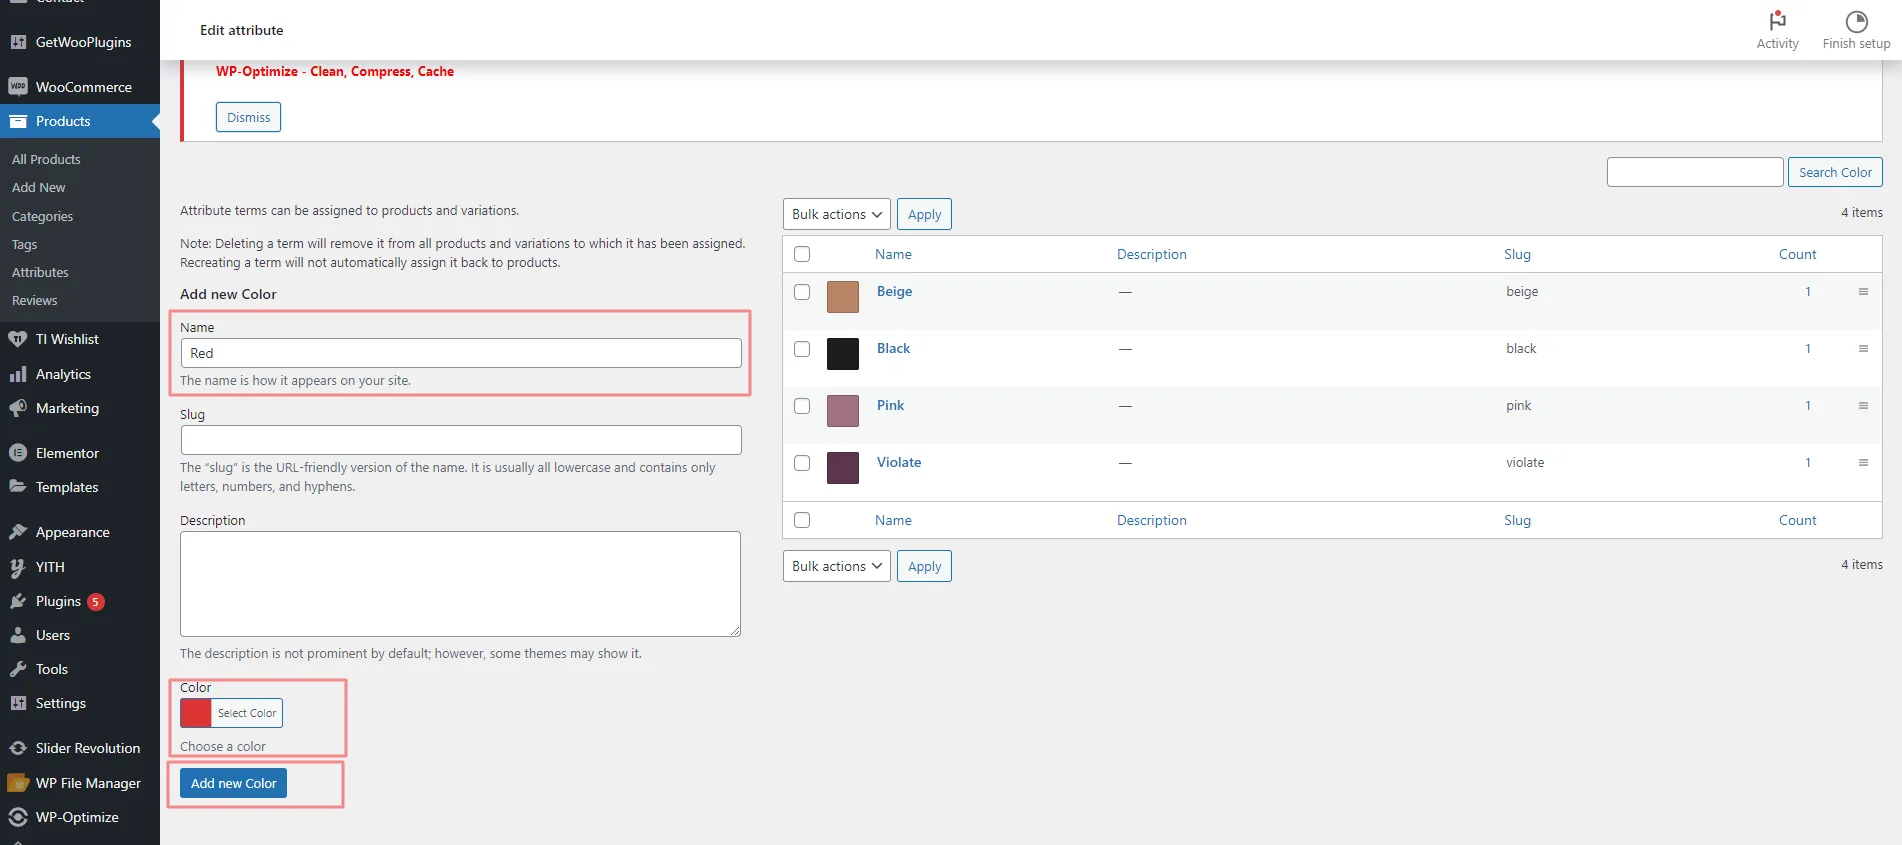
You have successfully created a variation of the Color attribute. You can now add more variation to it

Step : 4
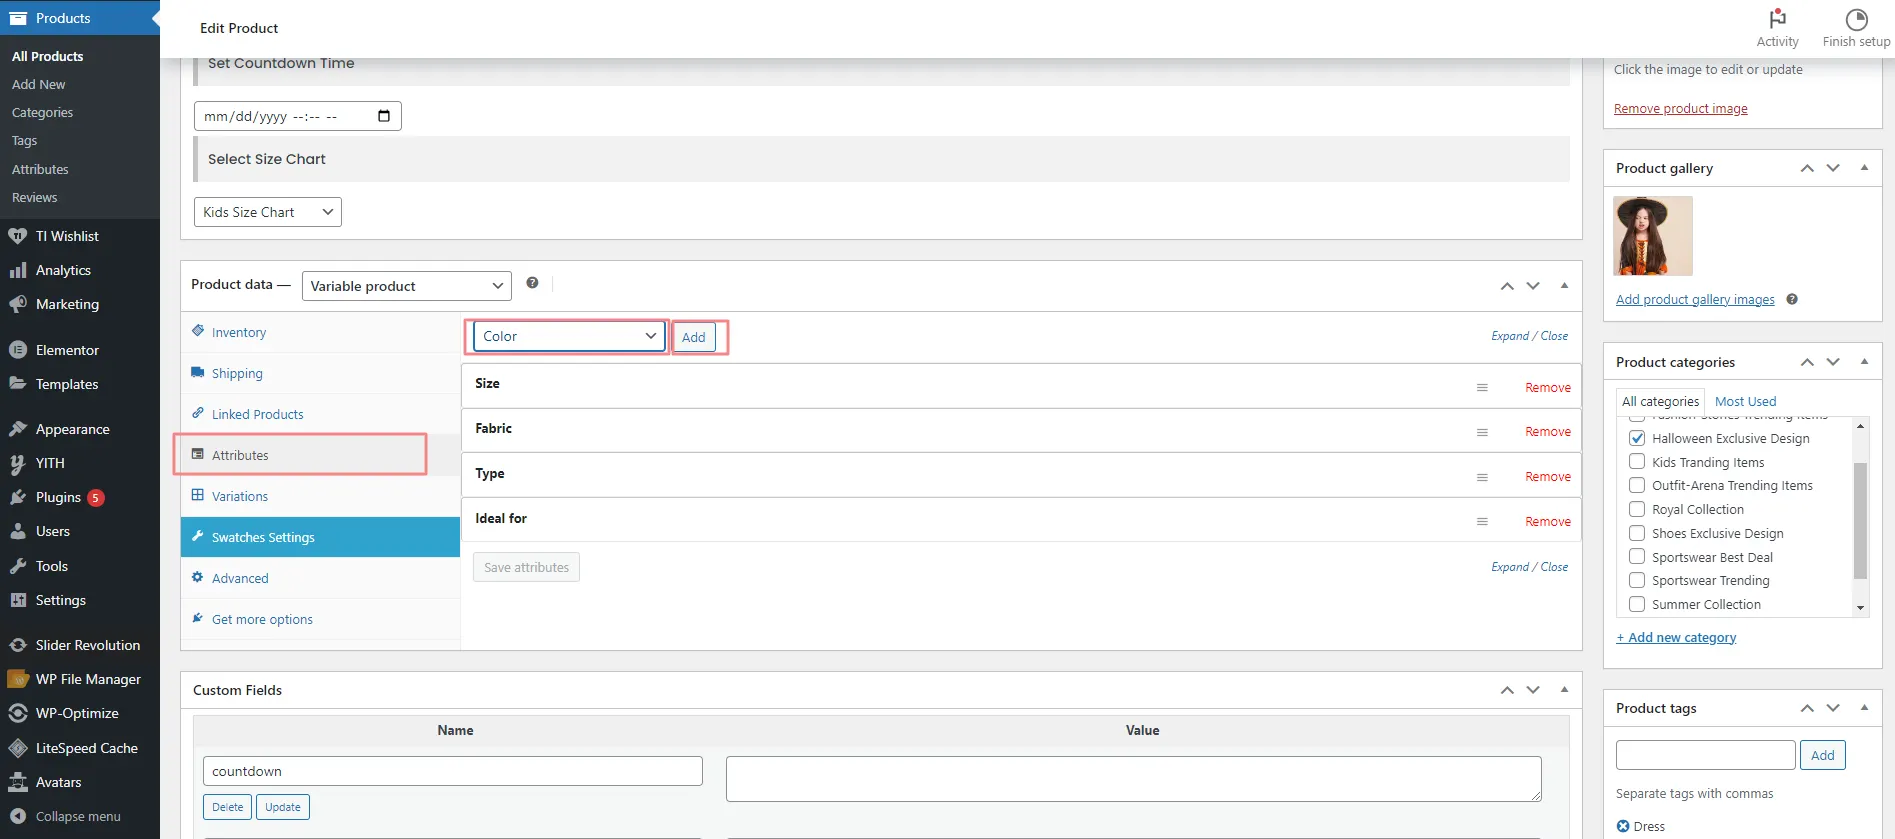
Step : 5
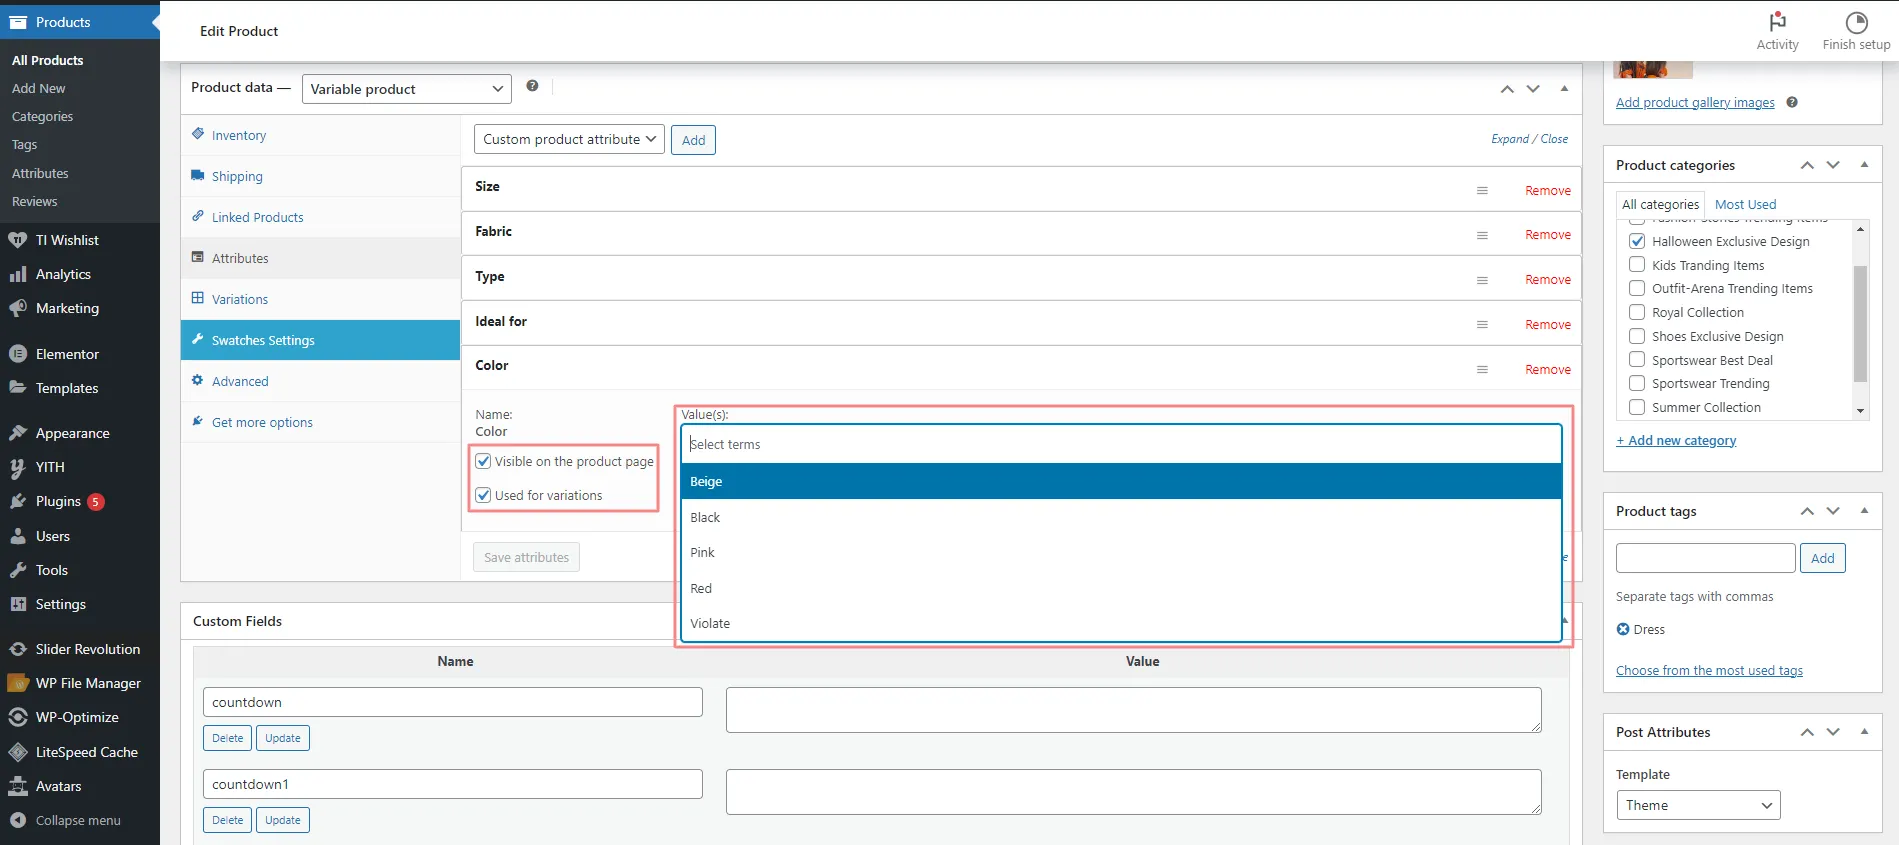
Step : 6

Step : 7
All the created colors is now added, Now you can edit or Remove the colour as per your choice
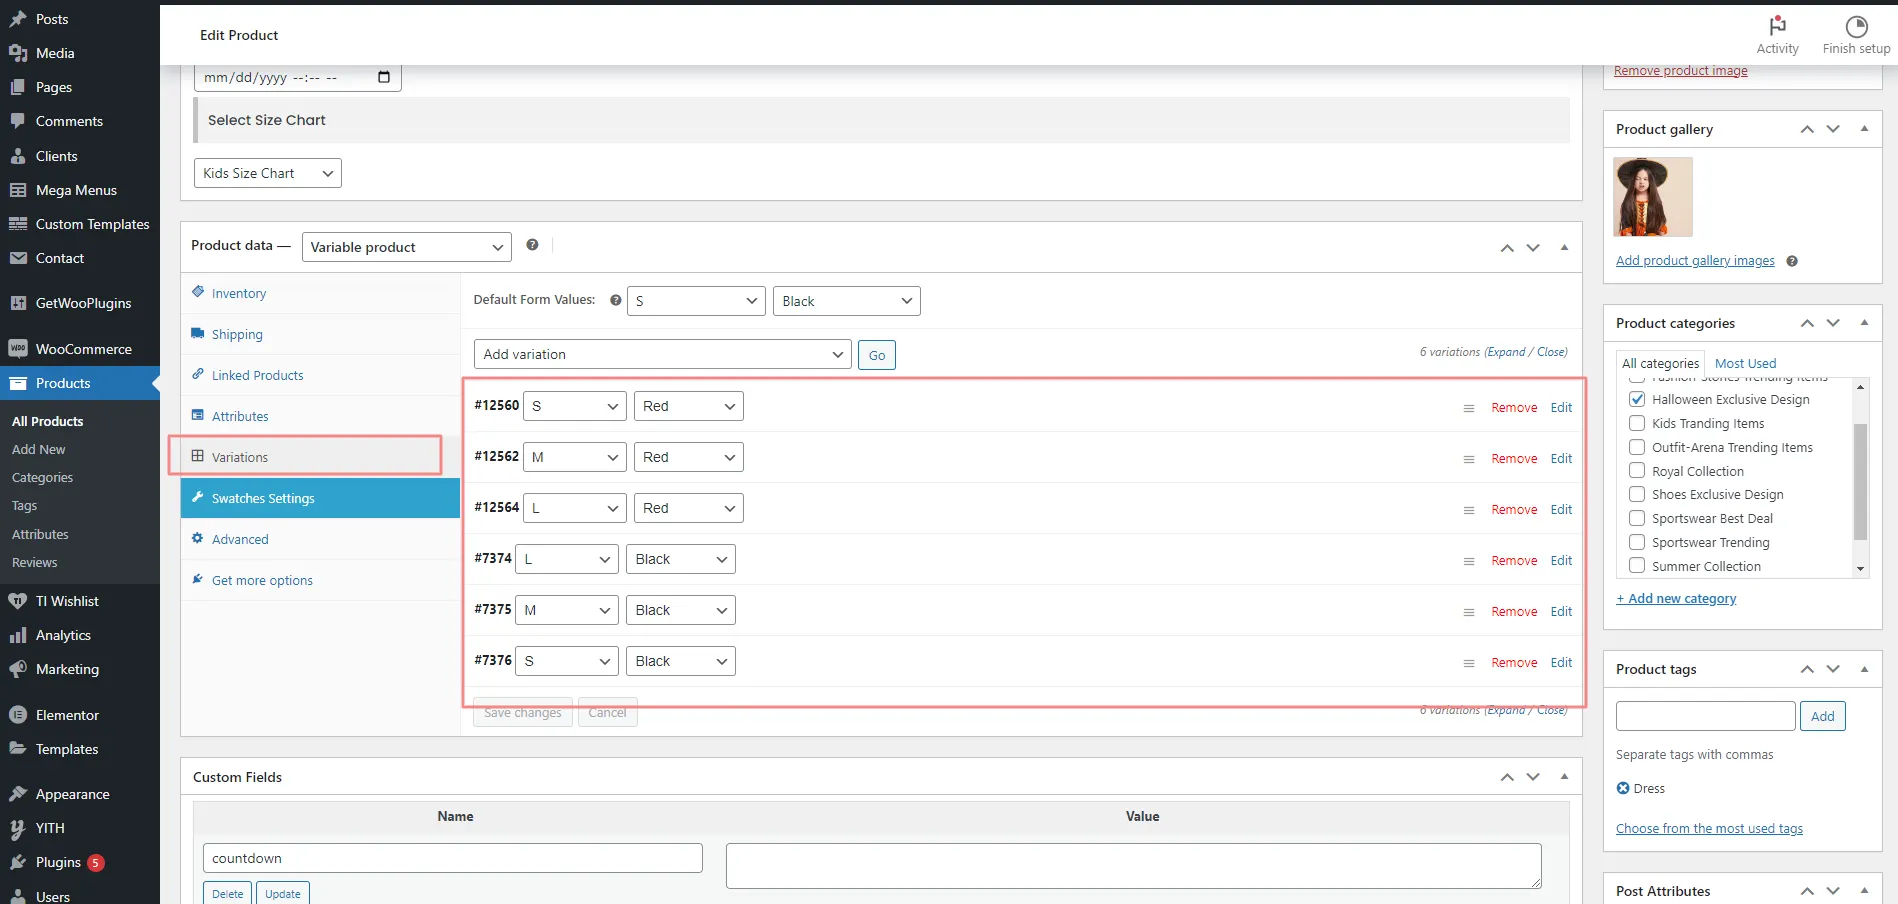
You have successfully added the colors at your product page.
If you wish to enable or disable shipping progress-bar from the cart page along with cart side-bar from Figure 1. Then navigate to customizer > shop > Product options in Figure 2. and turn off/ on product shipping toggle as per your requirements .
Figure 1.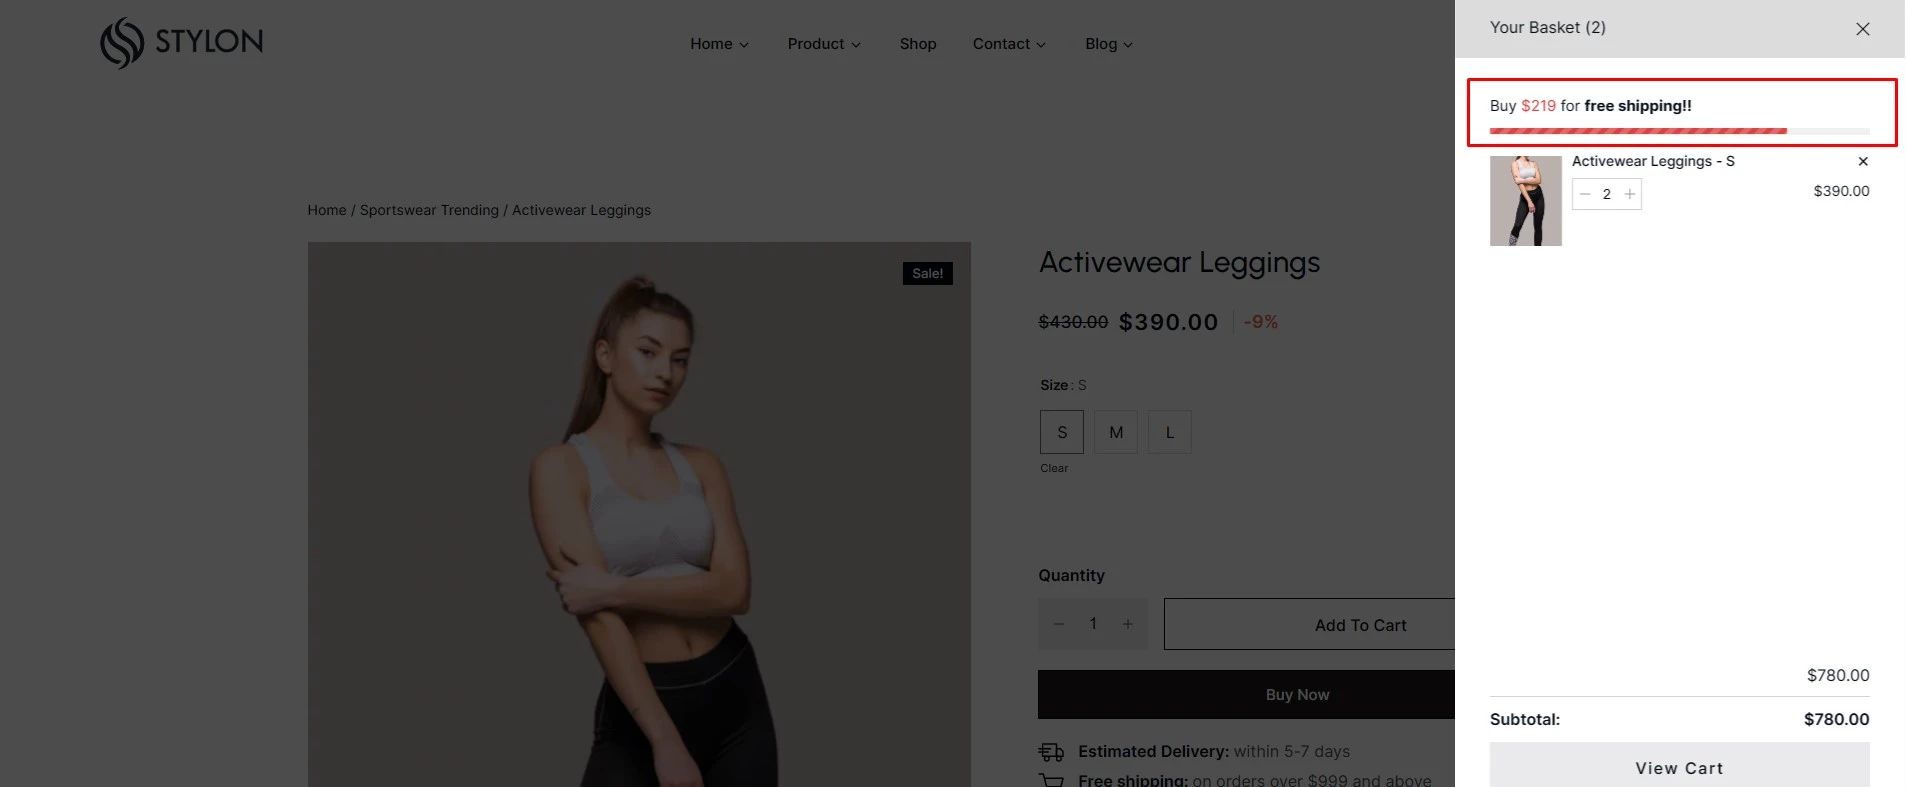
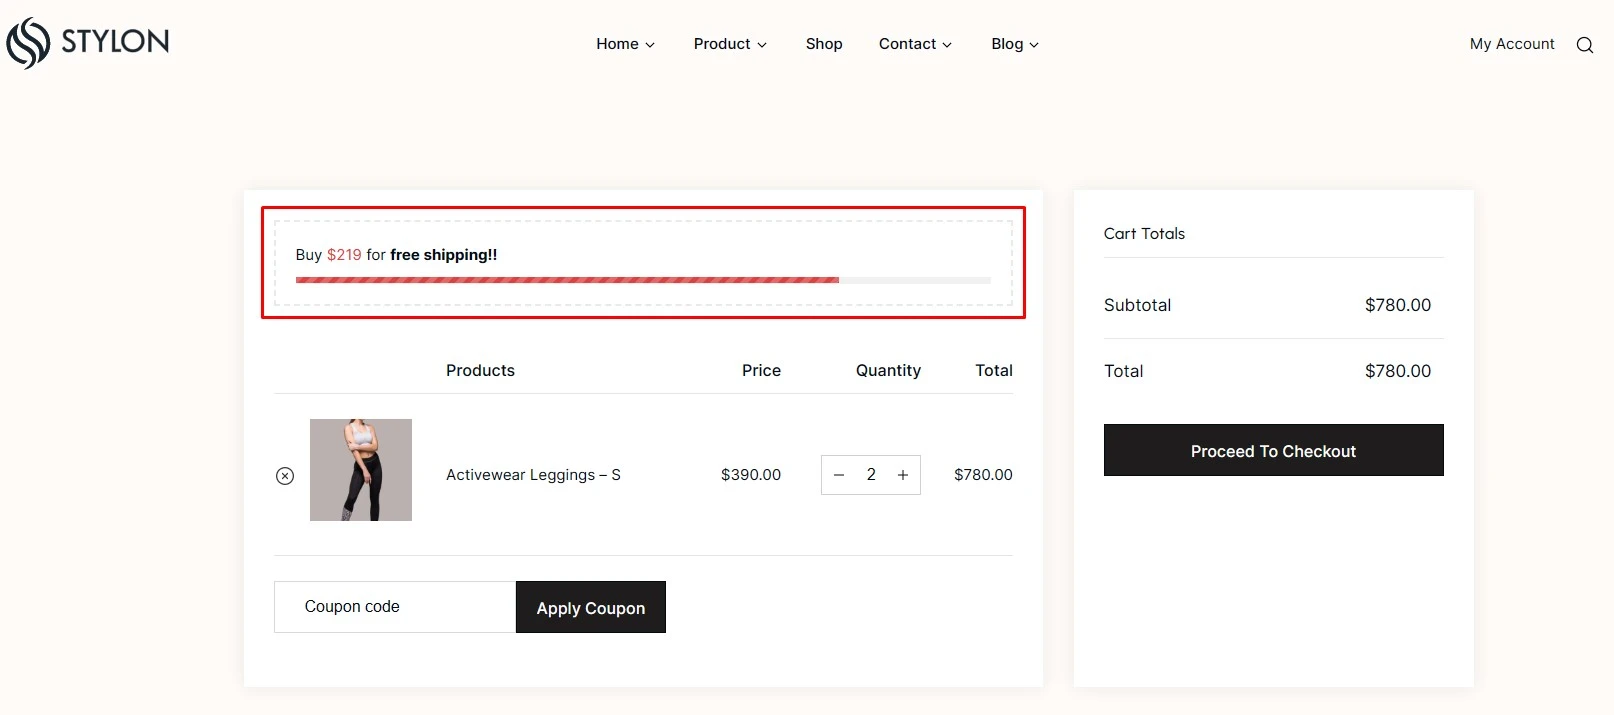
Figure 2.
For individuals who desire translation using files included in the theme, we suggest using the .mo/.po files. These files work in 'buddies' or pairs, so for every language, you must have 2 files with the same name but with a different extension name altogether. For example, if you wish to translate into the French language, your files would be fr_FR.mo and fr_FR.po
To make edits on these files, you have to use Poedit which is an “easy to use” software. You only need to upload our provided .pot file into Poedit, then edit relevant text values, save the file and upload them into the language folder that is included or provided in the theme.
You can use https://wordpress.org/plugins/loco-translate/ plugin for translate too.
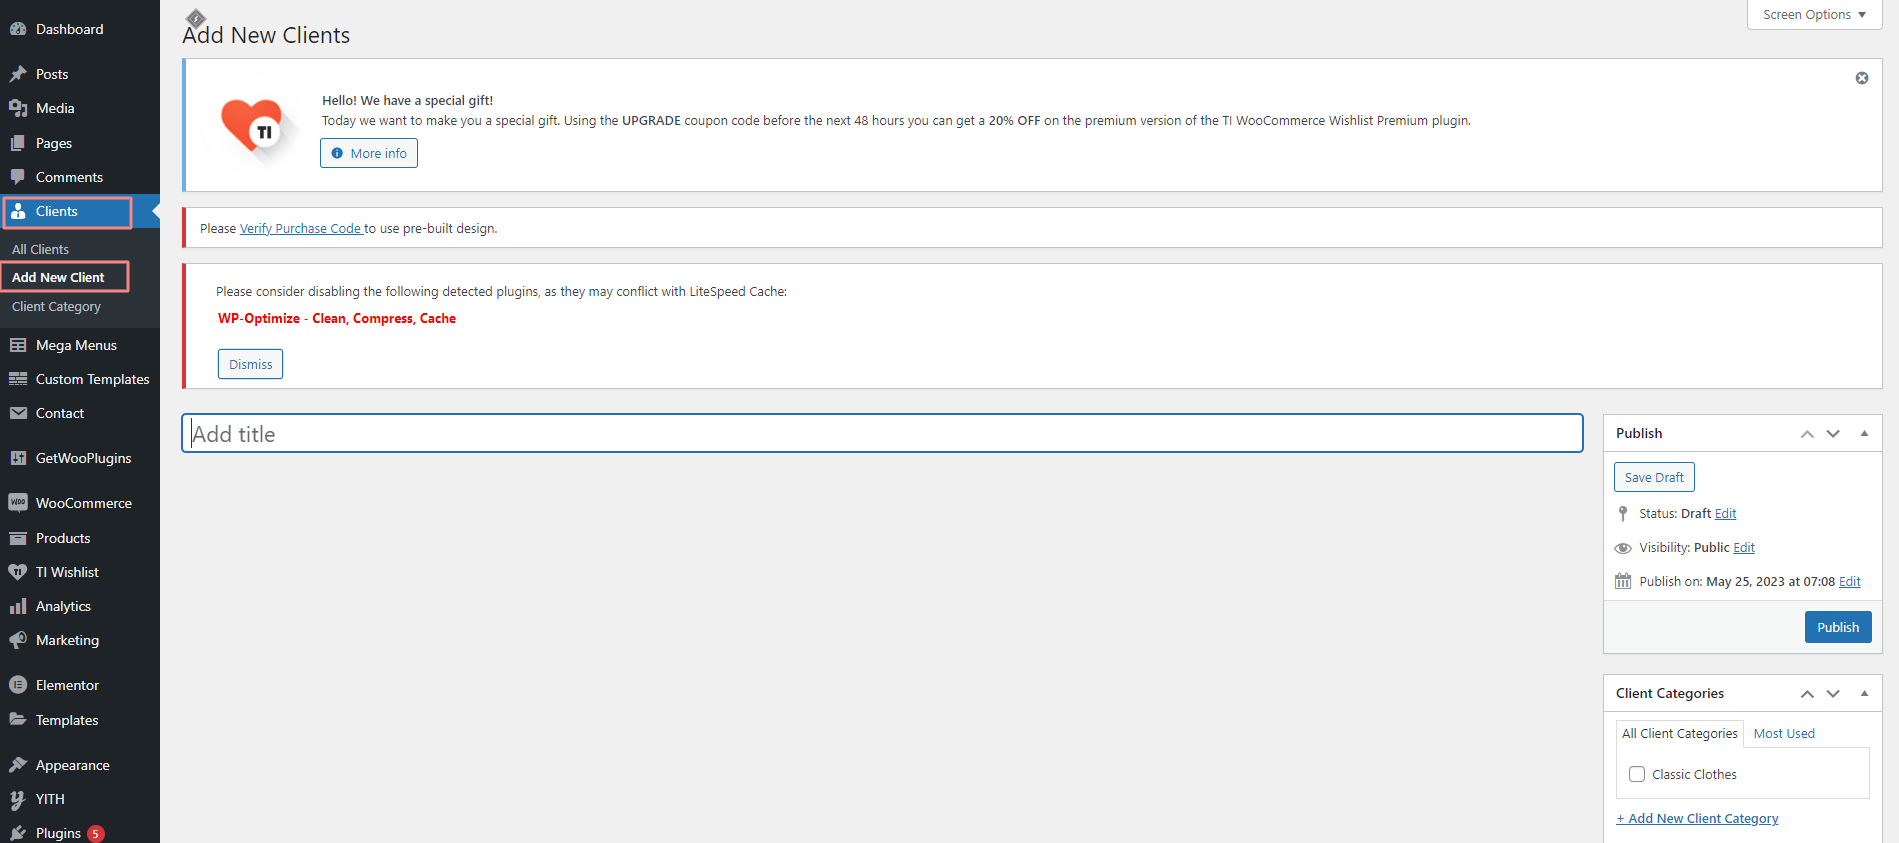
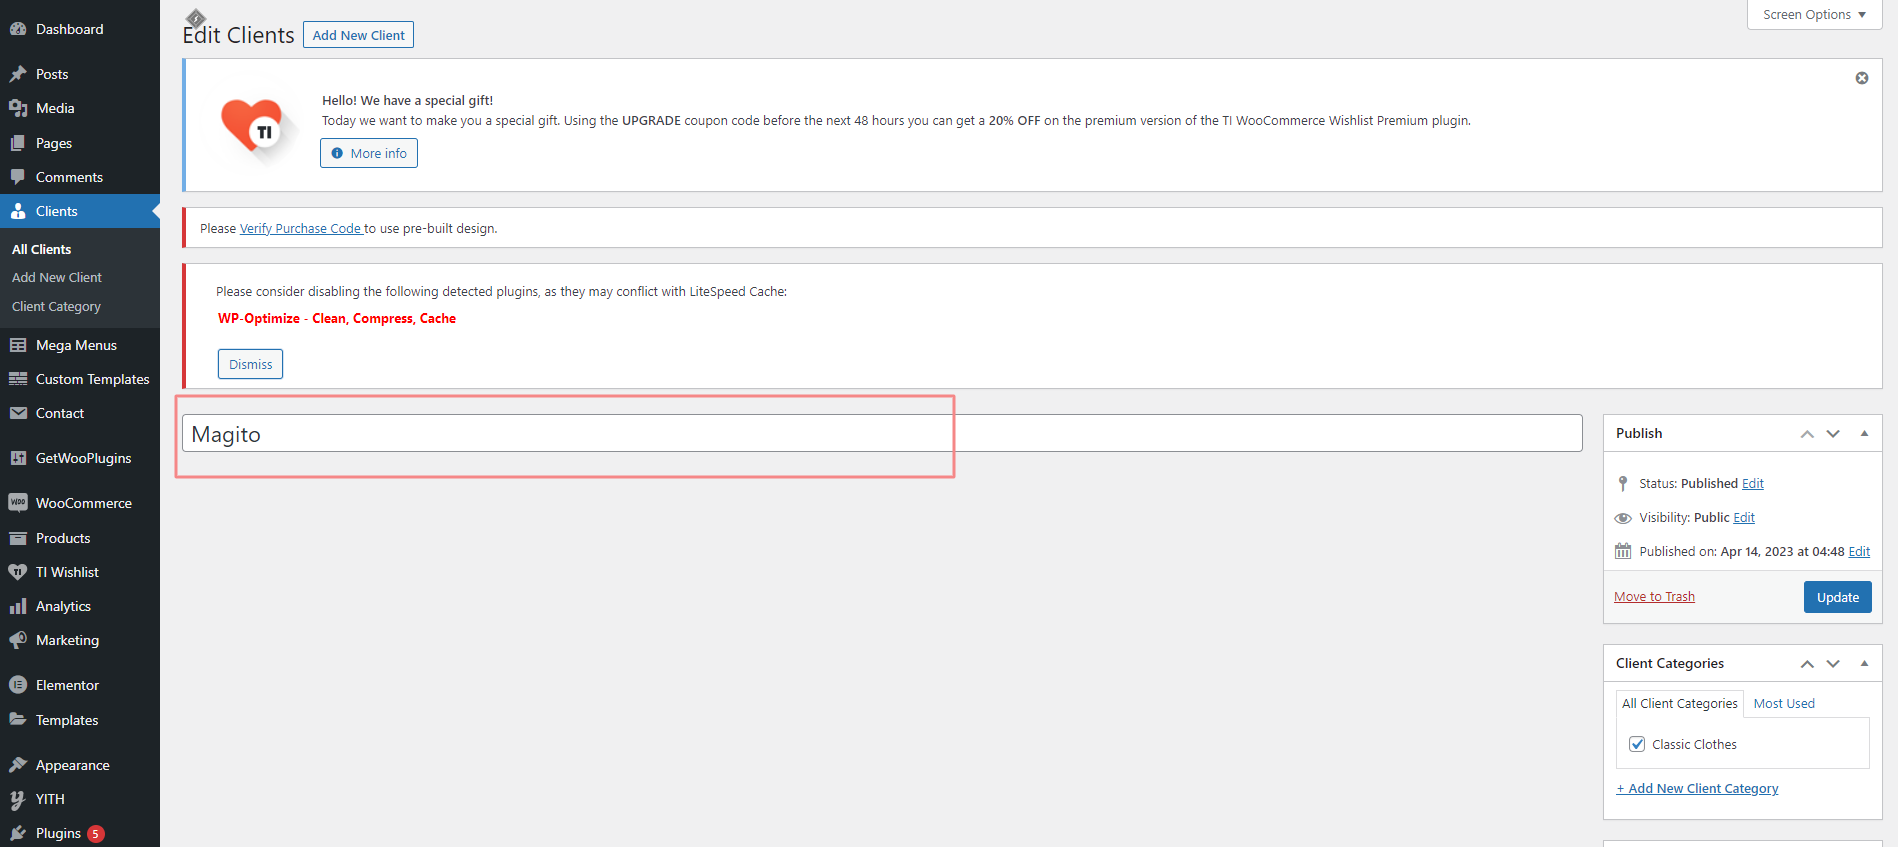
Please go through the points given below to understand how to create a new client item—